Raible's Wiki
Raible Designs
Wiki Home
News
Recent Changes
AppFuse
Homepage- Korean
- Chinese
- Italian
- Japanese
QuickStart Guide
- Chinese
- French
- German
- Italian
- Korean
- Portuguese
- Spanish
- Japanese
User Guide
- Korean
- Chinese
Tutorials
- Chinese
- German
- Italian
- Korean
- Portuguese
- Spanish
Other Applications
Struts ResumeSecurity Example
Struts Menu
UserPreferences
Referenced by
Articles
Articles_ko
CreateManager_ko
ValidationAndList_ko
![[RSS]](https://raibledesigns.com/wiki/images/xml.png "Aggregate the RSS feed")

Hide Menu
CreateActions_ko |
|
| Your trail: | |
Part III: Actions 클래스 들과 JSP 작성하기 - Struts Action 클래스들과 JSP 페이지들을 만드는 방법.
- 이 tutorial 은 Part II: 새로운 Managers 작성하기 에 의존 되어 있습니다.
About this Tutorial
이번 tutorial 에서는 Action 과 JSP, 그리고 StrutsTestCase 를 이용한 JUnit Test 를 작성하는 방법을 알아봅니다.우리가 만들 Action 은 새로운 Managers 작성하기 에서 만들었던 PersonManager 과 대화를 할 겁니다.
기본적으로 AppFuse 는 웹프레임워크로 Struts를 사용합니다.
1.6 버젼에서는 Spring 또는 WebWork 를 웹 프레임 워크로 사용할 수 있습니다.
Tapestry 와 JSF 는 각각 1.7과 1.8버젼에 계획되어 있습니다.
Spring MVC 를 사용하려면 extras/spring 의 README.txt 를 읽어보세요. WebWork 를 사용하려면 extras/webwork/README.txt 를 보시면 됩니다.
"ant install-springmvc" 또는 "ant install-webwork" 를 실행함으로서 위 옵션들을 쉽게 설치 할 수 있습니다.
위 옵션에 해당하는 이 튜토리얼은 다음에서 찾을수 있습니다.
- Spring: Creating Spring Controllers and JSPs
- WebWork: Creating WebWork Actions and JSPs
자 그럼 tutorial 을 시작해 봅시다.
Table of Contents
- [1] PersonForm 을 만들기 위한 XDoclet 태그를 Person 클래스에 추가 합니다.
- [2] XDoclet 이용해 JSP 의 뼈대를 만듭니다
- [3] PersonAction 을 테스트 하기 위해 PersonActionTest 를 작성합니다.
- [4] PersonAction 을 만듭니다.
- [5] PersonActionTest 을 실행합니다.
- [6] JSP 를 정리합니다.
- [7] 브라우저 동작 처럼 테스트 하기 위해 Canoo WebTests 를 만듭니다.
PersonForm 을 만들기 위한 XDoclet 태그를 Person 클래스에 추가 합니다 [#1]
Struts 와 웹 계층을 위한 PersonForm(Struts ActionForm) 을 만들기 위해서 우리는 Person.java 에 XDoclet 태그를 추가 해야 합니다. Person.java 파일의 JavaDoc 부분에 다음 @struts.form 태그를 추가합니다.(예제가 필요하다면 User.java 파일을 보세요):
|
우리는 org.appfuse.webapp.form.BaseForm 를 상속받도록 하였습니다. 그 이유는 BaseForm 에는 toString() 메소드가 있기 때문입니다. toString() 메소드는 log.debug(formName)를 호출했을때 폼의 내용을 읽기 좋게 프린트 할 수 있도록 합니다.
만약 기존의 "org.appfuse" 패키지 이름을 당신의 "com.company" 패키지의 이름으로 바꾸지 않았거나 model 클래스가 다른 패키지에 있다면 @struts.form 태그에 BaseForm 을 fully-qualify (ex: org.appfuse.webapp.form.BaseForm) 으로 적어야 합니다.
XDoclet 이용해 JSP 의 뼈대를 만듭니다 [#2]
이 단계에서는 PersonForm 의 정보를 보여주기 위한 JSP 의 뼈대를 만들어 봅시다.내가 뼈대 라고 말한 이유는 우리가 만들 JSP 가 단지 form 만을 가지고 있기 때문입니다.
이 JSP 에는 테이블 구조 내에 PersonForm.java 의 각 속성을 나타내는 Struts' <html:text> 태그를 가지고 있습니다.
이 JSP 를 만들기 위한 Tool 은 Erik Hatcher
에 의해 만들어 졌습니다.이 Tool 은 하나의 클래스 (FormTagsHandler.java) 와 두개의 XDoclet templates (FormKeys.xdt 와 StrutsForm_jsp.xdt) 으로 이루어 졌습니다.
이 파일들은 extras/viewgen 디렉토리에 들어있습니다.
JSP 와 를 properties(form elements을 위한 label 값) 파일을 만드는 순서:
- ant compile 를 실행합니다 - Person.java POJO 로 부터 PersonForm.java 를 만들어 냅니다.
- "extras/viewgen" 으로 이동합니다
- extras/viewgen/build 에 아래 세개의 파일을 만들기 위해 ant -Dform.name=PersonForm 태그를 실행합니다:
- PersonForm.properties (form elements을 위한 label 값)
- personForm.jsp (한개의 Person 을 보기 위한 JSP 뼈대 파일)
- PersonFormList.jsp (Person 리스트를 보기 위한 JSP 뼈대 파일)
- PersonForm.properties 의 내용을 web/WEB-INF/classes/ApplicationResources_en.properties 에 복사 합니다.
여기 ApplicationResources_en.properties 에 추가해야 할 속성들의 예제가 있습니다:
# -- person form -- personForm.firstName=First Name personForm.id=Id personForm.lastName=Last Name
- personForm.jsp 을 web/pages/personForm.jsp PersonFormList.jsp 를 web/pages/personList.jsp 으로 복사 합니다. 각 파일의 첫 글짜는 소문자라는걸 알아두세요.
"pages" 디렉토리의 파일들은 deployment 될때 "WEB-INF/pages" 이동됩니다. 컨테이너는 이 WEB-INF 에 있는 모든 파일들에 대한 보안을 제공합니다.
이 보안은 클라이언트로 부터의 요청에는 적용 되지만, Struts'ActionServlet 에 의한 forward 에는 적용 되지 않습니다. 즉, JSP 페이지들을 WEB-INF 디렉토리에 넣는것은 이 페이지들이 클라이언트(다른 jsp)로부터 직접적으로 엑세스 되지 않고 오로지 Action 으로부터만 엑세스 된다는 것을 보장하게 되는 것입니다.
이것은 프리젠테이션 영역이 아닌 보다 Action(효과적으로 조정할수 있는) 쪽에 보안을 허락하게 만듭니다.
AppFuse 에서는 모든 *.html url-pattern 에 해당하는 자원을 보호하게 되어 있습니다. (/signup.html, /passwordHint.html 은 제외) 이것은 클라이언가 JSP 페이지를 얻기위해서는 반드시 Action 을 통해야 한다는 것을 보장하는 것입니다.
이것은 SiteMesh 에 의해 읽혀지고 마지막 페이지(SiteMesh 에 의해 파싱된 결과 페이지)에 쓰여지게 됩니다.
그리고 각 페이지 마다의 CSS 를 다음처럼 만들면 됩니다:
body#pageName element.class { background-color: blue }
- JSP 에 쓰여질 title 과 heading 키를 ApplicationResources_en.properties 에 추가 합니다.
web/WEB-INF/classes/ApplicationResources_en.properties 파일을 열고 다음 라인을 파일의 가장 뒤에 추가 합니다.
# -- person detail page --
personDetail.title=Person Detail
personDetail.heading=Person Information
- 위에서 우리는 "personForm.*" 키들을 이파일에서 추가 했었습니다. 그런데 왜 이번에는 personDetail 키를 사용했을까요? 가장 큰 이유는 form lebel 과 text 를 구분하기 위해서입니다. 다른 이유는 모든 "Form.*" 는 데이타베이스의 필드값들을 나타낸다는 것을 알 수 있기 때문입니다.
최근에 나의 클라이언트가 데이타베이스에서 검색 가능한 필드들의 모든 리스트를 요구한적이 있었다. 그것은 무척 쉬웠다. 난 단지 ApplicationResources.properties 에서 "Form." 을 가지고 있는 key 들을 찾아냈다. 그리고 클라이언트는 검색하기 원하는 컬럼들을 선택했다. 난 이 프로젝트에서 Form과 Detail 을 분리한것에 대해 매우 흡족해 했다.
Action 을 테스트 하기 위해 ActionTest 를 만듭니다 [#3]
Action 을 위한 StrutsTestCase 테스트를 하기 위해서는 우선 test/web/**/action 디렉토리에 PersonActionTest.java 파일을 만들어야 합니다.- 이미 만들어 놓은 ActionTest (i.e. UserActionTest) copy → save 를 해서 [Uu]ser 를 [P]erson 로 바꾸면 됩니다.
- 만약 UserActionTest 를 카피 했다면 UserFormEx(UserForm 이 아닌) 를 PersonForm 으로 변경해야 합니다. UserFormEx 는 UserForm 을 확장한 것으로 사용자 권한에 대한 String setter 메소드를 가지고 있습니다. User.java 로 부터 UserForm 이 만들어 졌을때는 위 기능을 실행 할수 없는 상태였습니다.
|
src/dao/**/Constants.java 클래스에 PERSON_KEY="personForm" 변수를 추가해야 합니다. 이 이름은 struts-config.xml 파일의 form 엘리먼트와 일치하게 됩니다.
|
이 테스트를 싱행시키면 NoSuchMethodErrors 가 발생합니다. - 그럼 이제 PersonAction 클래스에 edit, save, delete 메소드를 추가해 볼까요.
PersonAction 을 만듭니다 [#4]
src/web/**/action 에 다음의 내용을 가지는 PersonAction.java 파일을 만듭니다.
|
위 코드에서 PersonForm 이나 Person 을 변환하기 위해 convert 메소드를 자주 호출하는 것을 알아차렸을겁니다. BaseAction 에 있는 convert 메소드는 POJOs → ActionForms 그리고 ActionForms → POJOs 으로 변환하기 위해 ConvertUtil.convert()를 호출합니다. 또 ConvertUtil.convert() 메소드는 BeanUtils.copyProperties 를 사용합니다.
- 만약 Eclipse 를 사용한다면 PersonForm 을 보기 위해선 "refresh" 를 해야 합니다. PersonForm 은 프로젝트 소스 폴더 중 하나인 build/web/gen 에 위치하게 됩니다. "refresh" 하는것이 XDoclet에 의해서 PersonForm 이 민들어진후 Eclipse 에서 보고 또 다른 java 파일에서 import 할 수 있도록 하는 유일한 방법입니다. 파일은 build/web/gen/org/appfuse/webapp/form/PersonForm.java 에서 찾을 수 있습니다.
- BeanUtils.copyProperties 메소드에게 어떻게 Strings → Objects 를 변환해야 하는지 알려줄 수 있는 Converters (i.e. DateConverter) 를 BaseAction 에 추가적으로 등록 할 수 있습니다. 만약 POJO 가 List 를 가지고 있다면( i.e. for parent-child relationships) convertLists(java.lang.Object) 메소드를 이용해서 변환할 수도 있습니다.
이제 PersonActionTest 에서 사용했던 edit forward 와 savePerson action-mapping 를 추가 해야 하기 위해서 PersonAction.java 파일의 상단(class declaration) 부분의 다음과 같은 XDoclet tag 를 추가합니다.
|
위 XDoclet 에서 editPerson 과 savePerson 의 가장 큰 차이점은 savePerson validation 을 사용(see validation="true") 한다는 것이다. 여기서 input 속성은 일반적인 path(i.e. /editPerson.html) 가 아닌 반드시 forward 를 가리켜야 한다는 것이다. 만약 edit 와 save 를 위해 save 패스만 사용 하고 싶다면 validate="false" 로 바꾸고 save 메소드에서 form.validate() 와 에러 처리를 하면 됩니다.
success 메세지를 뿌려주기 위해 ApplicationResources_en.properties 에 추가할 몇가지 key(ActionMessages) 들이 있습니다. web/WEB-INF/classes 에서 이 파일을 열어서 다음 내용을 추가 합니다.
- 나는 주로 이런 메세지 위에 # -- success messages -- 주석을 답니다.
person.added=Information for <strong>{0}</strong> has been added successfully.
person.deleted=Information for <strong>{0}</strong> has been deleted successfully.
person.updated=Information for <strong>{0}</strong> has been updated successfully.
- 추가, 삭제, 갱신 등을 위한 범용적인 message 를 사용 할 수도 있습니다. 그렇게 하면 각 엔터티 마다의 변화로 부터 message 들을 분리 할 수 있게됩니다.
위 코드들이 PersonManagerTest 에서 PersonManager 을 사용하는 것과 같은 코드라는것을 알아차렸을겁니다. 그것은 PersonAction 와 PersonManagerTest 둘다 PersonManagerImpl 의 클라이언트 이기 때문입니다.
이 튜토리얼의 거의 모든게 끝났습니다. 자 이제 테스트를 해볼까요.
PersonActionTest 을 실행합니다. [#5]
PersonActionTest 를 보면 모든 테스트가 id=1(testRemove 에서는 id=2) 인 database 레코드에 의존되어 있으므로 샘플 데이타 파일(metadata/sql/sample-data.xml)에 위 레코드들을 추가하도록 합니다.
아래 내용을 sample-data.xml 파일의 가장 끝(다른 테이블과 연관 관계과 있기 전에는 순서는 중요하지 않습니다.)에 추가 합니다.
  <table name='person'>
    <column>id</column>
    <column>first_name</column>
    <column>last_name</column>
    <row>
      <value>1</value>
      <value>Matt</value>
      <value>Raible</value>
    </row>
    <row>
      <value>2</value>
      <value>James</value>
      <value>Davidson</value>
    </row>
  </table>
어떤 테스트를 실행 시키든지 간에 그 전에 DBUnit 이 이 파일을 읽게 되므로 PersonActionTest 에서 이 레코드들이 사용 되어 질수 있는 겁니다.
자 이제 ant test-web -Dtestcase=PersonAction - 모든게 정상적으로 작동 될겁니다. 이 태스크를 실행하기 전에 Tomcat 은 반드시 정지되 있어야 합니다.
BUILD SUCCESSFUL
Total time: 1 minute 21 seconds
JSP 를 정리합니다. [#6]
web/pages/personForm.jsp 에서 다음 코드 블럭을 제거 하고 대신에 "id" 를 hidden field 로 추가 합니다.
|
그리고
|
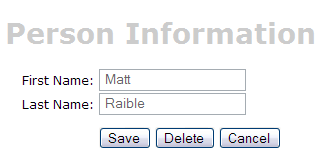
자 이제 ant db-load deploy를 실행하고, 톰캣을 구동 시키고 browser 의 주소를 http://localhost:8080/appfuse/editPerson.html?id=1 에 맞추면 다음과 같은 화면을 보게 될 겁니다.
마지막으로 보다 유저 친화적으로 만들기 위해 폼의 상단부에 어떤 메세지를 추가하길 원한다면 personForm.jsp 의 가장 위에 간단히 text(
[Optional]브라우저 동작 처럼 테스트 하기 위해 Canoo WebTests 를 만듭니다. [#7]
이 튜토리얼의 마지막(Optional)은 JSP 를 테스트 하기 위해 Canoo WebTest 를 만드는 겁니다.- 이 것이 optional 인 이유는 똑같은 테스트를 여러분의 웹브라우저를 통해서 할 수 있기 때문입니다.
You can use the following URLs to test the different actions for adding, editing and saving a user.
- Add - http://localhost:8080/appfuse/editPerson.html.
- Edit - http://localhost:8080/appfuse/editPerson.html?id=1 (make sure and run ant db-load first).
- Delete - http://localhost:8080/appfuse/editPerson.html?method=Delete&id=1 (or edit and click on the Delete button).
- Save - Click edit and then click the Save button.
Canoo tests are pretty slick in that they're simply configured in an XML file. To add tests for add, edit, save and delete, open test/web/web-tests.xml and add the following XML. You'll notice that this fragment has a target named PersonTests that runs all the related tests.
- I use CamelCase target names (vs. the traditional lowercase, dash-separated) because when you're typing -Dtestcase=Name, I've found that I'm used to doing CamelCase for my JUnit Tests.
|
After adding this, you should be able to run ant test-canoo -Dtestcase=PersonTests with Tomcat running or ant test-jsp -Dtestcase=PersonTests if you want Ant to start/stop Tomcat for you. To include the PersonTests when all Canoo tests are run, add it as a dependency to the "run-all-tests" target.
You'll notice that there's no logging in the client-side window by Canoo. If you'd like to see what it's doing, you can add the following between and at the end of each target.
<loadfile property="web-tests.result"
    srcFile="${test.dir}/data/web-tests-result.xml"/>
<echo>${web-tests.result}</echo>
BUILD SUCCESSFUL
Total time: 11 seconds
Next Up: Part IV: Validation 과 List 페이지 추가하기 - personForm 에 firstName 과 lastName 필드를 필수 요소로 하는 validation logic(검증 로직)을 추가하고 database에 있는 모든 person 레코드를 보여주는 list 페이지를 만듭니다.
Attachments:
| personForm-final.png |  |
5640 bytes |
|
Go to top
Edit this page
More info...
Attach file...
|
| This page last changed on 06-Nov-2006 13:53:00 MST by DongGukLee. |