Hyperproductive JSF 2.0 with Ed Burns at Jazoon
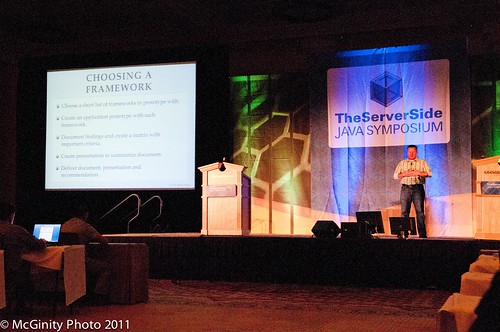
This morning, I attended Ed Burn's Talk on Hyperproductive JSF 2.0 at Jazoon. As you might know, I've been a critic of JSF for many years. However, it is one of the most used Java web frameworks, so I was hoping to learn how it's improved in the latest version. Below are my notes from Ed's presentation.
Ed's Plan for our Time Investment:
- Define a productive development environment
- JSF for greenfield and brownfield projects
- List the top 9 productivity killers with JSF projects and solutions
"I am always doing that which I cannot do, in order that I may learn how to do it." -- Pablo Picasso
Software is an executable representation of knowledge, a byproduct of learning how to solve a problem. Knowledge is something that changes as more information comes in. A productive environment makes it as easy as possible to learn how to solve a problem. Learning is an iterative process. Early iterations don't need to be optimal. Later iterations do ... and they need to be maintainable. First is the hardest. Fast iterations are they key. Spring Roo and Play are examples of frameworks that make the first iteration very fast.
You should use a tool to jumpstart JSF development: copy from an old project, use a Maven archetype or use your IDE. With greenfield development, you don't have to bother learning the byproduct of other people's learning. It's a great opportunity to pad your resume with the latest hot technologies. With brownfield development, it's vitally important to understand the existing solution and hidden assumptions. You're also much more constrained in your technology choices. If you want to change, you'll need to come up with a migration strategy, which can be difficult. JSF works well for both because it's not just a runtime framework, it's also a conceptual framework. You need to understand how your framework handles data conversion, validation, page flow, persistence integration, I18N, L10N, A11Y, Web standards and user friendliness.
Top 9 JSF Productivity Killers:
- Time wasting deployment step
- The perils of "there's more than one way to do it"
- Lengthy and painful developer on-boarding process
- Misused logging and misunderstood error messages
- Phantoms
- Under-utilized developer tools
- Premature optimization
- Difficulty in doing TDD
- Lack of an app framework
Time wasting deployment step
ZeroTurnaround solves this problem with JRebel, but there's other ways to do it. Some of the killers of flow state: 1) one large war file, 2) underutilizing dynamic language features, 3) complex server environment and 4) build process is redoing work unnecessarily. To stop the time wasting deployment step, the most important things you can do are as follows:
- Configure your IDE correctly. In Eclipse, compile directly into WEB-INF/classes and use continuous compilation. With NetBeans, use GlassFish.
- Don't do control-flow programming in XML.
Ed then showed a simple demo that showed how you can use Groovy to create a JSF UI Component. He also mentioned that Groovy can be used to author any JSF artifact. The benefit of this is you can simply edit and save a .groovy file without having to recompile or redeploy. Unfortunately, using Groovy didn't eliminate the XML syntax for pages or the XML for defining UI components.
The perils of "there's more than one way to do it"
JSF is very flexible, but flexibility is, more often than not, abused. There's a lack of convention for common things (e.g. master-detail, JSF concepts like converter, validator, etc.). The best way to fix this is to establish the norms for a project and stick with them. For example, Neil Griffin has a good blog entry for the different kind of managed beans you can create. Develop recommendations like Neil's and use them on all your projects.
Lengthy developer on-boarding process
Stick with standards when possible (at least have a common project description and build system across projects). Be committed to periodic cleanup cycles, including documenting for re-use. Pick one JSF component library and stick with it. Support for mixing and switching component libraries has improved with JSF 2, but it's still recommended you use only one.
Misused logging and misunderstood error messages
JSF is notorious for cryptic error messages and very long stack traces. It's still a problem, but the JSF Team is still working on improving them. Good tip: use the <ui:debug> tag. Its recordStateSize="true" attribute can be especially useful. If you're using PrimeFaces, add trace=true to request URLs.
Phantoms
Phantoms is when running code is not the same as the code you are modifying or wrong version of library gets picked up. You should have the capability to hit breakpoints anywhere in your entire software stack, including core Java sources. This is one of the most useful things about open source software. Solutions to phantoms: 1) put a timestamp on every redeploy and have the timestamp appear in the system log 2) write the running library stack to the system log (each library and version being used) and make it easy to compare one developer's runtime stack with another's 3) consider doing all work in tightly controlled VMs (checkout the VM at the beginning of the day, do your work, commit your changes and throw your VM away at the end of the day).
Under-utilizing developer tools
Make sure everyone has the fastest machines available and as much screen real estate as desired. Hardware is much cheaper than developer time. Another tip is to use Hudson as your butler. It's not just the team CI server. In other words, take advantage of automation wherever you can.
Premature Optimization
Keep in mind the trade-offs between readability and performance. When using frameworks such as JSF, don't try to outsmart the implementation. Rather, use the framework as intended and use open-source contributions to treat performance problems. Example, EL expressions got a lot faster between EE5 and EE6. If you spent time trying to optimize EL expressions, you might've been wasting your time.
Difficulty in doing TDD
Try to figure out why TDD is difficult in your company. For JSF, strongly consider JBoss's JSFUnit. Write your testcases to extend from Cactus ServletTestCase and leverage HtmlUnit (JSFUnit does this for you).
Lack of an app framework
Create common components: login panel, CRUD components, etc. If you don't have an app framework, build one over time.
Conclusion
This was an interesting talk by Ed. The dynamics of the room where a bit interesting. Jazoon is held in a movie theater, much like Devoxx. However, it appears there's a spotlight on the speaker that makes it very difficult to see the audience. I don't remember having this problem at Devoxx. Ed asked the audience quite a few questions, but it seemed he had a lot of difficulty in seeing if folks raised their hands. This made for some periods of awkward silence.
Personally, I was hoping to learn some new whizbang tips about JSF that I was not aware of. Unfortunately, I didn't learn anything new and wasn't that impressed with the Groovy demo.
I think Ed's tips about things outside of JSF were good, especially buying developers good hardware. I've seen many companies, including my current client, skimp on developer hardware and cause developer frustration because of it. I think it's great when companies provide developers top-of-the-line hardware and eliminate frustration over CPU and memory resources. LinkedIn and Time Warner Cable both provide their developers with Mac Pros and MacBook Pros as well as huge monitors. IMO, this is one of the best benefits you can provide your engineers.

")


")