Matt RaibleMatt Raible is a writer with a passion for software. Connect with him on LinkedIn.

The Angular Mini-Book The Angular Mini-Book is a guide to getting started with Angular. You'll learn how to develop a bare-bones application, test it, and deploy it. Then you'll move on to adding Bootstrap, Angular Material, continuous integration, and authentication.

Spring Boot is a popular framework for building REST APIs. You'll learn how to integrate Angular with Spring Boot and use security best practices like HTTPS and a content security policy.

For book updates, follow @angular_book on Twitter.

The JHipster Mini-Book The JHipster Mini-Book is a guide to getting started with hip technologies today: Angular, Bootstrap, and Spring Boot. All of these frameworks are wrapped up in an easy-to-use project called JHipster.

This book shows you how to build an app with JHipster, and guides you through the plethora of tools, techniques and options you can use. Furthermore, it explains the UI and API building blocks so you understand the underpinnings of your great application.

For book updates, follow @jhipster-book on Twitter.

10+ YEARS


Over 10 years ago, I wrote my first blog post. Since then, I've authored books, had kids, traveled the world, found Trish and blogged about it all.
You searched this site for "form". 326 entries found.

You can also try this same search on Google.

Integrating OAuth with AppFuse and its REST API

One of the new features in AppFuse 2.1 is an appfuse-ws archetype. This archetype leverages Enunciate and CXF to create a project with a REST API and generated HTML documentation. Enunciate is a very useful tool, allowing you to develop web services with JAX-RS and JAX-WS annotations and have all types of client libraries generated. For me, it seems very useful for developing the backend of SOFEA (a.k.a. modern) applications.

Back in March, Ryan Heaton published a nice article on Securing Web Services in an Enunciate application. I decided to take his tutorial a step further and not only secure my web services, but also to integrate with OAuth 2. In this tutorial, I'll show you how to create a new application with AppFuse WS, secure it, add OAuth support, and then use a client app to authenticate and retrieve data.

Create a New AppFuse WS Project
To begin, I visited the Create AppFuse Archetypes page and created a new application using the "Web Services Only" option in the Web Framework dropdown. Below is the command I used to create the "appfuse-oauth" project.

mvn archetype:generate -B -DarchetypeGroupId=org.appfuse.archetypes \
-DarchetypeArtifactId=appfuse-ws-archetype -DarchetypeVersion=2.1.0 \
-DgroupId=org.appfuse.example -DartifactId=appfuse-oauth 

After doing this, I started the app using mvn jetty:run and confirmed it started OK. At this point, I was able to view the generated documentation for the application at http://localhost:8080. The screenshot below shows what the app looks like at this point.

AppFuse WS Homepage

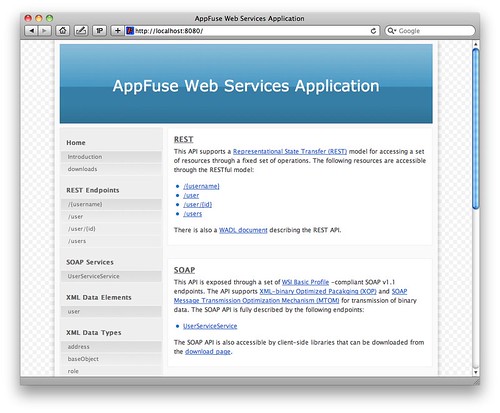
NOTE: You might notice the REST endpoint of /{username}. This is a bug in AppFuse 2.1.0 and has been fixed in SVN. It does not affect this tutorial.

Integrate Spring Security and OAuth
I originally tried to integrate Spring Security with Enunciate's Securing Web Services Tutorial. However, it only secures endpoints and doesn't do enough filtering for OAuth support, so I ended up using a custom web.xml. I put this file in src/main/resources and loaded it in my enunciate.xml file. I also upgraded Spring Security and imported my security.xml file.

  <?xml version="1.0"?>
  <enunciate xmlns:xsi="http://www.w3.org/2001/XMLSchema-instance"
             xsi:noNamespaceSchemaLocation="http://enunciate.codehaus.org/schemas/enunciate-1.22.xsd">
      ...
      <webapp mergeWebXML="src/main/resources/web.xml"/>
      <modules>
      ...
          <spring-app disabled="false" springVersion="3.0.5.RELEASE">
              <springImport uri="classpath:/applicationContext-resources.xml"/>
              <springImport uri="classpath:/applicationContext-dao.xml"/>
              <springImport uri="classpath:/applicationContext-service.xml"/>
              <springImport uri="classpath:/applicationContext.xml"/>
              <springImport uri="classpath:/security.xml"/>
          </spring-app>
      </modules>
  </enunciate>

Then I created src/main/resources/web.xml with a filter for Spring Security and a DispatcherServlet for OAuth support.

<?xml version="1.0" encoding="UTF-8"?>
<web-app xmlns="http://java.sun.com/xml/ns/javaee"
         xmlns:xsi="http://www.w3.org/2001/XMLSchema-instance"
         xsi:schemaLocation="http://java.sun.com/xml/ns/javaee http://java.sun.com/xml/ns/javaee/web-app_3_0.xsd"
         version="3.0">

    <filter>
        <filter-name>securityFilter</filter-name>
        <filter-class>org.springframework.web.filter.DelegatingFilterProxy</filter-class>
        <init-param>
            <param-name>targetBeanName</param-name>
            <param-value>springSecurityFilterChain</param-value>
        </init-param>
    </filter>

    <filter-mapping>
        <filter-name>securityFilter</filter-name>
        <url-pattern>/*</url-pattern>
    </filter-mapping>

    <servlet>
        <servlet-name>appfuse-oauth</servlet-name>
        <servlet-class>org.springframework.web.servlet.DispatcherServlet</servlet-class>
        <load-on-startup>1</load-on-startup>
    </servlet>

    <servlet-mapping>
        <servlet-name>appfuse-oauth</servlet-name>
        <url-pattern>/oauth/*</url-pattern>
    </servlet-mapping>
</web-app>

Next, I created a src/main/resources/security.xml and used it to secure my API, specify a login page, supply the users and integrate OAuth (see the last 4 beans below).

<?xml version="1.0" encoding="UTF-8"?>
<beans:beans xmlns="http://www.springframework.org/schema/security"
             xmlns:xsi="http://www.w3.org/2001/XMLSchema-instance"
             xmlns:beans="http://www.springframework.org/schema/beans"
             xmlns:oauth="http://www.springframework.org/schema/security/oauth2"
             xsi:schemaLocation="http://www.springframework.org/schema/beans http://www.springframework.org/schema/beans/spring-beans.xsd
                           http://www.springframework.org/schema/security http://www.springframework.org/schema/security/spring-security.xsd
                           http://www.springframework.org/schema/security/oauth2 http://www.springframework.org/schema/security/spring-security-oauth2.xsd">

    <http auto-config="true">
        <intercept-url pattern="/api/**" access="ROLE_USER"/>
        <intercept-url pattern="/oauth/**" access="ROLE_USER"/>
        <intercept-url pattern="/**" access="IS_AUTHENTICATED_ANONYMOUSLY"/>
        <form-login login-page="/login.jsp" authentication-failure-url="/login.jsp?error=true"
                    login-processing-url="/j_security_check"/>
    </http>

    <authentication-manager>
        <authentication-provider>
            <user-service>
                <user name="admin" password="admin" authorities="ROLE_USER,ROLE_ADMIN"/>
                <user name="user" password="user" authorities="ROLE_USER"/>
            </user-service>
        </authentication-provider>
    </authentication-manager>

    <!--hook up the spring security filter chain-->
    <beans:alias name="springSecurityFilterChain" alias="securityFilter"/>

    <beans:bean id="tokenServices"
                class="org.springframework.security.oauth2.provider.token.InMemoryOAuth2ProviderTokenServices">
        <beans:property name="supportRefreshToken" value="true"/>
    </beans:bean>

    <oauth:provider client-details-service-ref="clientDetails" token-services-ref="tokenServices">
        <oauth:verification-code user-approval-page="/oauth/confirm_access"/>
    </oauth:provider>

    <oauth:client-details-service id="clientDetails">
        <!--<oauth:client clientId="my-trusted-client" authorizedGrantTypes="password,authorization_code,refresh_token"/>
        <oauth:client clientId="my-trusted-client-with-secret"
                      authorizedGrantTypes="password,authorization_code,refresh_token" secret="somesecret"/>
        <oauth:client clientId="my-less-trusted-client" authorizedGrantTypes="authorization_code"/>-->
        <oauth:client clientId="ajax-login" authorizedGrantTypes="authorization_code"/>
    </oauth:client-details-service>
</beans:beans>

I used the OAuth for Spring Security sample apps to figure this out. In this example, I used authorizedGrantTypes="authorization_code", but you can see from the commented <oauth:client> elements above that there's a few different options. You should also note that the clientId is hard-coded to "ajax-login", signifying I only want to allow a single application to authenticate.

At this point, I'd like to give a shoutout to Ryan Heaton for creating both Enunciate and Spring Security's OAuth support. Nice work Ryan!

At this point, I needed to do a number of additional tasks to finish integrating oauth. The first was to modify the Jetty Plugin's configuration to 1) run on port 9000, 2) load my custom files and 3) allow jetty:run to recognize Enunciate's generated files. Below is the final configuration in my pom.xml.

<plugin>
    <groupId>org.mortbay.jetty</groupId>
    <artifactId>maven-jetty-plugin</artifactId>
    <version>6.1.26</version>
    <configuration>
        <connectors>
            <connector implementation="org.mortbay.jetty.nio.SelectChannelConnector">
                <port>9000</port>
                <maxIdleTime>60000</maxIdleTime>
            </connector>
        </connectors>
        <webAppConfig>
            <baseResource implementation="org.mortbay.resource.ResourceCollection">
                <resourcesAsCSV>
                    ${basedir}/src/main/webapp,
                    ${project.build.directory}/${project.build.finalName}
                </resourcesAsCSV>
            </baseResource>
            <contextPath>/appfuse-oauth</contextPath>
        </webAppConfig>
        <webXml>${project.build.directory}/${project.build.finalName}/WEB-INF/web.xml</webXml>
    </configuration>
</plugin>

Next, I added the necessary OAuth dependencies for Spring Security to my pom.xml. Since the latest release is a milestone release, I had to add Spring's milestone repo too.

<repository>
    <id>spring-milestone</id>
    <url>http://s3.amazonaws.com/maven.springframework.org/milestone</url>
</repository>
...
<dependency>
    <groupId>org.springframework.security</groupId>
    <artifactId>spring-security-taglibs</artifactId>
    <version>${spring.version}</version>
    <exclusions>
        <exclusion>
            <groupId>org.springframework</groupId>
            <artifactId>spring-web</artifactId>
        </exclusion>
        <exclusion>
            <groupId>org.springframework</groupId>
            <artifactId>spring-support</artifactId>
        </exclusion>
    </exclusions>
</dependency>
<dependency>
    <groupId>org.springframework.security.oauth</groupId>
    <artifactId>spring-security-oauth</artifactId>
    <version>1.0.0.M3</version>
    <exclusions>
        <exclusion>
            <groupId>org.springframework</groupId>
            <artifactId>spring-beans</artifactId>
        </exclusion>
        <exclusion>
            <groupId>org.springframework</groupId>
            <artifactId>spring-context</artifactId>
        </exclusion>
        <exclusion>
            <groupId>org.springframework</groupId>
            <artifactId>spring-core</artifactId>
        </exclusion>
    </exclusions>
</dependency>
<dependency>
    <groupId>org.springframework</groupId>
    <artifactId>spring-webmvc</artifactId>
    <version>${spring.version}</version>
</dependency>
<dependency>
    <groupId>javax.servlet</groupId>
    <artifactId>servlet-api</artifactId>
    <version>2.5</version>
    <scope>provided</scope>
</dependency>
<dependency>
    <groupId>javax.servlet</groupId>
    <artifactId>jstl</artifactId>
    <version>1.1.2</version>
</dependency>
<dependency>
    <groupId>taglibs</groupId>
    <artifactId>standard</artifactId>
    <version>1.1.2</version>
</dependency>

Since I named my DispatcherServlet "appfuse-oauth" in web.xml, I created a src/main/webapp/WEB-INF/appfuse-oauth-servlet.xml to configure Spring MVC. I had to create the src/main/webapp/WEB-INF directory.

<?xml version="1.0" encoding="UTF-8"?>
<beans xmlns="http://www.springframework.org/schema/beans"
       xmlns:xsi="http://www.w3.org/2001/XMLSchema-instance"
       xmlns:context="http://www.springframework.org/schema/context"
       xmlns:mvc="http://www.springframework.org/schema/mvc"
       xsi:schemaLocation="http://www.springframework.org/schema/beans http://www.springframework.org/schema/beans/spring-beans-3.0.xsd
                http://www.springframework.org/schema/context http://www.springframework.org/schema/context/spring-context-3.0.xsd
                http://www.springframework.org/schema/mvc http://www.springframework.org/schema/mvc/spring-mvc-3.0.xsd">

    <!-- Scans the classpath of this application for @Components to deploy as beans -->
    <context:component-scan base-package="org.appfuse.examples.webapp"/>

    <!-- Configures the @Controller programming model -->
    <mvc:annotation-driven/>

    <!-- Resolves view names to protected .jsp resources within the /WEB-INF/views directory -->
    <bean class="org.springframework.web.servlet.view.InternalResourceViewResolver">
        <property name="viewClass" value="org.springframework.web.servlet.view.JstlView"/>
        <property name="prefix" value="/"/>
        <property name="suffix" value=".jsp"/>
    </bean>
</beans>

In order to show the OAuth confirmation page, I needed to create src/main/java/org/appfuse/examples/webapp/AccessConfirmationController.java and map it to /oauth/confirm_access. I copied this from one of the sample projects and modified to use Spring's annotations.

package org.appfuse.examples.webapp;

import org.springframework.beans.factory.annotation.Autowired;
import org.springframework.security.oauth2.provider.ClientAuthenticationToken;
import org.springframework.security.oauth2.provider.ClientDetails;
import org.springframework.security.oauth2.provider.ClientDetailsService;
import org.springframework.security.oauth2.provider.verification.ClientAuthenticationCache;
import org.springframework.security.oauth2.provider.verification.DefaultClientAuthenticationCache;
import org.springframework.stereotype.Controller;
import org.springframework.web.bind.annotation.RequestMapping;
import org.springframework.web.bind.annotation.RequestMethod;
import org.springframework.web.servlet.ModelAndView;

import javax.servlet.http.HttpServletRequest;
import javax.servlet.http.HttpServletResponse;
import java.util.TreeMap;

/**
 * Controller for retrieving the model for and displaying the confirmation page
 * for access to a protected resource.
 *
 * @author Ryan Heaton
 */
@Controller
@RequestMapping("/confirm_access")
public class AccessConfirmationController {

    private ClientAuthenticationCache authenticationCache = new DefaultClientAuthenticationCache();
    @Autowired
    private ClientDetailsService clientDetailsService;

    @RequestMapping(method = RequestMethod.GET)
    protected ModelAndView confirm(HttpServletRequest request, HttpServletResponse response) throws Exception {
        ClientAuthenticationToken clientAuth = authenticationCache.getAuthentication(request, response);
        if (clientAuth == null) {
            throw new IllegalStateException("No client authentication request to authorize.");
        }

        TreeMap<String, Object> model = new TreeMap<String, Object>();
        ClientDetails client = clientDetailsService.loadClientByClientId(clientAuth.getClientId());
        model.put("auth_request", clientAuth);
        model.put("client", client);

        return new ModelAndView("access_confirmation", model);
    }
}

This controller delegates to src/main/webapp/access_confirmation.jsp. I created this file and filled it with code to display Accept and Deny buttons.

<%@ page import="org.springframework.security.core.AuthenticationException" %>
<%@ page import="org.springframework.security.oauth2.common.exceptions.UnapprovedClientAuthenticationException" %>
<%@ page import="org.springframework.security.oauth2.provider.verification.BasicUserApprovalFilter" %>
<%@ page import="org.springframework.security.oauth2.provider.verification.VerificationCodeFilter" %>
<%@ page import="org.springframework.security.web.WebAttributes" %>
<%@ taglib prefix="authz" uri="http://www.springframework.org/security/tags" %>
<%@ taglib uri="http://java.sun.com/jsp/jstl/core" prefix="c" %>
<html>
<head>
    <title>Confirm Access</title>
    <link rel="stylesheet" type="text/css" media="all"
          href="http://demo.appfuse.org/appfuse-struts/styles/simplicity/theme.css"/>
    <style type="text/css">
        h1 {
            margin-left: -300px;
            margin-top: 50px
        }
    </style>
</head>

<body>

<h1>Confirm Access</h1>

<div id="content">

    <% if (session.getAttribute(WebAttributes.AUTHENTICATION_EXCEPTION) != null && 
                 !(session.getAttribute(WebAttributes.AUTHENTICATION_EXCEPTION) instanceof UnapprovedClientAuthenticationException)) { %>
    <div class="error">
        <h2>Woops!</h2>

        <p>Access could not be granted.
            (<%= ((AuthenticationException) session.getAttribute(WebAttributes.AUTHENTICATION_EXCEPTION)).getMessage() %>)</p>
    </div>
    <% } %>
    <c:remove scope="session" var="SPRING_SECURITY_LAST_EXCEPTION"/>

    <authz:authorize ifAnyGranted="ROLE_USER,ROLE_ADMIN">
        <h2>Please Confirm</h2>

        <p>You hereby authorize "<c:out value="${client.clientId}" escapeXml="true"/>" to access your protected resources.</p>

        <form id="confirmationForm" name="confirmationForm"
              action="<%=request.getContextPath() + VerificationCodeFilter.DEFAULT_PROCESSING_URL%>" method="POST">
            <input name="<%=BasicUserApprovalFilter.DEFAULT_APPROVAL_REQUEST_PARAMETER%>"
                   value="<%=BasicUserApprovalFilter.DEFAULT_APPROVAL_PARAMETER_VALUE%>" type="hidden"/>
            <label><input name="authorize" value="Authorize" type="submit"></label>
        </form>
        <form id="denialForm" name="denialForm"
              action="<%=request.getContextPath() + VerificationCodeFilter.DEFAULT_PROCESSING_URL%>" method="POST">
            <input name="<%=BasicUserApprovalFilter.DEFAULT_APPROVAL_REQUEST_PARAMETER%>"
                   value="not_<%=BasicUserApprovalFilter.DEFAULT_APPROVAL_PARAMETER_VALUE%>" type="hidden"/>
            <label><input name="deny" value="Deny" type="submit"></label>
        </form>
    </authz:authorize>
</div>
</body>
</html>

Finally, I needed to create src/main/webapp/login.jsp to allow users to login.

<%@ page language="java" pageEncoding="UTF-8" contentType="text/html;charset=utf-8" %>
<%@ taglib uri="http://java.sun.com/jsp/jstl/core" prefix="c" %>
<%@ taglib uri="http://java.sun.com/jsp/jstl/fmt" prefix="fmt" %>
<%@ taglib uri="http://java.sun.com/jsp/jstl/core" prefix="c" %>

<html>
<head>
    <title>Login</title>
    <link rel="stylesheet" type="text/css" media="all"
          href="http://demo.appfuse.org/appfuse-struts/styles/simplicity/theme.css"/>
    <style type="text/css">
        h1 {
            margin-left: -300px;
            margin-top: 50px
        }
    </style>
</head>
<body>
<h1>Login</h1>

<form method="post" id="loginForm" action="<c:url value='/j_security_check'/>">
    <fieldset style="padding-bottom: 0">
        <ul>
            <c:if test="${param.error != null}">
                <li class="error">
                    ${sessionScope.SPRING_SECURITY_LAST_EXCEPTION.message}
                </li>
            </c:if>
            <li>
                <label for="j_username" class="required desc">
                    Username <span class="req">*</span>
                </label>
                <input type="text" class="text medium" name="j_username"
                       id="j_username" tabindex="1"/>
            </li>

            <li>
                <label for="j_password" class="required desc">
                    Password <span class="req">*</span>
                </label>
                <input type="password" class="text medium" name="j_password"
                       id="j_password" tabindex="2"/>
            </li>
            <li>
                <input type="submit" class="button" name="login" value="Login"
                       tabindex="3"/>
            </li>
        </ul>
    </fieldset>
</form>
</body>
</html>

All the changes described in the above section are necessary to implement OAuth if you create a project with AppFuse WS 2.1. It may seem like a lot of code, but I was able to copy/paste and get it all working in an app in under 5 minutes. Hopefully you can do the same. I'm also considering adding it by default to the next version of AppFuse. Now let's look at integrating OAuth into a client to authenticate and retrieve data from this application.

Authenticate and Retrieve Data with Client
I originally thought my GWT OAuth application would provide a nice client. However, after 30 minutes of trying to get GWT 1.7.1 and the GWT Maven plugin (1.1) working with my 64-bit Java 6 JDK on OS X, I gave up. So I opted to use the Ajax Login application I've been using in my recent security tutorials.

In this example, I used OAuth2RestTemplate from Spring Security OAuth. While this works, and works well, I'd still like to get things working with GWT (or jQuery) to demonstrate how to do it from a pure client-side perspective.

To begin, I got the latest source of Ajax Login from GitHub (as of this morning) and made some changes. First of all, I added the Spring Security OAuth dependencies to pom.xml:

<repository>
    <id>spring-milestone</id>
    <url>http://s3.amazonaws.com/maven.springframework.org/milestone</url>
</repository>
...
<dependency>
    <groupId>org.springframework.security.oauth</groupId>
    <artifactId>spring-security-oauth</artifactId>
    <version>1.0.0.M3</version>
    <exclusions>
        <exclusion>
            <groupId>org.springframework</groupId>
            <artifactId>spring-beans</artifactId>
        </exclusion>
        <exclusion>
            <groupId>org.springframework</groupId>
            <artifactId>spring-context</artifactId>
        </exclusion>
        <exclusion>
            <groupId>org.springframework</groupId>
            <artifactId>spring-core</artifactId>
        </exclusion>
    </exclusions>
</dependency>

Then I modified src/main/webapp/WEB-INF/security.xml and added an OAuth Token Service and defined the location of the OAuth server.

<?xml version="1.0" encoding="UTF-8"?>
<beans:beans xmlns="http://www.springframework.org/schema/security"
             xmlns:xsi="http://www.w3.org/2001/XMLSchema-instance"
             xmlns:beans="http://www.springframework.org/schema/beans"
             xmlns:oauth="http://www.springframework.org/schema/security/oauth2"
             xsi:schemaLocation="http://www.springframework.org/schema/beans http://www.springframework.org/schema/beans/spring-beans-3.0.xsd
              http://www.springframework.org/schema/security http://www.springframework.org/schema/security/spring-security-3.0.xsd
              http://www.springframework.org/schema/security/oauth2 http://www.springframework.org/schema/security/spring-security-oauth2.xsd">

...
    <oauth:client token-services-ref="oauth2TokenServices"/>

    <beans:bean id="oauth2TokenServices"
                class="org.springframework.security.oauth2.consumer.token.InMemoryOAuth2ClientTokenServices"/>

    <oauth:resource id="appfuse" type="authorization_code" clientId="ajax-login"
                    accessTokenUri="http://localhost:9000/appfuse-oauth/oauth/authorize"
                    userAuthorizationUri="http://localhost:9000/appfuse-oauth/oauth/user/authorize"/>

Next, I created a Controller that uses OAuth2RestTemplate to make the request and get the data from the AppFuse OAuth application's API. I created src/main/java/org/appfuse/examples/webapp/oauth/UsersApiController.java and filled it with the following code:

package org.appfuse.examples.webapp.oauth;

import org.appfuse.model.User;
import org.springframework.beans.factory.annotation.Autowired;
import org.springframework.beans.factory.annotation.Qualifier;
import org.springframework.security.core.context.SecurityContextHolder;
import org.springframework.security.oauth2.common.exceptions.InvalidTokenException;
import org.springframework.security.oauth2.consumer.*;
import org.springframework.security.oauth2.consumer.token.OAuth2ClientTokenServices;
import org.springframework.stereotype.Controller;
import org.springframework.web.bind.annotation.RequestMapping;
import org.springframework.web.bind.annotation.RequestMethod;
import org.springframework.web.bind.annotation.ResponseBody;

import java.util.ArrayList;
import java.util.List;

@RequestMapping("/appfuse/users")
@Controller
public class UsersApiController {

    private OAuth2RestTemplate apiRestTemplate;
    @Autowired
    private OAuth2ClientTokenServices tokenServices;

    private static final String REMOTE_DATA_URL = "http://localhost:9000/appfuse-oauth/api/users";

    @Autowired
    public UsersApiController(OAuth2ProtectedResourceDetails resourceDetails) {
        this.apiRestTemplate = new OAuth2RestTemplate(resourceDetails);
    }

    @RequestMapping(method = RequestMethod.GET)
    @ResponseBody
    public List<User> getUsers() {
        try {
            List users = apiRestTemplate.getForObject(REMOTE_DATA_URL, List.class);
            return new ArrayList<User>(users);
        } catch (InvalidTokenException badToken) {
            //we've got a bad token, probably because it's expired.
            OAuth2ProtectedResourceDetails resource = apiRestTemplate.getResource();
            OAuth2SecurityContext context = OAuth2SecurityContextHolder.getContext();
            if (context != null) {
                // this one is kind of a hack for this application
                // the problem is that the sparklr photos page doesn't remove the 'code=' request parameter.
                ((OAuth2SecurityContextImpl) context).setVerificationCode(null);
            }
            //clear any stored access tokens...
            tokenServices.removeToken(SecurityContextHolder.getContext().getAuthentication(), resource);
            //go get a new access token...
            throw new OAuth2AccessTokenRequiredException(resource);
        }
    }
}

At this point, I thought everything would work and I spent quite some time banging my head against the wall when it didn't. As I was composing an email to the Enunciate users mailing list, I realized the issue. It appeared to be working, but from the server side, and the redirect back to the client was not happening. The Ajax Login app uses UrlRewriteFilter (for pretty URLs) to redirect from /app/* to /$1 and this redirect was losing the code parameter in the URL.

<rule>
    <from>/app/**</from>
    <to last="true" type="redirect">%{context-path}/$1</to>
</rule>

To fix this, I added use-query-string="true" to the root element in src/main/webapp/WEB-INF/urlrewrite.xml:

<urlrewrite default-match-type="wildcard" use-query-string="true">

After making all these changes, I ran mvn jetty:run on both apps and opened http://localhost:8080/appfuse/users in my browser. It all worked and a smile crept across my face. I've checked in the client changes into ajax-login on GitHub and the appfuse-oauth example into AppFuse Demos on Google Code. If you'd like to see this example in action, I'd encourage you to checkout both projects and let me know if you find any issues.

Posted in Java at Jul 05 2011, 10:56:48 AM MDT 4 Comments

Java Web Application Security - Part V: Penetrating with Zed Attack Proxy

Web Application Security is an important part of developing applications. As developers, I think we often forget this, or simply ignore it. In my career, I've learned a lot about web application security. However, I only recently learned and became familiar with the rapidly growing "appsec" industry.

I found a disconnect between what appsec consultants were selling and what I was developing. It seemed like appsec consultants were selling me fear, mostly because I thought my apps were secure. So I set out on a mission to learn more about web application security and penetration testing to see if my apps really were secure. This article is part of that mission, as are the previous articles I've written in this series.

When I first decided I wanted to do a talk on Webapp Security, I knew it would be more interesting if I showed the audience how to hack and fix an application. That's why I wrote it into my original proposal:

Webapp Security: Develop. Penetrate. Protect. Relax.
In this session, you'll learn how to implement authentication in your Java web applications using Spring Security, Apache Shiro and good ol' Java EE Container Managed Authentication. You'll also learn how to secure your REST API with OAuth and lock it down with SSL.

After learning how to develop authentication, I'll introduce you to OWASP, the OWASP Top 10, its Testing Guide and its Code Review Guide. From there, I'll discuss using WebGoat to verify your app is secure and commercial tools like webapp firewalls and accelerators.

At the time, I hadn't done much webapp pentesting. You can tell this from the fact that I mentioned WebGoat as the pentesting tool. From WebGoat's Project page:

WebGoat is a deliberately insecure J2EE web application maintained by OWASP designed to teach web application security lessons. In each lesson, users must demonstrate their understanding of a security issue by exploiting a real vulnerability in the WebGoat application. For example, in one of the lessons the user must use SQL injection to steal fake credit card numbers. The application is a realistic teaching environment, providing users with hints and code to further explain the lesson.

What I really meant to say and use was Zed Attack Proxy, also known as OWASP ZAP. ZAP is a Java Desktop application that you setup as a proxy for your browser, then use to find vulnerabilities in your application. This article explains how you can use ZAP to pentest a web applications and fix its vulnerabilities.

The application I'll be using in this article is the Ajax Login application I've been using throughout this series. I think it's great that projects like Damn Vulnerable Web App and WebGoat exist, but I wanted to test one that I think is secure, rather than one I know is not secure. In this particular example, I'll be testing the Spring Security implementation, since that's the framework I most often use in my open source projects.

Zed Attack Proxy Tutorial

Download and Run the Application
To begin, download the application and expand it on your hard drive. This app is the completed version of the Ajax Login application referenced in Java Web Application Security - Part II: Spring Security Login Demo. You'll need Java 6 and Maven installed to run the app. Run it using mvn jetty:run and open http://localhost:8080 in your browser. You'll see it's a simple CRUD application for users and you need to login to do anything.

Install and Configure ZAP
The Zed Attack Proxy (ZAP) is an easy to use integrated penetration testing tool for finding vulnerabilities in web applications. Download the latest version (I used 1.3.0) and install it on your system. After installing, launch the app and change the proxy port to 9000 (Tools > Options > Local Proxy). Next, configure your browser to proxy requests through port 9000 and allow localhost requests to be proxied. I used Firefox 4 (Preferences > Advanced > Network > Connection Settings). When finished, your proxy settings should look like the following screenshot:

Firefox Proxy Settings

Another option (instead of removing localhost) is to add an entry to your hosts file with your production domain name. This is what I've done for this demo.

127.0.0.1       demo.raibledesigns.com

I've also configured Apache to proxy requests to Jetty with the following mod_proxy settings in my httpd.conf:

<IfModule mod_proxy.c>
    ProxyRequests Off 
    ProxyPreserveHost Off 

    <VirtualHost *:80>
       ProxyPass  /  http://localhost:8080/
    </VirtualHost>

    <VirtualHost *:443>
        SSLEngine on
        SSLProxyEngine on
        SSLCertificateFile "/etc/apache2/ssl.key/server.crt"
        SSLCertificateKeyFile "/etc/apache2/ssl.key/server.key"

        ProxyPass  /  https://localhost:8443/
    </VirtualHost>
</IfModule>

Perform a Scan
Now you need to give ZAP some data to work with. Using Firefox, I navigated to http://demo.raibledesigns.com and browsed around a bit, listing users, added a new one and deleted an existing one. After doing this, I noticed a number of flags in the ZAP UI under Sites. I then right-clicked on each site (one for http and one for https) and selected Attack > Active Scan site. You should be able to do this from the "Active Scan" tab at the bottom of ZAP, but there's a bug when the URLs are the same. After doing this, I received a number of alerts, ranging from high (cross-site scripting) to low (password autocomplete). The screenshot below shows the various issues.

ZAP Alerts

Now let's take a look at how to fix them.

Fix Vulnerabilities
One of the things not mentioned by the scan, but #1 in Seven Security (Mis)Configurations in Java web.xml Files, is Custom Error Pages Not Configured. Custom error pages are configured in this app, but error.jsp contains the following code:

<% if (exception != null) { %>
    <% exception.printStackTrace(new java.io.PrintWriter(out)); %>
<% } else { %>
    Please check your log files for further information.
<% } %>

Stack traces can be really useful to an attacker, so it's important to start by removing the above code from src/main/webapp/error.jsp.

The rest of the issues have to do with XSS, autocomplete, and cookies. Let's start with the easy ones. Fixing autocomplete is easy enough; simply changed the HTML in login.jsp and userform.jsp to have autocomplete="off" as part of the <form> tag.

Then modify web.xml so http-only and secure cookies are used. While you're at it, add session-timeout and tracking-mode as recommended by the aforementioned web.xml misconfigurations article.

<session-config>
    <session-timeout>15</session-timeout>
    <cookie-config>
        <http-only>true</http-only>
        <secure>true</secure>
    </cookie-config>
    <tracking-mode>COOKIE</tracking-mode>
</session-config>

Next, modify Spring Security's Remember Me configuration so it uses secure cookies. To do this, add use-secure-cookies="true" to the <remember-me> element in security.xml.

<remember-me user-service-ref="userService" key="e37f4b31-0c45-11dd-bd0b-0800200c9a66"
             use-secure-cookie="true"/>

Unfortunately, Spring Security doesn't support HttpOnly cookies, but will in a future release.

The next issue to solve is disabling directory browsing. You can do this by copying Jetty's webdefault.xml (from the org.eclipse.jetty:jetty-webapp JAR) into src/test/resources and changing its "dirAllowed" <init-param> to false:

<servlet>
  <servlet-name>default</servlet-name>
  <servlet-class>org.mortbay.jetty.servlet.DefaultServlet</servlet-class>
  <init-param>
    <param-name>acceptRanges</param-name>
    <param-value>true</param-value>
  </init-param>
  <init-param>
    <param-name>dirAllowed</param-name>
    <param-value>false</param-value>
  </init-param>
  <init-param>

You'll also need to modify the plugin's configuration to point to this file by adding it to the <webAppConfig> section in pom.xml.

<configuration>
    <webAppConfig>
        <contextPath>/</contextPath>
        <defaultsDescriptor>src/test/resources/webdefault.xml</defaultsDescriptor>
    </webAppConfig>

Of course, if you're running in production you'll want to configure this in your server's settings rather than in your pom.xml file.

Next, I set out to fix secure page browser cache issues. I had the following settings in my SiteMesh decorator:

<meta http-equiv="Cache-Control" content="no-store"/>
<meta http-equiv="Pragma" content="no-cache"/>

However, according to ZAP, the first meta tag should have "no-cache" instead of "no-store", so I changed it to "no-cache".

After making all these changes, I created a new ZAP session and ran an active scan on both sites again. Below are the results:

Active Scan after Fixes

I believe the first issue (parameter tampering) is because I show the error page when a duplicate user exists. To fix this, I changed UserFormController so it catches a UserExistsException and sends the user back to the form.

try {
    userManager.saveUser(user);
} catch (UserExistsException uex) {
    result.addError(new ObjectError("user", uex.getMessage()));
    return "userform";
}

However, this still doesn't seem to cause the alert to go away. This is likely because I'm not filtering/escaping HTML when it's first submitted. I believe the best solution for this would be to use something like OWASP's ESAPI to filter parameter values. However, I was unable to find integration with Spring MVC's data binding, so I decided not to try and fix this vulnerability.

Finally, I tried to disable jsessionid in URLs using suggestions from Stack Overflow. The previous setting in web.xml (<tracking-mode>COOKIE</tracking-mode>) should do this, but it doesn't seem to work with Jetty 8. The other issues (secure page browser cache, HttpOnly cookies and secure cookies), I was unable to solve. The last two are issues caused by Spring Security as far as I can tell.

Summary
In this article, I've shown you how to pentest a web application using Firefox and OWASP's Zed Attack Proxy (ZAP). I found ZAP to be a nice tool for figuring out vulnerabilities, but it'd be nice if it had a "retest" feature to see if you fixed an issue for a particular URL. It does have a "resend" feature, but running it didn't seem to clear alerts after I'd fixed them.

The issues I wasn't able to solve seemed to be mostly related to frameworks (e.g. Spring Security and HttpOnly cookies) or servers (Jetty not using cookies for tracking). My suspicion is the Jetty issues are because it doesn't support Servlet 3 as well as it advertises. I believe this is fair; I am using a milestone release after all. I tried scanning http://demo.raibledesigns.com/ajax-login (which runs on Tomcat 7 at Contegix) and confirmed that no jsessionid exists.

Hopefully this article has helped you understand how to figure out security vulnerabilities in your web applications. I believe ZAP will continue to get more popular as developers become aware of it. If you feel ambitious and want to try and solve all of the issues in my Ajax Login application, feel free to fork it on GitHub.

If you're interested in talking more about Webapp Security, please leave a comment, meet me at Jazoon later this week or let's talk in July at Über Conf.

Posted in Java at Jun 21 2011, 07:45:41 AM MDT 4 Comments

Java Web Application Security - Part III: Apache Shiro Login Demo

A couple weeks ago, I wrote a tutorial on how to implement security with Spring Security. The week prior, I wrote a similar tutorial for Java EE 6. This week, I'd like to show you how to implement the same features using Apache Shiro. As I mentioned in previous articles, I'm writing this because I told the audience at April's UJUG that I would publish screencasts of the demos.

Today, I've finished the third screencast showing how to implement security with Apache Shiro. Below is the presentation (with the screencast embedded on slide 22) as well as a step-by-step tutorial.


Apache Shiro Login Tutorial

Download and Run the Application
To begin, download the application you'll be implementing security in. This app is a stripped-down version of the Ajax Login application I wrote for my article on Implementing Ajax Authentication using jQuery, Spring Security and HTTPS. You'll need Java 6 and Maven installed to run the app. Run it using mvn jetty:run and open http://localhost:8080 in your browser. You'll see it's a simple CRUD application for users and there's no login required to add or delete users.

Implement Basic Authentication
The first step is to protect the list screen so people have to login to view users. To do this, you'll need to create a shiro.ini file Shiro's configuration. Create src/main/resources/shiro.ini and populate it with the contents below:

[main]

[users]
admin = admin, ROLE_ADMIN

[roles]
ROLE_ADMIN = *

[urls]
/app/users = authcBasic

You can see this file has four sections and is pretty simple to read and understand. For more information about what each section is for, check out Shiro's configuration documentation.

Next, open src/main/webapp/WEB-INF/web.xml and add Shiro's IniShiroFilter:

<filter>
    <filter-name>securityFilter</filter-name>
    <filter-class>org.apache.shiro.web.servlet.IniShiroFilter</filter-class>
    <!-- no init-param means load the INI config from classpath:shiro.ini -->
</filter>

And add its filter-mapping just after the rewriteFilter in the filter-mappings section (order is important!):

<filter-mapping>
    <filter-name>rewriteFilter</filter-name>
    <url-pattern>/*</url-pattern>
</filter-mapping>
<filter-mapping>
    <filter-name>securityFilter</filter-name>
    <url-pattern>/*</url-pattern>
    <dispatcher>REQUEST</dispatcher>
    <dispatcher>FORWARD</dispatcher>
    <dispatcher>INCLUDE</dispatcher>
</filter-mapping>

Then add Shiro's core and web dependencies to your pom.xml:

<dependency>
    <groupId>org.apache.shiro</groupId>
    <artifactId>shiro-core</artifactId>
    <version>1.1.0</version>
</dependency>
<dependency>
    <groupId>org.apache.shiro</groupId>
    <artifactId>shiro-web</artifactId>
    <version>1.1.0</version>
</dependency>

At this point, if you restart Jetty (Ctrl+C and jetty:run again), you should be prompted to login when you click on the "Users" tab. Enter admin/admin to login. Apache Shiro is easier to configure than Spring Security out-of-the-box, mostly because it doesn't require XML.

After logging in, you can try to logout by clicking the "Logout" link in the top-right corner. This calls a LogoutController with the following code that logs the user out.

public void logout(HttpServletResponse response) throws ServletException, IOException {
    request.getSession().invalidate();
    response.sendRedirect(request.getContextPath()); 
}

NOTE: Shiro doesn't currently have a way to logout with its API. However, it will be added in the 1.2 release.

You'll notice that clicking this link doesn't log you out, even though the session is invalidated. The only way to logout with basic authentication is to close the browser. In order to get the ability to logout, as well as to have more control over the look-and-feel of the login, you can implement form-based authentication. Before you implement form-based authentication, I'd like to show you how easy it is to force SSL with Apache Shiro.

Force SSL
Apache Shiro allows you to force SSL on a URL by simply adding "ssl[port]" to a URL in the [urls] section. If you don't specify the port, it will use the default port (443). I'm not sure if it allows you to switch back to http like Spring Security's requires-channel, but I don't think it does. Modify the URLs section of your shiro.ini to have the following:

[urls]
/app/users = ssl[8443],authc

In order for this to work, you have to configure Jetty to listen on an SSL port. Add the following just after the jetty-maven-plugin's </webAppConfig> element in your pom.xml:

<connectors>
    <connector implementation="org.eclipse.jetty.server.nio.SelectChannelConnector">
        <forwarded>true</forwarded>
        <port>8080</port>
    </connector>
    <connector implementation="org.eclipse.jetty.server.ssl.SslSelectChannelConnector">
        <forwarded>true</forwarded>
        <port>8443</port>
        <maxIdleTime>60000</maxIdleTime>
        <keystore>${project.build.directory}/ssl.keystore</keystore>
        <password>appfuse</password>
        <keyPassword>appfuse</keyPassword>
    </connector>
</connectors>

The keystore must be generated for Jetty to start successfully, so add the keytool-maven-plugin just above the jetty-maven-plugin in pom.xml.

<plugin>
    <groupId>org.codehaus.mojo</groupId>
    <artifactId>keytool-maven-plugin</artifactId>
    <version>1.0</version>
    <executions>
        <execution>
            <phase>generate-resources</phase>
            <id>clean</id>
            <goals>
                <goal>clean</goal>
            </goals>
        </execution>
        <execution>
            <phase>generate-resources</phase>
            <id>genkey</id>
            <goals>
                <goal>genkey</goal>
            </goals>
        </execution>
    </executions>
    <configuration>
        <keystore>${project.build.directory}/ssl.keystore</keystore>
        <dname>cn=localhost</dname>
        <keypass>appfuse</keypass>
        <storepass>appfuse</storepass>
        <alias>appfuse</alias>
        <keyalg>RSA</keyalg>
    </configuration>
</plugin>

Now if you restart Jetty, go to http://localhost:8080 and click on the "Users" tab, you'll be prompted to accept the Untrusted Certificate and then redirected to https://localhost:8443/users after logging in.

Now let's look at how to have more control over the look-and-feel of the login screen, as well as how to make logout work with form-based authentication.

Implement Form-based Authentication
To change from basic to form-based authentication, you simply have to add a few lines to shiro.ini. First of all, since I'd rather not change the name of the input elements in login.jsp, override the default names in the [main] section:

# name of request parameter with username; if not present filter assumes 'username'
authc.usernameParam = j_username
# name of request parameter with password; if not present filter assumes 'password'
authc.passwordParam = j_password
authc.failureKeyAttribute = shiroLoginFailure

Then change the [urls] section to filter on login.jsp and use "authc" instead of "authcBasic":

[urls]
# The /login.jsp is not restricted to authenticated users (otherwise no one could log in!), but
# the 'authc' filter must still be specified for it so it can process that url's
# login submissions. It is 'smart' enough to allow those requests through as specified by the
# shiro.loginUrl above.
/login.jsp = authc
/app/users = ssl[8443],authc

Then change login.jsp so the form's action is blank (causing it to submit to itself) instead of j_security_check:

<form action="" id="loginForm" method="post">

Now, restart Jetty and you should be prompted to login with this JSP instead of the basic authentication dialog.

Store Users in a Database
To store your users in a database instead of file, you'll need to add a few settings to shiro.ini to define your database and tables to use. Open src/main/resources/shiro.ini and add the following lines under the [main] section.

jdbcRealm=org.apache.shiro.realm.jdbc.JdbcRealm
#jdbcRealm.permissionsLookupEnabled=false
# If not filled, subclasses of JdbcRealm assume "select password from users where username = ?"
jdbcRealm.authenticationQuery = select user_pass from users where user_name = ?
# If not filled, subclasses of JdbcRealm assume "select role_name from user_roles where username = ?"
jdbcRealm.userRolesQuery = select role_name from users_roles where user_name = ?

ds = com.mysql.jdbc.jdbc2.optional.MysqlDataSource
ds.serverName = localhost
ds.user = root
ds.databaseName = appfuse
jdbcRealm.dataSource = $ds

This configuration is similar to what I did with the Java EE 6 tutorial where I'm pointing to a database other than the H2 instance that's used by the application. I believe Shiro can talk to a DAO like Spring Security, but I have yet to explore that option.

While you're at it, add the following lines to enable password encryption.

sha256Matcher = org.apache.shiro.authc.credential.Sha256CredentialsMatcher
jdbcRealm.credentialsMatcher = $sha256Matcher

You'll need to install MySQL for this to work. After installing it, you should be able to create an "appfuse" database using the following command:

mysql -u root -p -e 'create database appfuse'

Then create the tables necessary and populate it with an 'admin' user. Login using "mysql -u root -p appfuse" and execute the following SQL statements:

create table users (
  user_name         varchar(30) not null primary key,
  user_pass         varchar(100) not null
);

create table user_roles (
  user_name         varchar(30) not null,
  role_name         varchar(30) not null,
  primary key (user_name, role_name)
);

insert into users values ('admin', '22f256eca1f336a97eef2b260773cb0d81d900c208ff26e94410d292d605fed8');
insert into user_roles values ('admin', 'ROLE_ADMIN');

Now if you restart Jetty, you should be able to login with admin/adminjdbc and view the list of users.

Summary
In this tutorial, you learned how to implement authentication using Apache Shiro 1.1.0. I don't have a lot of experience with Apache Shiro, but I was able to get the basics working without too much effort. This tutorial doesn't show how to do Remember Me because I couldn't figure it out in 5 minutes, which means I have 5 more minutes before it fails the 10-minute test. ;)

Shiro was formerly named JSecurity and has been an Apache project for less than a year. It seems to be more targeted towards non-web use, so its certainly something to look at if you're more interested in cryptography or non-web apps. I think there's a good chance this project will continue to grow and be used more as more developers learn about it. The Apache brand certainly doesn't hurt.

I didn't include a slide about the limitations I found with Shiro, mostly because I haven't used it much. I've used Java EE and Spring Security for several years. The main limitation I found was the lack of documentation, but I've heard it's improving rapidly.

In the next couple weeks, I'll post a Part IV on implementing programmatic login using the APIs of Java EE 6, Spring Security and Apache Shiro. I'll be presenting this topic at Jazoon as well as the long-form version (with hacking) at ÜberConf. Hopefully I'll see you at one of those conferences.

Update: Thanks to help from Les Hazlewood, I've figured out how to implement Remember Me with Apache Shiro. In the [urls] section of shiro.ini, the second url (shown below) says to Shiro "In order to visit the /app/users URL, you must be connecting via SSL on port 8443 and you must also be authenticated."

/app/users = ssl[8443],authc

Remembered users are not authenticated because their identity hasn't been proven during the current session. What I want Shiro to say is "In order to visit the /app/users URL, you must be connecting via SSL on 8443 and you must also be a known user. If you're not, you should login first." Where a known user is someone who has a recognized identity and has either authenticated during the current session or is known via RememberMe from a previous session. The documentation gives a good example with Amazon.com for why Shiro makes this distinction. It allows more control (usually necessary), but you can relax the control as you see fit.

So, to relax my configuration a bit to match what I want (known users), I updated shiro.ini's [urls] section to be as follows:

/app/users = ssl[8443],user

The key is that the /app/users url is now protected with the more relaxed user filter instead of the authc filter. However, you would typically want an account profile page (or credit card information page, or similar) protected with the authc filter instead to guarantee proof of identity for those sensitive operations.

Posted in Java at May 26 2011, 04:43:22 PM MDT 10 Comments

Java Web Application Security - Part II: Spring Security Login Demo

Last week, I wrote a tutorial on how to implement Security in Java EE 6. This week, I'd like to show you how to implement the same features using Spring Security. Before I begin, I'd like to explain my reason for writing this article.

Last month, I presented a talk on Java Web Application Security at the Utah JUG (UJUG). As part of that presentation, I did a number of demos about how to implement security with Java EE 6, Spring Security and Apache Shiro. I told the audience that I would post the presentation and was planning on recording screencasts of the various demos so the online version of the presentation would make more sense.

Today, I've finished the second screencast showing how to implement security with Spring Security. Below is the presentation (with the screencast embedded on slide 16) as well as a step-by-step tutorial.


Spring Security Login Tutorial

Download and Run the Application
To begin, download the application you'll be implementing security in. This app is a stripped-down version of the Ajax Login application I wrote for my article on Implementing Ajax Authentication using jQuery, Spring Security and HTTPS. You'll need Java 6 and Maven installed to run the app. Run it using mvn jetty:run and open http://localhost:8080 in your browser. You'll see it's a simple CRUD application for users and there's no login required to add or delete users.

Implement Basic Authentication
The first step is to protect the list screen so people have to login to view users. To do this, you'll need to create a Spring context file that contains Spring Security's configuration. Create src/main/webapp/WEB-INF/security.xml and populate it with the contents below:

  <?xml version="1.0" encoding="UTF-8"?>
  <beans:beans xmlns="http://www.springframework.org/schema/security"
               xmlns:xsi="http://www.w3.org/2001/XMLSchema-instance"
               xmlns:beans="http://www.springframework.org/schema/beans"
               xsi:schemaLocation="http://www.springframework.org/schema/beans http://www.springframework.org/schema/beans/spring-beans-3.0.xsd
                http://www.springframework.org/schema/security http://www.springframework.org/schema/security/spring-security-3.0.xsd">

      <!-- New in Spring Security 3.1 -->
      <!-- <http pattern="/css/**" security="none"/> -->

      <http auto-config="true">
          <intercept-url pattern="/app/users" access="ROLE_USER,ROLE_ADMIN"/>
          <http-basic/>
      </http>

      <authentication-manager alias="authenticationManager">
          <authentication-provider>
              <password-encoder hash="sha"/>
              <user-service>
                  <user name="user" password="12dea96fec20593566ab75692c9949596833adc9" authorities="ROLE_USER"/>
                  <user name="admin" password="d033e22ae348aeb5660fc2140aec35850c4da997" authorities="ROLE_ADMIN"/>
              </user-service>
          </authentication-provider>
      </authentication-manager>

      <!-- Override userSecurityAdvice bean in appfuse-service to allow any role to update a user. -->
      <beans:bean id="userSecurityAdvice" class="org.appfuse.examples.webapp.security.UserSecurityAdvice"/>
  </beans:beans>

The last bean, userSecurityAdvice, is an aspect that's needed to override some behavior in AppFuse. You won't need this normally when implementing Spring Security.

Next, open src/main/webapp/WEB-INF/web.xml and add Spring's DelegatingFilterProxy:

<filter>
    <filter-name>securityFilter</filter-name>
    <filter-class>org.springframework.web.filter.DelegatingFilterProxy</filter-class>
    <init-param>
        <param-name>targetBeanName</param-name>
        <param-value>springSecurityFilterChain</param-value>
    </init-param>
</filter>

And add its filter-mapping just after the rewriteFilter in the filter-mappings section (order is important!):

<filter-mapping>
    <filter-name>rewriteFilter</filter-name>
    <url-pattern>/*</url-pattern>
</filter-mapping>
<filter-mapping>
    <filter-name>securityFilter</filter-name>
    <url-pattern>/*</url-pattern>
    <dispatcher>REQUEST</dispatcher>
    <dispatcher>FORWARD</dispatcher>
    <dispatcher>INCLUDE</dispatcher>
</filter-mapping>

You don't need to add any dependencies in your pom.xml is because this project depends on AppFuse, which already contains these dependencies.

At this point, if you restart Jetty (Ctrl+C and jetty:run again), you should be prompted to login when you click on the "Users" tab. Enter admin/admin to login. Spring Security is a bit easier to configure than Java EE 6 out-of-the-box, mostly because it doesn't require you to configure your container.

After logging in, you can try to logout by clicking the "Logout" link in the top-right corner. This calls a LogoutController with the following code that logs the user out.

public void logout(HttpServletResponse response) throws ServletException, IOException {
    request.getSession().invalidate();
    response.sendRedirect(request.getContextPath()); 
}

NOTE: Spring Security has a way to configure "logout" to match a URL and get rid of a class like LogoutController. Since it was already in the project, I don't cover that in this tutorial.

You'll notice that clicking this link doesn't log you out, even though the session is invalidated. The only way to logout with basic authentication is to close the browser. In order to get the ability to logout, as well as to have more control over the look-and-feel of the login, you can implement form-based authentication. Before you implement form-based authentication, I'd like to show you how easy it is to force SSL with Spring Security.

Force SSL
Spring Security allows you to switch between secure (https) and non-secure (http) protocols using a simple requires-channel attribute on the <intercept-url> element. Possible values are "http", "https" and "any". Add requires-channel="https" to your security.xml file:

<intercept-url pattern="/app/users" access="ROLE_USER,ROLE_ADMIN" requires-channel="https"/>

In order for this to work, you have to configure Jetty to listen on an SSL port. Add the following just after the jetty-maven-plugin's </webAppConfig> element in your pom.xml:

<connectors>
    <connector implementation="org.eclipse.jetty.server.nio.SelectChannelConnector">
        <forwarded>true</forwarded>
        <port>8080</port>
    </connector>
    <connector implementation="org.eclipse.jetty.server.ssl.SslSelectChannelConnector">
        <forwarded>true</forwarded>
        <port>8443</port>
        <maxIdleTime>60000</maxIdleTime>
        <keystore>${project.build.directory}/ssl.keystore</keystore>
        <password>appfuse</password>
        <keyPassword>appfuse</keyPassword>
    </connector>
</connectors>

The keystore must be generated for Jetty to start successfully, so add the keytool-maven-plugin just above the jetty-maven-plugin in pom.xml.

<plugin>
    <groupId>org.codehaus.mojo</groupId>
    <artifactId>keytool-maven-plugin</artifactId>
    <version>1.0</version>
    <executions>
        <execution>
            <phase>generate-resources</phase>
            <id>clean</id>
            <goals>
                <goal>clean</goal>
            </goals>
        </execution>
        <execution>
            <phase>generate-resources</phase>
            <id>genkey</id>
            <goals>
                <goal>genkey</goal>
            </goals>
        </execution>
    </executions>
    <configuration>
        <keystore>${project.build.directory}/ssl.keystore</keystore>
        <dname>cn=localhost</dname>
        <keypass>appfuse</keypass>
        <storepass>appfuse</storepass>
        <alias>appfuse</alias>
        <keyalg>RSA</keyalg>
    </configuration>
</plugin>

Now if you restart Jetty, go to http://localhost:8080 and click on the "Users" tab, you'll be prompted to accept the Untrusted Certificate and then redirected to https://localhost:8443/users after logging in. This is an improvement on Java EE's user-data-constraint for two reasons:

  • You can switch between http and https protocols. With Java EE, you can only force https. You have to write a custom filter to switch back to http.
  • Redirecting to https actually works. With Java EE (on Jetty at least), a 403 is returned instead of redirecting the request.

Now let's look at how to have more control over the look-and-feel of the login screen, as well as how to make logout work with form-based authentication.

Implement Form-based Authentication
To change from basic to form-based authentication, you simply have to add a <form-login> element in security.xml's <http> element:

<http auto-config="true">
    <intercept-url pattern="/app/users" access="ROLE_USER,ROLE_ADMIN" requires-channel="https"/>
    <form-login login-page="/login" authentication-failure-url="/login?error=true"
                login-processing-url="/j_security_check"/>
    <http-basic/>
</http>

You can leave the <http-basic> element since Spring Security is smart enough to serve up the form for browsers and use Basic Authentication for clients such as web services. The login.jsp page (that /login forwards to) already exists in the project, in the src/main/webapp directory. The forwarding is done by the UrlRewriteFilter with the following configuration in src/main/webapp/WEB-INF/urlrewrite.xml.

<rule>
    <from>/login</from>
    <to>/login.jsp</to>
</rule>

This JSP has 3 important elements: 1) a form that submits to "/j_security_check", 2) an input element named "j_username" and 3) an input element named "j_password". If you restart Jetty, you'll now be prompted to login with this JSP instead of the basic authentication dialog.

Add Remember Me
Remember Me is a feature you see in many web applications today. It's usually a checkbox on the login form that allows you to auto-login the next time you visit a site. This feature doesn't exist in Java EE security, but it does exist in Spring Security. To enable it, add the following just below <form-login> in security.xml:

<remember-me user-service-ref="userDao" key="e37f4b31-0c45-11dd-bd0b-0800200c9a66"/>

Next, open src/main/webapp/login.jsp and change the name of the "remember me" checkbox to be _spring_security_remember_me:

<input type="checkbox" name="_spring_security_remember_me" id="rememberMe"/>

After making these changes, you should be able to restart Jetty, go to http://localhost:8080/users, enter admin/adminjdbc, check the Remember Me checkbox and login. Then close your browser, and repeat the process. This time, you won't be prompted to login. For more information on this feature, see Spring Security's Remember Me documentation.

While storing usernames and passwords in a file is convenient for demos, it's not very real-world-ish. The next section shows you how to configure Spring Security to use a database for its user store.

Store Users in a Database
To store your users in a database instead of file, you'll need to add a user-service-ref attribute to the <authentication-provider> element. You can also delete the <user-service> element.

<authentication-manager alias="authenticationManager">
    <authentication-provider user-service-ref="userDao">
        <password-encoder hash="sha"/>
    </authentication-provider>
</authentication-manager>

The "userDao" bean is provided by AppFuse and its UserDaoHibernate.java class. This class implements Spring Security's UserDetailsService interface. With Java EE, I had to configure a database connection and make sure the JDBC Driver was in my container's classpath. With Spring Security, you can talk to the database you already have configured in your application.

Of course, you could do this with Java EE too. One thing I neglected to show in my last tutorial was that 1) the app uses H2 and 2) I had to configure Java EE's database to be MySQL. This was because when I tried to access my H2 instance, I got an error about two threads trying to access it at once.
2011-05-13 08:47:29.081:WARN::UserRealm Java EE Login could not connect to database; will try later
org.h2.jdbc.JdbcSQLException: Database may be already in use: "Locked by another process". 
        Possible solutions: close all other connection(s); use the server mode [90020-154]
	at org.h2.message.DbException.getJdbcSQLException(DbException.java:327)
	at org.h2.message.DbException.get(DbException.java:167)
	at org.h2.message.DbException.get(DbException.java:144)
	at org.h2.store.FileLock.getExceptionAlreadyInUse(FileLock.java:443)
	at org.h2.store.FileLock.lockFile(FileLock.java:338)
	at org.h2.store.FileLock.lock(FileLock.java:134)
	at org.h2.engine.Database.open(Database.java:535)
	at org.h2.engine.Database.openDatabase(Database.java:218)

The password for the "admin" user is configured in src/test/resources/sample-data.xml and it's loaded by DbUnit before the application starts. You can view your pom.xml and the dbunit-maven-plugin's configuration if you're interested in learning how this is done. The password is currently configured to "adminjdbc", but you can reset it by generating a new password and modifying sample-data.xml.

Now if you restart Jetty, you should be able to login with admin/adminjdbc and view the list of users.

Summary
In this tutorial, you learned how to implement authentication using Spring Security 3.0.5. In addition to the basic XML configuration, Spring Security also provides a AOP support and annotations you can use to secure methods. It also has many more features than standard Java EE Security. In my opinion, it's the most mature security framework we have in Java today. Currently, I think its reference documentation is the best place to learn more.

There are a few limitations I found with Spring Security:

  • The authentication mechanism (file, database, ldap, etc.) is contained in the WAR
  • Securing methods only works on Spring beans
  • Remember Me doesn't work in my screencast (because I forgot to rename the checkbox in login.jsp)

Of course, you can configure Spring to load its configuration from outside the WAR (e.g. a file or JNDI), but it's not as easy as including the configuration in your app.

In the next couple weeks, I'll post Part III of this series, where I'll show you how to implement this same set of features using Apache Shiro. In the meantime, please let me know if you have any questions.

I created the screencasts with Camtasia. For small screens, and embedding in the presentation, I created it at 50% and used the SmartFocus feature to zoom in and out during the demo. For larger screens, I published another screencast at 100%, in HD. If you have a preference for which screencast is better, I'd love to hear about it.

Posted in Java at May 13 2011, 09:20:51 AM MDT 10 Comments

Java Web Application Security - Part I: Java EE 6 Login Demo

Back in February, I wrote about my upcoming conferences:

In addition to Vegas and Poland, there's a couple other events I might speak at in the next few months: the Utah Java Users Group (possibly in April), Jazoon and ÜberConf (if my proposals are accepted). For these events, I'm hoping to present the following talk:

Webapp Security: Develop. Penetrate. Protect. Relax.
In this session, you'll learn how to implement authentication in your Java web applications using Spring Security, Apache Shiro and good ol' Java EE Container Managed Authentication. You'll also learn how to secure your REST API with OAuth and lock it down with SSL.

After learning how to develop authentication, I'll introduce you to OWASP, the OWASP Top 10, its Testing Guide and its Code Review Guide. From there, I'll discuss using WebGoat to verify your app is secure and commercial tools like webapp firewalls and accelerators.

Fast forward a couple months and I'm happy to say that I've completed my talk at the Utah JUG and it's been accepted at Jazoon and Über Conf. For this talk, I created a presentation that primarily consists of demos implementing basic, form and Ajax authentication using Java EE 6, Spring Security and Apache Shiro. In the process of creating the demos, I learned (or re-educated myself) how to do a number of things in all 3 frameworks:

  • Implement Basic Authentication
  • Implement Form-based Authentication
  • Implement Ajax HTTP -> HTTPS Authentication (with programmatic APIs)
  • Force SSL for certain URLs
  • Implement a file-based store of users and passwords (in Jetty/Maven and Tomcat standalone)
  • Implement a database store of users and passwords (in Jetty/Maven and Tomcat standalone)
  • Encrypt Passwords
  • Secure methods with annotations

For the demos, I showed the audience how to do almost all of these, but skipped Tomcat standalone and securing methods in the interest of time. In July, when I do this talk at ÜberConf, I plan on adding 1) hacking the app (to show security holes) and 2) fixing it to protect it against vulnerabilities.

I told the audience at UJUG that I would post the presentation and was planning on recording screencasts of the various demos so the online version of the presentation would make more sense. Today, I've finished the first screencast showing how to implement security with Java EE 6. Below is the presentation (with the screencast embedded on slide 10) as well as a step-by-step tutorial.


Java EE 6 Login Tutorial

Download and Run the Application
To begin, download the application you'll be implementing security in. This app is a stripped-down version of the Ajax Login application I wrote for my article on Implementing Ajax Authentication using jQuery, Spring Security and HTTPS. You'll need Java 6 and Maven installed to run the app. Run it using mvn jetty:run and open http://localhost:8080 in your browser. You'll see it's a simple CRUD application for users and there's no login required to add or delete users.

Implement Basic Authentication
The first step is to protect the list screen so people have to login to view users. To do this, add the following to the bottom of src/main/webapp/WEB-INF/web.xml:

<security-constraint>
    <web-resource-collection>
        <web-resource-name>users</web-resource-name>
        <url-pattern>/users</url-pattern>
        <http-method>GET</http-method>
        <http-method>POST</http-method>
    </web-resource-collection>
    <auth-constraint>
        <role-name>ROLE_ADMIN</role-name>
    </auth-constraint>
</security-constraint>

<login-config>
    <auth-method>BASIC</auth-method>
    <realm-name>Java EE Login</realm-name>
</login-config>

<security-role>
    <role-name>ROLE_ADMIN</role-name>
</security-role>

At this point, if you restart Jetty (Ctrl+C and jetty:run again), you'll get an error about a missing LoginService. This happens because Jetty doesn't know where the "Java EE Login" realm is located. Add the following to pom.xml, just after </webAppConfig> in the Jetty plugin's configuration.

<loginServices>
    <loginService implementation="org.eclipse.jetty.security.HashLoginService">
        <name>Java EE Login</name>
        <config>${basedir}/src/test/resources/realm.properties</config>
    </loginService>
</loginServices>

The realm.properties file already exists in the project and contains user names and passwords. Start the app again using mvn jetty:run and you should be prompted to login when you click on the "Users" tab. Enter admin/admin to login.

After logging in, you can try to logout by clicking the "Logout" link in the top-right corner. This calls a LogoutController with the following code that logs the user out.

public void logout(HttpServletResponse response) throws ServletException, IOException {
    request.getSession().invalidate();
    response.sendRedirect(request.getContextPath());
}

You'll notice that clicking this link doesn't log you out, even though the session is invalidated. The only way to logout with basic authentication is to close the browser. In order to get the ability to logout, as well as to have more control over the look-and-feel of the login, you can implement form-based authentication.

Implement Form-based Authentication
To change from basic to form-based authentication, you simply have to replace the <login-config> in your web.xml with the following:

<login-config>
    <auth-method>FORM</auth-method>
    <form-login-config>
        <form-login-page>/login.jsp</form-login-page>
        <form-error-page>/login.jsp?error=true</form-error-page>
    </form-login-config>
</login-config>

The login.jsp page already exists in the project, in the src/main/webapp directory. This JSP has 3 important elements: 1) a form that submits to "${contextPath}/j_security_check", 2) an input element named "j_username" and 3) an input element named "j_password". If you restart Jetty, you'll now be prompted to login with this JSP instead of the basic authentication dialog.

Force SSL
Another thing you might want to implement to secure your application is forcing SSL for certain URLs. To do this on the same <security-constraint> you already have in web.xml, add the following after </auth-constraint>:

<user-data-constraint>
    <transport-guarantee>CONFIDENTIAL</transport-guarantee>
</user-data-constraint>

To configure Jetty to listen on an SSL port, add the following just after </loginServices> in your pom.xml:

<connectors>
    <connector implementation="org.eclipse.jetty.server.nio.SelectChannelConnector">
        <forwarded>true</forwarded>
        <port>8080</port>
    </connector>
    <connector implementation="org.eclipse.jetty.server.ssl.SslSelectChannelConnector">
        <forwarded>true</forwarded>
        <port>8443</port>
        <maxIdleTime>60000</maxIdleTime>
        <keystore>${project.build.directory}/ssl.keystore</keystore>
        <password>appfuse</password>
        <keyPassword>appfuse</keyPassword>
    </connector>
</connectors>

The keystore must be generated for Jetty to start successfully, so add the keytool-maven-plugin just above the jetty-maven-plugin in pom.xml.

<plugin>
    <groupId>org.codehaus.mojo</groupId>
    <artifactId>keytool-maven-plugin</artifactId>
    <version>1.0</version>
    <executions>
        <execution>
            <phase>generate-resources</phase>
            <id>clean</id>
            <goals>
                <goal>clean</goal>
            </goals>
        </execution>
        <execution>
            <phase>generate-resources</phase>
            <id>genkey</id>
            <goals>
                <goal>genkey</goal>
            </goals>
        </execution>
    </executions>
    <configuration>
        <keystore>${project.build.directory}/ssl.keystore</keystore>
        <dname>cn=localhost</dname>
        <keypass>appfuse</keypass>
        <storepass>appfuse</storepass>
        <alias>appfuse</alias>
        <keyalg>RSA</keyalg>
    </configuration>
</plugin>

Now if you restart Jetty, go to http://localhost:8080 and click on the "Users" tab, you'll get a 403. What the heck?! When this first happened to me, it took me a while to figure out. It turns out that Jetty doesn't redirect to HTTPS when using Java EE authentication, so you have to manually type in https://localhost:8443/ (or add a filter to redirect for you). If you deployed this same application on Tomcat (after enabling SSL), it would redirect for you.

Store Users in a Database
Finally, to store your users in a database instead of file, you'll need to change the <loginService> in the Jetty plugin's configuration. Replace the existing <loginService> element with the following:

<loginServices>
    <loginService implementation="org.eclipse.jetty.security.JDBCLoginService">
        <name>Java EE Login</name>
        <config>${basedir}/src/test/resources/jdbc-realm.properties</config>
    </loginService>
</loginServices>

The jdbc-realm.properties file already exists in the project and contains the database settings and table/column names for the user and role information.

jdbcdriver = com.mysql.jdbc.Driver
url = jdbc:mysql://localhost/appfuse
username = root
password =
usertable = app_user
usertablekey = id
usertableuserfield = username
usertablepasswordfield = password
roletable = role
roletablekey = id
roletablerolefield = name
userroletable = user_role
userroletableuserkey = user_id
userroletablerolekey = role_id
cachetime = 300

Of course, you'll need to install MySQL for this to work. After installing it, you should be able to create an "appfuse" database and populate it using the following commands:

mysql -u root -p -e 'create database appfuse'
curl https://gist.github.com/raw/958091/ceecb4a6ae31c31429d5639d0d1e6bfd93e2ea42/create-appfuse.sql > create-appfuse.sql
mysql -u root -p appfuse < create-appfuse.sql

Next you'll need to configure Jetty so it has MySQL's JDBC Driver in its classpath. To do this, add the following dependency just after the <configuration> element (before <executions>) in pom.xml:

<dependencies>
    <!-- MySQL for JDBC Realm -->
    <dependency>
        <groupId>mysql</groupId>
        <artifactId>mysql-connector-java</artifactId>
        <version>5.1.14</version>
    </dependency>
</dependencies>

Now run the jetty-password.sh file in the root directory of the project to generate a password of your choosing. For example:

$ sh jetty-password.sh javaeelogin
javaeelogin
OBF:1vuj1t2v1wum1u9d1ugo1t331uh21ua51wts1t3b1vur
MD5:53b176e6ce1b5183bc970ef1ebaffd44

The last two lines are obfuscated and MD5 versions of the password. Update the admin user's password to this new value. You can do this with the following SQL statement.

UPDATE app_user SET password='MD5:53b176e6ce1b5183bc970ef1ebaffd44' WHERE username = 'admin';

Now if you restart Jetty, you should be able to login with admin/javaeelogin and view the list of users.

Summary
In this tutorial, you learned how to implement authentication using standard Java EE 6. In addition to the basic XML configuration, there's also some new methods in HttpServletRequest for Java EE 6 and Servlet 3.0:

  • authenticate(response)
  • login(user, pass)
  • logout()

This tutorial doesn't show you how to use them, but I did play with them a bit as part of my UJUG demo when implementing Ajax authentication. I found that login() did work, but it didn't persist the authentication for the users session. I also found that after calling logout(), I still needed to invalidate the session to completely logout the user. There are some additional limitations I found with Java EE authentication, namely:

  • No error messages for failed logins
  • No Remember Me
  • No auto-redirect from HTTP to HTTPS
  • Container has to be configured
  • Doesn’t support regular expressions for URLs

Of course, no error messages indicating why login failed is probably a good thing (you don't want to tell users why their credentials failed). However, when you're trying to figure out if your container is configured properly, the lack of container logging can be a pain.

In the next couple weeks, I'll post Part II of this series, where I'll show you how to implement this same set of features using Spring Security. In the meantime, please let me know if you have any questions.

Posted in Java at May 05 2011, 04:58:00 PM MDT 9 Comments

Adding Search to AppFuse with Compass

Over 5 years ago, I recognized that AppFuse needed to have a search feature and entered an issue in JIRA. Almost 4 years later, a Compass Tutorial was created and shortly after Shay Banon (Compass Founder), sent in a patch. From the message he sent me:

A quick breakdown of enabling search:

  1. Added Searchable annotations to the User and Address.
  2. Defined Compass bean, automatically scanning the model package for mapped searchable classes. It also automatically integrates with Spring transaction manager, and stores the index on the file system ([work dir]/target/test-index).
  3. Defined CompassTemplate (similar in concept to HibernateTemplate).
  4. Defined CompassSearchHelper. Really helps to perform search since it does pagination and so on.
  5. Defined CompassGps, basically it allows for index operation allowing to completely reindex the data from the database. JPA and Hiberante also automatically mirror changes done through their API to the index. iBatis uses AOP.

Fast forward 2 years and I finally found the time/desire to put a UI on the backend Compass implementation that Shay provided. Yes, I realize that Compass is being replaced by ElasticSearch. I may change to use ElasticSearch in the future; now that the search feature exists, I hope to see it evolve and improve.

Since Shay's patch integrated the necessary Spring beans for indexing and searching, the only thing I had to do was to implement the UI. Rather than having an "all objects" results page, I elected to implement it so you could search on an entity's list screen. I started with Spring MVC and added a search() method to the UserController:

@RequestMapping(method = RequestMethod.GET)
public ModelAndView handleRequest(@RequestParam(required = false, value = "q") String query) throws Exception {
    if (query != null && !"".equals(query.trim())) {
        return new ModelAndView("admin/userList", Constants.USER_LIST, search(query));
    } else {
        return new ModelAndView("admin/userList", Constants.USER_LIST, mgr.getUsers());
    }
}

public List<User> search(String query) {
    List<User> results = new ArrayList<User>();
    CompassDetachedHits hits = compassTemplate.findWithDetach(query);
    log.debug("No. of results for '" + query + "': " + hits.length());
    for (int i = 0; i < hits.length(); i++) {
        results.add((User) hits.data(i));
    }
    return results;
}

At first, I used compassTemplate.find(), but got an error because I wasn't using an OpenSessionInViewFilter. I decided to go with findWithDetach() and added the following search form to the top of the userList.jsp page:

<div id="search">
<form method="get" action="${ctx}/admin/users" id="searchForm">
    <input type="text" size="20" name="q" id="query" value="${param.q}"
           placeholder="Enter search terms"/>
    <input type="submit" value="<fmt:message key="button.search"/>"/>
</form>
</div>

NOTE: I tried using HTML5's <input type="search">, but found Canoo WebTest doesn't support it.

Next, I wrote a unit test to verify everything worked as expected. I found I had to call compassGps.index() as part of my test to make sure my index was created and up-to-date.

public class UserControllerTest extends BaseControllerTestCase {
    @Autowired
    private CompassGps compassGps;
    @Autowired
    private UserController controller;

    public void testSearch() throws Exception {
        compassGps.index();
        ModelAndView mav = controller.handleRequest("admin");
        Map m = mav.getModel();
        List results = (List) m.get(Constants.USER_LIST);
        assertNotNull(results);
        assertTrue(results.size() >= 1);
        assertEquals("admin/userList", mav.getViewName());
    }
}

After getting this working, I started integrating similar code into AppFuse's other web framework modules (Struts, JSF and Tapestry). When I was finished, they all looked pretty similar from a UI perspective.

Struts:

<div id="search">
<form method="get" action="${ctx}/admin/users" id="searchForm">
    <input type="text" size="20" name="q" id="query" value="${param.q}"
           placeholder="Enter search terms..."/>
    <input type="submit" value="<fmt:message key="button.search"/>"/>
</form>
</div>

JSF:

<div id="search">
<h:form id="searchForm">
    <h:inputText id="q" name="q" size="20" value="#{userList.query}"/>
    <h:commandButton value="#{text['button.search']}" action="#{userList.search}"/>
</h:form>
</div>

Tapestry:

<div id="search">
<t:form method="get" t:id="searchForm">
    <t:textfield size="20" name="q" t:id="q"/>
    <input t:type="submit" value="${message:button.search}"/>
</t:form>
</div>

One frustrating thing I found was that Tapestry doesn't support method="get" and AFAICT, neither does JSF 2. With JSF, I had to make my UserList bean session-scoped or the query parameter would be null when it listed the results. Tapestry took me the longest to implement, mainly because I had issues figuring out how it's easy-to-understand-once-you-know onSubmit() handlers worked and I had the proper @Property and @Persist annotations on my "q" property. This tutorial was the greatest help for me. Of course, now that it's all finished, the code looks pretty intuitive.

Feeling proud of myself for getting this working, I started integrating this feature into AppFuse's code generation and found I had to add quite a bit of code to the generated list pages/controllers.

So I went on a bike ride...

While riding, I thought of a much better solution and added the following search method to AppFuse's GenericManagerImpl.java. In the code I added to pages/controllers previously, I'd already refactored to use CompassSearchHelper and I continued to do so in the service layer implementation.

@Autowired
private CompassSearchHelper compass;

public List<T> search(String q, Class clazz) {
    if (q == null || "".equals(q.trim())) {
        return getAll();
    }

    List<T> results = new ArrayList<T>();

    CompassSearchCommand command = new CompassSearchCommand(q);
    CompassSearchResults compassResults = compass.search(command);
    CompassHit[] hits = compassResults.getHits();

    if (log.isDebugEnabled() && clazz != null) {
        log.debug("Filtering by type: " + clazz.getName());
    }

    for (CompassHit hit : hits) {
        if (clazz != null) {
            if (hit.data().getClass().equals(clazz)) {
                results.add((T) hit.data());
            }
        } else {
            results.add((T) hit.data());
        }
    }

    if (log.isDebugEnabled()) {
        log.debug("Number of results for '" + q + "': " + results.size());
    }

    return results;
}

This greatly simplified my page/controller logic because now all I had to do was call manager.search(query, User.class) instead of doing the Compass login in the controller. Of course, it'd be great if I didn't have to pass in the Class to filter by object, but that's the nature of generics and type erasure.

Other things I learned along the way:

  • To index on startup, I added compassGps.index() to the StartupListener..
  • In unit tests that leveraged transactions around methods, I had to call compassGps.index() before any transactions started.
  • To scan multiple packages for searchable classes, I had to add a LocalCompassBeanPostProcessor.

But more than anything, I was reminded it always helps to take a bike ride when you don't like the design of your code. ;-)

This feature and many more will be in AppFuse 2.1, which I hope to finish by the end of the month. In the meantime, please feel free to try out the latest snapshot.

Posted in Java at Mar 15 2011, 05:11:12 PM MDT 1 Comment

Upgrading to JSF 2

Last week, I spent a few hours upgrading AppFuse from JSF 1.2 to JSF 2.0. In reality, I upgraded from MyFaces 1.2.7 to 2.0.4, but all JSF implementations should be the same, right? All in all, it was a pretty easy upgrade with a few minor AppFuse-specific things. My goal in upgrading was to do the bare minimum to get things working and to leave integration of JSF 2 features for a later date.

In addition to upgrading MyFaces, I had to upgrade Tomahawk by changing the dependency's artifactId to tomahawk20. I was also able to remove the following listener from my web.xml:

<listener>
    <listener-class>org.apache.myfaces.webapp.StartupServletContextListener</listener-class>
<listener>

After that, I discovered that MyFaces uses a new URI (/javax.faces.resource/) for serving up some of its resource files. I kindly asked Spring Security to ignore these requests by adding the following to my security.xml file.

<intercept-url pattern="/javax.faces.resource/**" filters="none"/>

Since JSF 2 includes Facelets by default, I tried removing Facelets as a dependency. After doing this, I received the following error:

ERROR [308855416@qtp-120902214-7] ViewHandlerWrapper.fillChain(158) | Error instantiation parent Faces ViewHandler
java.lang.ClassNotFoundException: com.sun.facelets.FaceletViewHandler
        at org.codehaus.plexus.classworlds.strategy.SelfFirstStrategy.loadClass(SelfFirstStrategy.java:50)
        at org.codehaus.plexus.classworlds.realm.ClassRealm.loadClass(ClassRealm.java:244)
        at org.codehaus.plexus.classworlds.realm.ClassRealm.loadClass(ClassRealm.java:230)
        at org.mortbay.jetty.webapp.WebAppClassLoader.loadClass(WebAppClassLoader.java:401)
        at org.mortbay.jetty.webapp.WebAppClassLoader.loadClass(WebAppClassLoader.java:363)
        at org.ajax4jsf.framework.ViewHandlerWrapper.fillChain(ViewHandlerWrapper.java:144)
        at org.ajax4jsf.framework.ViewHandlerWrapper.calculateRenderKitId(ViewHandlerWrapper.java:68)
        at org.apache.myfaces.lifecycle.DefaultRestoreViewSupport.isPostback(DefaultRestoreViewSupport.java:179)
        at org.apache.myfaces.lifecycle.RestoreViewExecutor.execute(RestoreViewExecutor.java:113)
        at org.apache.myfaces.lifecycle.LifecycleImpl.executePhase(LifecycleImpl.java:171)
        at org.apache.myfaces.lifecycle.LifecycleImpl.execute(LifecycleImpl.java:118)
        at javax.faces.webapp.FacesServlet.service(FacesServlet.java:189)

Figuring this was caused by the following element in my web.xml ...

<context-param>
    <param-name>org.ajax4jsf.VIEW_HANDLERS</param-name>
    <param-value>com.sun.facelets.FaceletViewHandler</param-value>
</context-param>

... I removed it and tried again. This time I received a NoClassDefFoundError:

java.lang.NoClassDefFoundError: com/sun/facelets/tag/TagHandler
        at java.lang.ClassLoader.defineClass1(Native Method)
        at java.lang.ClassLoader.defineClassCond(ClassLoader.java:632)
        at java.lang.ClassLoader.defineClass(ClassLoader.java:616)
        at java.security.SecureClassLoader.defineClass(SecureClassLoader.java:141)
        at java.net.URLClassLoader.defineClass(URLClassLoader.java:283)
        at java.net.URLClassLoader.access$000(URLClassLoader.java:58)
        at java.net.URLClassLoader$1.run(URLClassLoader.java:197)
        at java.security.AccessController.doPrivileged(Native Method)
        at java.net.URLClassLoader.findClass(URLClassLoader.java:190)
        at org.mortbay.jetty.webapp.WebAppClassLoader.loadClass(WebAppClassLoader.java:392)
        at org.mortbay.jetty.webapp.WebAppClassLoader.loadClass(WebAppClassLoader.java:363)
        at java.lang.Class.forName0(Native Method)
        at java.lang.Class.forName(Class.java:247)
        at org.apache.myfaces.shared_impl.util.ClassUtils.classForName(ClassUtils.java:184)
        at org.apache.myfaces.view.facelets.util.ReflectionUtil.forName(ReflectionUtil.java:67)

Since everything seemed to work with Facelets in the classpath, I decided to save this headache for a later date. I entered two issues in AppFuse's JIRA, one for removing Facelets and one for replacing Ajax4JSF with RichFaces.

The next issue I encountered was redirecting from AppFuse's password hint page. The navigation-rule for this page is as follows:

<navigation-rule>
    <from-view-id>/passwordHint.xhtml</from-view-id>
    <navigation-case>
        <from-outcome>success</from-outcome>
        <to-view-id>/login</to-view-id>
        <redirect/>
    </navigation-case>
</navigation-rule>

With JSF 2.0, the rule changes the URL to /login.xhtml when redirecting (where it was left as /login with 1.2) and it was caught by the security setting in my web.xml that prevents users from viewing raw templates.

<security-constraint>
    <web-resource-collection>
        <web-resource-name>Protect XHTML Templates</web-resource-name>
        <url-pattern>*.xhtml</url-pattern>
    </web-resource-collection>
    <auth-constraint/>
</security-constraint>

To solve this issue, I had to make a couple of changes:

  • Comment out the security-constraint in web.xml and move it to Spring Security's security.xml file.
    <intercept-url pattern="/**/*.xhtml" access="ROLE_NOBODY"/>
    
  • Add a rule to urlrewrite.xml that redirects back to login (since login.xhtml doesn't exist and I'm using extensionless URLs).
    <rule match-type="regex">
        <from>^/login.xhtml$</from>
        <to type="redirect">%{context-path}/login</to>
    </rule>
    

After getting the Password Hint feature passing in the browser, I tried running the integration tests (powered by Canoo WebTest). The Password Hint test kept failing with the following error:

[ERROR] /Users/mraible/dev/appfuse/web/jsf/src/test/resources/web-tests.xml:51: JavaScript error loading
page http://localhost:9876/appfuse-jsf-2.1.0-SNAPSHOT/passwordHint?username=admin: syntax error (http://
localhost:9876/appfuse-jsf-2.1.0-SNAPSHOT/javax.faces.resource/oamSubmit.js.jsf?ln=org.apache.myfaces#122)

Figuring this was caused by my hack to submit the form when the page was loaded, I turned to Pretty Faces, which allows you to call a method directly from a URL. After adding the Pretty Faces dependencies to my pom.xml, I created a src/main/webapp/WEB-INF/pretty-config.xml file with the following XML:

<url-mapping>
    <pattern value="/editProfile"/>
    <view-id value="/userForm.jsf"/>
    <action>#{userForm.edit}</action>
</url-mapping>

<url-mapping>
    <pattern value="/passwordHint/#{username}"/>
    <view-id value="/passwordHint.jsf"/>
    <action>#{passwordHint.execute}</action>
</url-mapping>

This allowed me to remove both editProfile.xhtml and passwordHint.xhtml, both of which simply auto-submitted forms.

At this point, I figured I'd be good to go and ran my integration tests again. The first thing I discovered was that ".jsf" was being tacked onto my pretty URL, most likely by the UrlRewriteFilter. Adding the following to my PasswordHint.java class solved this.

if (username.endsWith(".jsf")) {
    username = username.substring(0, username.indexOf(".jsf"));
}

The next thing was a cryptic error that took me a while to figure out.

DEBUG [1152467051@qtp-144702232-0] PasswordHint.execute(38) | Processing Password Hint...
2011-03-05 05:48:52.471:WARN::/passwordHint/admin
com.ocpsoft.pretty.PrettyException: Exception occurred while processing <:#{passwordHint.execute}> null
        at com.ocpsoft.pretty.faces.beans.ActionExecutor.executeActions(ActionExecutor.java:71)
        at com.ocpsoft.pretty.faces.event.PrettyPhaseListener.processEvent(PrettyPhaseListener.java:214)
        at com.ocpsoft.pretty.faces.event.PrettyPhaseListener.afterPhase(PrettyPhaseListener.java:108)
        at org.apache.myfaces.lifecycle.PhaseListenerManager.informPhaseListenersAfter(PhaseListenerManager.java:111)
        at org.apache.myfaces.lifecycle.LifecycleImpl.executePhase(LifecycleImpl.java:185)
        at org.apache.myfaces.lifecycle.LifecycleImpl.execute(LifecycleImpl.java:118)
        at javax.faces.webapp.FacesServlet.service(FacesServlet.java:189)

Digging into the bowels of MyFaces, I discovered a class was looking for a viewId with an extension and no view-id was being set. Adding the following to the top of my execute() method solved this.

getFacesContext().getViewRoot().setViewId("/passwordHint.xhtml");

After making this change, all AppFuse's integration tests are passing and the upgrade seems complete. The only other issues I encountered were logging-related. The first is an error about Tomahawk that doesn't seem to affect anything.

Mar 5, 2011 6:44:01 AM com.sun.facelets.compiler.TagLibraryConfig loadImplicit
SEVERE: Error Loading Library: jar:file:/Users/mraible/.m2/repository/org/apache/myfaces/tomahawk/tomahawk20/1.1.10/tomahawk20-1.1.10.jar!/META-INF/tomahawk.taglib.xml
java.io.IOException: Error parsing [jar:file:/Users/mraible/.m2/repository/org/apache/myfaces/tomahawk/tomahawk20/1.1.10/tomahawk20-1.1.10.jar!/META-INF/tomahawk.taglib.xml]: 
        at com.sun.facelets.compiler.TagLibraryConfig.create(TagLibraryConfig.java:410)
        at com.sun.facelets.compiler.TagLibraryConfig.loadImplicit(TagLibraryConfig.java:431)
        at com.sun.facelets.compiler.Compiler.initialize(Compiler.java:87)
        at com.sun.facelets.compiler.Compiler.compile(Compiler.java:104)

The second is excessive logging from MyFaces. As far as I can tell, this is because MyFaces switched to java.util.logging instead of commons logging. With all the frameworks that AppFuse leverages, I think it has all the logging frameworks in its classpath now. I was hoping to fix this by posting a message to the mailing list, but haven't received a reply yet.

[WARNING] [talledLocalContainer] Mar 5, 2011 6:50:25 AM org.apache.myfaces.config.annotation.TomcatAnnotationLifecycleProvider newInstance
[WARNING] [talledLocalContainer] INFO: Creating instance of org.appfuse.webapp.action.BasePage
[WARNING] [talledLocalContainer] Mar 5, 2011 6:50:25 AM org.apache.myfaces.config.annotation.TomcatAnnotationLifecycleProvider destroyInstance
[WARNING] [talledLocalContainer] INFO: Destroy instance of org.appfuse.webapp.action.BasePage

After successfully upgrading AppFuse, I turned to AppFuse Light, where things were much easier.

Now that AppFuse uses JSF 2, I hope to start leveraging some of its new features. If you're yearning to get started with them today, I invite you to grab the source and start integrating them yourself.

Posted in Java at Mar 07 2011, 01:24:53 PM MST 3 Comments

Implementing Extensionless URLs with Tapestry, Spring MVC, Struts 2 and JSF

For the past couple of weeks, I've spent several evening hours implementing extensionless URLs in AppFuse. I've been wanting to do this ever since I wrote about how to do it a few years ago. This article details my experience and will hopefully help others implement this feature in their webapps.

First of all, I used the UrlRewriteFilter, one of my favorite Java open source projects. Then I followed a pattern I found in Spring's "mvc-basic" sample app from MVC Simplifications in Spring 3.0. The app has since changed (because SpringSource integrated UrlRewriteFilter-type functionality in Spring MVC), but the pattern was basically path-matching instead of extension-mapping. That is, the "dispatcher" for the web framework was mapped to /app/* instead of *.html.

Prior to the move to extensionless URLs, AppFuse used *.html for its mapping and this seemed to cause users problems when they wanted to serve up static HTML files. To begin with, I removed all extensions from URLs in tests (Canoo WebTest is used for testing the UI). I also did this for any links in the view pages and redirects in the Java code. This provided a decent foundation to verify my changes worked. Below are details about each framework I did this for, starting with the one that was easiest and moving to hardest.

Tapestry 5
Tapestry was by far the easiest to integrate extensionless URLs into. This is because it's a native feature of the framework and was already integrated as part of Serge Eby's Tapestry 5 implementation. In the end, the only things I had to do where 1) add a couple entries for CXF (mapped to /services/*) and DWR (/dwr/*) to my urlrewrite.xml and 2) change the UrlRewriteFilter so it was only mapped to REQUEST instead of both REQUEST and FORWARD. Below are the mappings I added for CXF and DWR.

<urlrewrite default-match-type="wildcard">
    ...
    <rule>
        <from>/dwr/**</from>
        <to>/dwr/$1</to>
    </rule>
    <rule>
        <from>/services/**</from>
        <to>/services/$1</to>
    </rule>
</urlrewrite>

Spring MVC
I had a fair amount of experience with Spring MVC and extensionless URLs. Both the Spring MVC applications we developed last year at Time Warner Cable used them. To change from a *.html mapping to /app/* was pretty easy and involved removing more code than I added. Previously, I had a StaticFilter that looked for HTML files and if it didn't find them, it dispatched to Spring's DispatcherServlet. I was able to remove this class and make the web.xml file quite a bit cleaner.

To make UrlRewriteFilter and Spring Security play well together, I had to move the securityFilter so it came after the rewriteFilter and add an INCLUDE dispatcher so included JSPs would have a security context available to them.

<filter-mapping>
    <filter-name>rewriteFilter</filter-name>
    <url-pattern>/*</url-pattern>
</filter-mapping>
<filter-mapping>
    <filter-name>securityFilter</filter-name>
    <url-pattern>/*</url-pattern>
    <dispatcher>REQUEST</dispatcher>
    <dispatcher>FORWARD</dispatcher>
    <dispatcher>INCLUDE</dispatcher>
</filter-mapping>

The only other things I had to change were security.xml and dispatcher-servlet.xml to remove the .html extensions. The urlrewrite.xml file was fairly straightforward. I used the following at the bottom as a catch-all for dispatching to Spring MVC.

<rule>
    <from>/**</from>
    <to>/app/$1</to>
</rule>
<outbound-rule>
    <from>/app/**</from>
    <to>/$1</to>
</outbound-rule>

Then I added a number of other rules for j_security_check, DWR, CXF and static assets (/images, /scripts, /styles, /favicon.ico). You can view the current urlrewrite.xml in FishEye. The only major issue I ran into was that Spring Security recorded protected URLs as /app/URL so I had to add a rule to redirect when this happened after logging in.

<rule>
    <from>/app/**</from>
    <to last="true" type="redirect">%{context-path}/$1</to>
</rule>

Struts 2
Using extensionless URLs with Struts 2 is likely pretty easy thanks to the Convention Plugin. Even though this plugin is included in AppFuse, it's not configured with the proper constants and I have struts.convention.action.disableScanning=true in struts.xml. It looks like I had to do this when I upgraded from Struts 2.0.x to Struts 2.1.6. It's true AppFuse's Struts 2 support could use a bit of love to be aligned with Struts 2's recommended practices, but I didn't want to spend the time doing it as part of this exercise.

With Struts 2, I tried the path-mapping like I did with Spring MVC, but ran into issues. Instead, I opted to use an ".action" extension by changing struts.action.extension from "html" to "action," in struts.xml. Then I had to do a bunch of filter re-ordering and dispatcher changes. Before, with a .html extension, I had all filters mapped to /* and in the following order.

Filter NameDispatchers
securityFilter request
rewriteFilter request, forward
struts-prepare request
sitemesh request, forward, include
staticFilter request, forward
struts request

Similar to Spring MVC, I had to remove the rewriteFilter in front of the securityFilter and I was able to remove the staticFilter. I also had to map the struts filter to *.action instead of /* to stop Struts from trying to catch static asset and DWR/CXF requests. Below is the order of filters and their dispatchers that seems to work best.

Filter NameDispatchers
rewriteFilter request
securityFilter request, forward, include
struts-prepare request, forward
sitemesh request, forward, include
struts forward

From there, it was a matter of modifying urlrewrite.xml to have the following catch-all and rules for static assets, j_security_check and DWR/CXF.

<rule match-type="regex">
    <from>^([^?]*)/([^?/\.]+)(\?.*)?$</from>
    <to last="true">$1/$2.action$3</to>
</rule>
<outbound-rule match-type="regex">
    <from>^(.*)\.action(\?.*)?$</from>
    <to last="false">$1$2</to>
</outbound-rule>

JSF
JSF was by far the most difficult to get extensionless URLs working with. I'm not convinced it's impossible, but I spent a several hours over a few days and was unsuccessful in completely removing them. I was able to make things work so I could request pages without an extension, but found when clicking buttons and links, the extension would often show up in the URL. I'm also still using JSF 1.2, so it's possible that upgrading to 2.0 would solve many of the issues I encountered.

For the time being, I've changed my FacesServlet mapping from *.html to *.jsf. As with Struts, I had issues when I tried to map it to /app/*. Other changes include changing the order of dispatchers and filters, the good ol' catch-all in urlrewrite.xml and modifying security.xml. For some reason, I wasn't able to get file upload working without adding an exception to the outbound-rule.

<rule match-type="regex">
    <from>^([^?]*)/([^?/\.]+)(\?.*)?$</from>
    <to last="true">$1/$2.jsf</to>
</rule>
<outbound-rule match-type="regex">
  <!-- TODO: Figure out how to make file upload work w/o using *.jsf -->
    <condition type="path-info">selectFile</condition>
    <from>^(.*)\.jsf(\?.*)?$</from>
    <to last="false">$1$2</to>
</outbound-rule>

I also spent a couple hours trying to get Pretty Faces to work. I wrote about my issues on the forums. I tried writing a custom Processor to strip the extension, but found that I'd get into an infinite loop where the processor kept getting called. To workaround this, I tried using Spring's RequestContextHolder to ensure the processor only got invoked once, but that proved fruitless. Finally, I tried inbound and outbound custom processors, but failed to get those working. The final thing I tried was url-mappings for each page in pretty-config.xml.

<url-mapping>
  <pattern value="/admin/users"/>
  <view-id value="/admin/users.jsf"/>
</url-mapping>
<url-mapping>
  <pattern value="/mainMenu"/>
  <view-id value="/mainMenu.jsf"/>
</url-mapping>

The issue with doing this was that some of the navigation rules in my faces-config.xml stopped working. I didn't spend much time trying to diagnose the problem because I didn't like having to add an entry for each page in the application. The one nice thing about Pretty Faces is it did allow me to do things like the following, which I formerly did with a form that auto-submitted when the page loaded.

<url-mapping>
  <pattern value="/passwordHint/#{username}"/>
  <view-id value="/passwordHint.jsf"/>
  <action>#{passwordHint.execute}</action>
</url-mapping>

Conclusion
My journey implementing extensionless URLs was an interesting one, and I solidified my knowledge about ordering of filters, dispatchers and the UrlRewriteFilter. I still think I have more to learn about properly implementing extensionless URLs in Struts 2 and JSF and I hope to do that in the near future. I believe Struts' Convention Plugin will help me and JSF 2 + Pretty Faces will hopefully work nicely too. Of course, it'd be great if all Java Web Frameworks had an easy mechanism for producing and consuming extensionless URLs. In the meantime, thank goodness for the UrlRewriteFilter.

If you'd like to try AppFuse and its shiny new URLs, see the QuickStart Guide and choose the 2.1.0-SNAPSHOT version.

Posted in Java at Feb 10 2011, 04:53:27 PM MST 10 Comments

RE: Moving from Spring to Java EE 6: The Age of Frameworks is Over

Last Tuesday, Cameron McKenzie wrote an interesting article on TheServerSide titled Moving from Spring to Java EE 6: The Age of Frameworks is Over. In this article, Cameron says the following:

J2EE represents the past, and Java EE 6 represents the future. Java EE 6 promises us the ability to go beyond frameworks. Frameworks like Spring are really just a bridge between the mistakes of the J2EE past and the success of the Java EE 6 future. Frameworks are out, and extensions to the Java EE 6 platform are in. Now is the time to start looking past Spring, and looking forward to Seam and Weld and CDI technologies.

He then links to an article titled Spring to Java EE - A Migration Experience, an article written by JBoss's Lincoln Baxter. In this article, Lincoln talks about many of the technologies in Java EE 6, namely JPA, EJB, JSF, CDI and JAX-RS. He highlights all the various XML files you'll need to know about and the wide variety of Java EE 6 application servers: JBoss AS 6 and GlassFish v3.

I don't have a problem with Lincoln's article, in fact I think it's very informative and some of the best documentation I've seen for Java EE 6.

I do have some issues with Cameron's statements that frameworks are mistakes of the J2EE past and that Java EE 6 represents the future. Open source frameworks made J2EE successful. Struts and Hibernate came out in the early days of J2EE and still exist today. Spring came out shortly after and has turned into the do-everything J2EE implementation it was trying to fix. Java EE 6 might be a better foundation to build upon, but it's certainly not going to replace frameworks.

To prove my point, let's start by looking at the persistence layer. We used to have Hibernate based on JDBC, now we have JPA implementations built on top of the JPA API. Is JPA a replacement for all persistence frameworks? I've worked with it and think it's a good API, but the 2.0 version isn't available in a Maven repo and Alfresco recently moved away from Hibernate (which == JPA IMO) to iBATIS for greater data access layer control and scalability. Looks like the age of frameworks isn't over for persistence frameworks.

The other areas that Java EE 6 covers that I believe frameworks will continue to excel in: EJB, CDI, JSF and JAX-RS. Personally, I don't have a problem with EJB 3 and think it's a vast improvement on EJB 2.x. I don't have an issue with CDI either, and as long as it resembles Guice for dependency injection, it works for me. However, when you get into the space I've been living in for the last couple years (high-traffic public internet sites), EJB and things like the "conversation-scope" feature of CDI don't buy you much. The way to make web application scale is to eliminate state and cache as much as possible, both of which Java EE doesn't provide much help for. In fact, to disable sessions in a servlet-container, you have to write a Filter like the following:

public class DisabledSessionFilter extends OncePerRequestFilter {

    /**
     * Filters requests to disable URL-based session identifiers.
     */
    @Override
    protected void doFilterInternal(final HttpServletRequest request,
                                    final HttpServletResponse response,
                                    final FilterChain chain)
            throws IOException, ServletException {

        HttpServletRequestWrapper wrappedRequest = new HttpServletRequestWrapper(request) {

            @Override
            public HttpSession getSession(final boolean create) {
                if (create) {
                    throw new UnsupportedOperationException("Session support disabled");
                }
                return null;
            }

            @Override
            public HttpSession getSession() {
                throw new UnsupportedOperationException("Session support disabled");
            }
        };

        // process next request in chain
        chain.doFilter(wrappedRequest, response);
    }
}

What about JAX-RS? Does it replace the need for frameworks? I like the idea of having a REST API in Java. However, its reference implementation is Jersey, which seems more like a framework than just Java EE. If you choose to use JAX-RS in your application, you still have to choose between CXF, Jersey, RESTEasy and Restlet. I compared these frameworks last year and found the Java EE implementation lacking in the features I needed.

Finally, let's talk about my-least-framework-web-framework: JSF. The main reason I don't like JSF is because of its 1.x version. JSF 1.0 was released a year before the Ajax term was coined (see timeline below). Not only did it take forever to develop as a spec, but it tried to be a client-component framework that was very stateful by default.

History of Web Frameworks

Now that JSF 2.0 is out, it has Ajax integrated and allows you to use GET instead of POST-for-everything. However, the only people that like Ajax integrated into their web frameworks are programmers scared of JavaScript (who probably shouldn't be developing your UI). Also, the best component development platform for the web is JavaScript. I recommend using an Ajax framework for your components if you really want a rich UI.

Sure you can use the likes of Tapestry and Wicket if you like POJO-based web development, but if you're looking to develop a webapp that's easy to maintain and understand, chances are that you'll do much better with traditional MVC frameworks like Spring MVC and Struts 2. The simplicity and popularity of Rails and Grails further emphasize that developers prefer these types of web frameworks.

Another reason I don't like JSF: there's very few developers in the wild happy with it. The major promoters of JSF are book authors, trainers, Java EE Vendors and MyFaces developers. Whenever I speak at conferences, I ask folks to raise their hands for the various web frameworks they're using. I always ask the JSF users to keep their hands up if they like it. Rarely do they stay up.

So it looks like we still need web frameworks.

Eberhard Wolff has an interesting post where he defends Spring and talks about the productivity comparisons between Spring and Java EE. He recommends using Grails or Spring Roo if you want the level of productivity that Ruby on Rails provides. That's a valid recommendation if you're building CRUD-based webapps, but I haven't developed those in quite some time. Nowadays, the apps I develop are true SOFEA apps, where the backend serves up XML or JSON and the frontend client is HTML/JavaScript/CSS, Android, iPad or Sony Blu-Ray players. On my current project, our services don't even talk to a database, they talk to a CMS via RESTful APIs. We use Spring's RestTemplate for this and HttpClient when it doesn't have the features we need. Not much in Java EE 6 for this type of communication. Sure, Jersey has a client, but it's certainly not part of the Java EE spec.

As far as getting Ruby on Rails' zero-turnaround productivity, I don't need Grails or Spring Roo, I simply use IDEA and JRebel.

Conclusion
I don't see how new features in Java EE 6 can mean the age of frameworks is over. Java SE and J2EE have always been foundations for frameworks. The Java EE 6 features are often frameworks in themselves that can be used outside of a Java EE container. Furthermore, Java EE 6 doesn't provide all the features you need to build a high-scale web app today. There's no caching, no stateless web framework that can serve up JSON and HTML and no hot-reload productivity enhancements like JRebel. Furthermore, there's real excitement in Javaland for languages like Scala, Groovy and JRuby. All of these languages have web frameworks that've made many developers happy.

Here's to the Age of Frameworks - may it live as long as the JVM!

P.S. If you'd like to hear me talk about web frameworks on the JVM, I'll be speaking at The Colorado Springs Open Source Meetup and Devoxx 2010 in the near future.

Posted in Java at Oct 16 2010, 03:19:07 PM MDT 37 Comments

Highly Interactive Software with Java and Flex

This morning at TSSJS, I attended James Ward's talk about Highly Interactive Software with Java and Flex. Below are my notes from his talk.

Application have moved from mainframes (hard to deploy, limited clients) to client/server (hard to deploy, full client capabilities) to web applications (easy to deploy, limited clients) to rich internet applications (easy to deploy, full client capabilities).

Shortly after showing a diagram of how applications have changed, James showed a demo of a sample Flex app for an automobile insurance company. It was very visually appealing, kinda like using an iPhone app. It was a multi-form application that slides right-to-left as you progress through the wizard. It also allowed you to interact with a picture of your car (to indicate where the damage happened) and a map (to indicate how the accident happened). Both of these interactive dialogs still performed data entry, they just did it in more of a visual way.

Adobe's developer technology for building RIAs is Flex. There's two different languages in Flex: ActionScript and MXML. ActionScript was originally based on JavaScript, but now (in ActionScript 3) uses features from Java and C#. On top of ActionScript is MXML. It's a declarative language, but unlike JSP taglibs. All you can do with MXML is instantiate objects and set properties. It's merely a convenience language, but also allows tooling. The open source SDK compiler takes Flex files and compiles it into a *.swf file. This file can then be executed using the Flash Player (in browser) or Air (desktop).

The reason Adobe developed two different runtimes was because they didn't want to bloat the Flash Player. Once the applications are running client-side, the application talks to the web server. Protocols that can be used for communication: SOAP, HTTP/S, AMF/S and RTMP/S. The web server can be composed of REST or SOAP Web Services, as well as BlazeDS or LC Data Services to talk directly to Java classes.

To see all the possible Flex components, see Tour de Flex. It contains a number of components: core components, data access controls, AIR capabilities, cloud APIs, data visualization. The IBM ILOG Elixir real-time dashboard is particularly interesting, as is Doug McCune's Physics Form.

Next James showed us some code. He used Flex Builder to create a new Flex project with BlazeDS. The backend for this application was a JSP page that talks to a database and displays the results in XML. In the main .mxml file, he used <s:HTTPService> with a URL pointing to the URI of the JSP. Then he added an <mx:DataGrid> and the data binding feature of Flex. To do this, he added dataProvider="{srv.lastResult.items.item}" to the DataGrid tag, where "srv" is the id of the HTTPService. Then he added a Button with click="srv.send()" and set the layout to VerticalLayout. This was a simple demo to show how to hook in a backend with XML.

To show that Flex can interact with more than XML over HTTP, James wrote a SOAP service and changed <s:HTTPService> to <s:WebService> and changed the "url" attribute to "wsdl" (and adjusted the value as appropriate). Then rather than using {srv.lastResult.*}, he had to bind to a particular method and change it to {srv.getElements.lastResults}. The Button's click value also had to change to "srv.getElements(0, 2000)" (since the method takes 2 parameters).

After doing coding in Flex Builder, James switched to his Census to compare server-execution times. In the first example (Flash XML AS), most of the time was spent gzipping the 1MB XML file, but the transfer time is reduced because of this. The server execution time is around 800ms. Compare this to the Flex AMF3 example where the server execution time is 49ms. This is because the AMF (binary) protocol streamlines the data and doesn't include repeated metadata.

To integrate BlazeDS in your project, you add the dependencies and then map the MessageBrokerServlet in your web.xml. Then you use a services-config.xml to define the protocol and remoting-config.xml to define what Java classes to export as services. To use this in the Flex aplication, James changed <s:WebService> to <s:RemoteObject>. He changed the "wsdl" attribute to "endpoint" and added a "destination" attribute to specify the name of the aliased Java class to talk to. Next, James ran the demo and showed that he could change the number of rows from 2,000 to 20,000 and the load time was still much, much faster than the XML and SOAP versions.

There's also a Spring BlazeDS Integration project that allows you to simply annotate beans to expose them as AMF services.

BlazeDS also includes a messaging service that you can use to create publishers and subscribers. The default channels in BlazeDS uses HTTP Streaming and HTTP Long Polling (comet), but it can be configurable (e.g. to use JMS). There's also an Adobe commercial product that keeps a connection open using NIO on the server and has a binary protocol. This is useful for folks that need more real-time data in their applications (e.g. trading floors).

I thought this was a really good talk by James. It had some really cool visual demos and the demo was interesting in showing how easy it was to switch between different web services and protocols. This afternoon, I'll be duking it out with James at the Flex vs. GWT Smackdown. If you have deficiencies of Flex you'd like me to share during that talk, please let me know.

Posted in Java at Mar 18 2010, 12:29:26 PM MDT 4 Comments