

Developing with AngularJS - Part II: Dialogs and Data
A couple of days ago, I wrote an article on how I started developing with AngularJS. I used AngularJS for several months to develop a "My Dashboard" feature for a client's product and learned a whole bunch of stuff along the way.
This article provides an overview of how I changed some of My Dashboard's features to use Angular instead of jQuery. After finishing the prototype work in January, we started moving bits and pieces into the main application. We kept the same file names for our Angular-related files and copied them into the project.
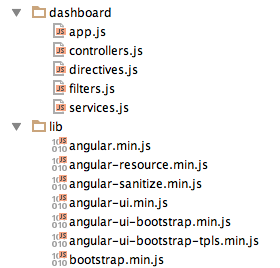
All these files are packaged up into a dashboard.js file that's included at the bottom of our Dashboard page. While our prototype used jQuery 1.9 and jQuery UI 1.10, the application's codebase used jQuery 1.7.1 and jQuery UI 1.8.3. Luckily, this didn't present a problem as everything continued to work as expected.
Around this time, we also had many discussions with the Product Team about charts. Since Highcharts required we purchase a license, we took at look at AnyChart, which we were already using. We were able to get AnyChart to work with our existing chart directive with minimal changes. Most changes were in the JSON itself.
We committed the first pass (with sample data still hard-coded) in mid-February.
Angular UI's Carousel
While finishing our initial prototype, I learned about Angular UI's Carousel, an implementation of Bootstrap's Carousel. It required a 70% less HTML and is quite a bit easier to read. Below is the refactored carousel section.
<carousel interval="-1" class="oneup">
    <slide ng-repeat="widget in widgets | filter: {type: 'chart'} | orderBy: 'order'" active="slide.active" class="chart">
        <chart class="widget" value="{{widget}}" type="{{widget.chartType}}"></chart>
    </slide>
</carousel>
<carousel interval="-1" class="twoup">
    <slide ng-repeat="widget in widgets | filter: {type: 'chart'} | chunk: 2 | orderBy: 'order'" active="slide.active" class="chart">
        <chart class="widget" value="{{widget[0]}}" type="{{widget[0].chartType}}"></chart>
        <chart class="widget" value="{{widget[1]}}" type="{{widget[1].chartType}}"></chart>
    </slide>
</carousel>
I was also able to remove the JavaScript that once initialized the carousel.
-    var carousel = $('.carousel');
-    $(carousel).carousel({
-        interval: 0
-    });
While integrating this directive, I found a way to improve it by hiding navigation indicators if there's only one slide. And thus my first contribution to Angular UI was born.
Angular UI's Sortable
Next, I switched from using JavaScript to Angular UI's sortable to initialize drag-and-drop functionality. This was as simple as removing 5 lines of JavaScript and adding "ui-sortable" as an attribute to HTML tags.
<div class="container-widgets" ng-controller="WidgetController" ng-cloak>
     <div class="row-fluid">
         <div class="span9">
-                <ul class="widgets">
+                <ul class="widgets" ui-sortable="{handle:'.heading'}">
                 <li id="summary-bar">
                     <div class="heading">Summary <a href='#' class='configure'></a></div>
-                        <ul class="tiles">
+                        <ul class="tiles" ui-sortable>
                         <li class="span3" ng-repeat="widget in widgets | filter:{type: 'summary'} | orderBy: 'order'">
                             <h3>{{widget.value}}</h3>
@@ -36,7 +36,7 @@
                 </li>
                 <li id="task-bar">
                     <div class="heading">My Tasks <a href='#' class='configure'></a></div>
-                        <ul class="tasks">
+                        <ul class="tasks" ui-sortable>
@@ -151,55 +131,44 @@
-    $('.widgets').sortable({
-        cursor: "move",
-        handle: ".heading"
-    }).disableSelection();
-    $('.tiles,.tasks').sortable();
This directive uses jQuery UI under the covers, so it accepts all the same arguments you'd normally use.
Dialogs with jQuery
The next feature I implemented was a dialog that allowed end users to add/remove widgets from their dashboard. Since I knew how to do this with jQuery, that's the path I started down. I figured it'd be easier to get something working quickly and then refactor to Angular later. I put the HTML for the dialog at the bottom of the page:
<script type="text/javascript" src="js/move.js"></script>
<script type="text/javascript" src="js/upDown.js"></script>
<div id="configure-widgets" class="hidden" data-title="Bar Configuration" data-close="Close">
    <div class="row-fluid center">
        Decide which items you would like to display and set the display order.
        <div class="span5" style="margin-left: 25px">
            <label for="available-widgets" class="bold">Available Widgets</label>
            <select size=10 id="available-widgets" multiple class="width100pr"></select>
        </div>
        <div class="span1 arrows" style="padding-top: 50px">
            <img src="images/arrow_up.png" class="arrow arrow-up" alt="Move Up" onclick="return moveUp($('#assigned-widgets')[0]);"/>
            <img src="images/arrow_right.png" class="arrow arrow-right" alt="Move Right" onclick="return move($('#available-widgets')[0], $('#assigned-widgets')[0]);"/>
            <img src="images/arrow_left.png" class="arrow arrow-left" alt="Move Left" onclick="return move($('#assigned-widgets')[0], $('#available-widgets')[0]);"/>
            <img src="images/arrow_down.png" class="arrow arrow-down" alt="Move Down" onclick="return moveDown($('#assigned-widgets')[0]);"/>
        </div>
        <div class="span5">
            <label for="assigned-widgets" class="bold">Assigned Widgets</label>
            <select size=10 id="assigned-widgets" multiple class="width100pr"></select>
        </div>
    </div>
</div>
Then I changed the WidgetController to split the widgets variable into variables for each widget type.
+    var filter = $filter('filter');
+    var orderBy = $filter('orderBy');
+
+    $scope.summaryWidgets = filterData($scope.widgets, {type: 'summary'}, filter, orderBy);
+    $scope.taskWidgets = filterData($scope.widgets, {type: 'task'}, filter, orderBy);
+    $scope.chartWidgets = filterData($scope.widgets, {type: 'chart'}, filter, orderBy);
+}
+
+function filterData(array, query, filter, orderBy) {
+    var data = filter(array, query);
+    return orderBy(data, 'order');
+}
Finally, I added a new config directive and hooked it into the page by adding config="type" to each heading (e.g. <div class="heading" config="task">My Tasks</div>).
.directive('config', function ($sanitize, $filter) {
return {
restrict: 'A',
link: function (scope, element, attrs) {
var configBtn = $('<a href="#"/>').addClass('configure');
configBtn.appendTo(element);
var widgets = scope[attrs.config + 'Widgets'];
// availableWidgets is defined as a global variable embedded in the page
var allWidgets = availableWidgets;
$(configBtn).on('click', function (e) {
e.preventDefault();
var configDialog = $('#configure-widgets');
var availableWidgets = $('#available-widgets');
availableWidgets.empty();
var filter = $filter('filter');
var orderBy = $filter('orderBy');
allWidgets = filter(allWidgets, {type: attrs.config});
allWidgets = orderBy(allWidgets, 'order');
var unselectedWidgets = jQuery.grep(allWidgets, function(item) {
return jQuery.inArray(item, widgets) < 0;
});
$.each(unselectedWidgets, function(index, item) {
var title = (item.title) ? item.title.replace(/"/g, '"') : 'No Title';
availableWidgets.append(new Option(title, item.id));
});
var assignedWidgets = $('#assigned-widgets');
assignedWidgets.empty();
$.each(widgets, function(index, item) {
var title = (item.title) ? item.title.replace(/"/g, '"') : 'No Title';
assignedWidgets.append(new Option(title, item.id));
});
configDialog.dialog({
title: $(element).text() + ' ' + configDialog.attr('data-title'),
width: 600,
modal: true,
buttons: [{
text: configDialog.attr('data-close'),
'class': 'btn',
click: function() {
$(this).dialog("close");
}
}]
});
});
}
}
})
As you can tell, this is quite a bit of code, and it doesn't even show you the JavaScript in move.js and upDown.js (included at the top of the dialog HTML). While writing this code, I could tell that I was not doing things the Angular Way.
To refactor, I did some research, found the $dialogProvider service and went to work.
Dialogs with Angular
I started by refactoring the config directive to be much shorter.
.directive('config', function() {
    return {
        restrict: 'A',
        link: function (scope, element, attrs) {
            var configBtn = $('<a href=""/>').addClass('configure');
            configBtn.appendTo(element);
            configBtn.bind('click', function(e) {
                e.preventDefault();
                e.stopPropagation();
                scope.$apply(scope.configureDialog(attrs.config, $(element).text()))
            });
        }
    }
})
Line #10 that starts with scope.$apply is what makes the magic happens.This calls the configureDialog() function in WidgetController. The $dialog service you see below is injected by adding it as a parameter to the WidgetController function.
$scope.configureDialog = function (type, title) {
    var dialog = $dialog.dialog({
        dialogClass: 'modal draggable',
        modalFade: false,
        backdropClick: true,
        controller: 'ConfigController',
        template: $('#configure-widgets').html(),
        resolve: {
            title: function() {
                return title;
            },
            hiddenItems: function () {
                return Widget.getHiddenWidgets(type);
            },
            items: function () {
                return angular.copy($scope[type + 'Widgets']);
            }
        }
    });
    dialog.open().then(function(results) {
        if (!angular.isUndefined(results)) {
            $scope[type + 'Widgets'] = results.items;
            Preferences.saveWidgetPreferences(type, results);
        }
    });
};
draggable directive
If you look closely, you'll see this dialog is initialized with a 'draggable' class. I created a draggable directive that gives draggability using jQuery UI to any elements with this class.
.directive('draggable', function() {
    return {
        restrict: 'C',
        link: function(scope, elem, attr, ctrl) {
            elem.draggable({handle: '.modal-header'});
        }
    };
});
The interesting parts of this file are the controller, template, and resolve parameters. The controller is just another function in controllers.js, the template is HTML in the page (so text could be i18n-ized) and resolve has the variables to pass to the controller. Widget and Preferences are services I'll talk about in the Part 3. The reason angular.copy() is used is so the widget arrays aren't modified while the dialog is displayed (we want to wait until the user clicks "Save").
The ConfigController function started quite simply:
function ConfigController($scope, $sanitize, dialog, title, hiddenItems, items) {
    $scope.title = title;
    $scope.hiddenItems = hiddenItems;
    $scope.items = items;
}
The HTML (defined by the aforementioned template parameter) is as follows. You can see that title, hiddenItems and items are the variables defined in $scope and used to render the data.
<div id="configure-widgets" class="modal hidden">
<div class="modal-header" style="border: 0">
<button type="button" class="close" ng-click="close(false)" aria-hidden="true" style="margin-top: -3px">×</button>
<h4>{{title}} Bar Configuration</h4>
</div>
<div class="modal-body">
Decide which items you would like to display and set the display order.
<div class="row-fluid center">
<div class="span4" style="width: 320px; margin-left: 25px">
<label for="available-widgets" class="bold">Available Widgets</label>
<select size=10 id="available-widgets" ng-model="items.available" ng-options="i.title for i in hiddenItems"
class="width100pr" multiple="multiple"></select>
</div>
<div class="span1 arrows" style="padding-top: 50px">
<img src="images/arrow_up.png" class="arrow arrow-up" alt="Move Up" ng-click="moveUp(items.selected, items)"/>
<img src="images/arrow_right.png" class="arrow arrow-right" alt="Move Right" ng-click="moveItem(items.available, hiddenItems, items)"/>
<img src="images/arrow_left.png" class="arrow arrow-left" alt="Move Left" ng-click="moveItem(items.selected, items, hiddenItems)"/>
<img src="images/arrow_down.png" class="arrow arrow-down" alt="Move Down" ng-click="moveDown(items.selected, items)"/>
</div>
<div class="span4" style="width: 320px">
<label for="assigned-widgets" class="bold">Assigned Widgets</label>
<select size=10 id="assigned-widgets" ng-model="items.selected" ng-options="i.title for i in items"
class="width100pr" multiple="multiple"></select>
</div>
</div>
</div>
<div class="modal-footer">
<button ng-click="close(true)" class="btn btn-primary">Save and Close</button>
</div>
</div>
There's a couple of new directives introduced by this code: ngOptions and ngClick. The former is used to display options in a <select>, the latter to call functions in the controller. These functions are defined in ConfigController:
$scope.moveUp = function(items, list) {
    angular.forEach(items, function(item) {
        var idx = list.indexOf(item);
        if (idx != -1) {
            list.splice(idx - 1, 0, list.splice(idx, 1)[0]);
        }
    });
};

$scope.moveDown = function(items, list) {
    angular.forEach(items, function(item) {
        var idx = list.indexOf(item);
        if (idx != -1) {
            list.splice(idx + 1, 0, list.splice(idx, 1)[0]);
        }
    });
};

$scope.moveItem = function(items, from, to) {
    angular.forEach(items, function(item) {
        var idx = from.indexOf(item);
        if (idx != -1) {
            from.splice(idx, 1);
            to.push(item);
        }
    });
};

$scope.close = function(save) {
    if (save) {
        dialog.close({
            hidden: $scope.hiddenItems,
            items: $scope.items
        });
    } else {
        dialog.close();
    }
};
As you can see, Angular allows you to easily access and manipulate the data. Its two-way binding feature is great because when you modify the object in JavaScript, it auto-updates the displayed HTML.The only thing you need to do to the HTML is to add the ngModel directive.
<ul class="tasks" ng-model="taskWidgets" ui-sortable>
The dialog's close() method is called in the header (where it passes false) and in the footer (where it passes true). The configureDialog() function handles saving if the user indicates they wanted to do so. The 3rd line (starts with $scope) is all that's needed to update the UI. The Preferences service is covered in the next article.
dialog.open().then(function(results) {
    if (!angular.isUndefined(results)) {
        $scope[type + 'Widgets'] = results.items;
        Preferences.saveWidgetPreferences(type, results);
    }
});
Modals with Data
Displaying the widgets in a consolidated dashboard is a nice product feature, but we wanted to take it a step further and allow users to "click through" to see the data. To do this, I added an "event" directive that could read from our JSON data and act upon it accordingly. We decided on 2 types of events: function and href. The href event type is for report widgets, because we want to allow users to click on the widget and it takes them directly to the report. For function, we simply eval() what's passed in. The function is expected to have a container argument that it can use to render data in a modal window.
Using the event directive, you can attach this behavior to a widget simply by adding a class.
<h3 class="events">{{widget.value}}</h3>
The event directive that attaches click behavior is below:
directive('events', function () {
    // This is necessary because widgets may be chunked when charts are displayed 2-up
    function getWidget(element, widget, scope) {
        if (element.hasClass('chart-title')) {
            if (element.parent().hasClass('first')) {
                widget = scope.widget[0];
            } else if (element.parent().hasClass('second')) {
                widget = scope.widget[1];
            } else {
                widget = scope.widget;
            }
        } else {
            widget = scope.widget;
        }
        return widget;
    }
    return {
        restrict: 'C',
        link: function (scope, element, attrs) {
            var widget = getWidget(element, widget, scope);
            if (angular.isUndefined(widget)) {
                return;
            }
            var events = widget.events;
            if (!angular.isUndefined(events)) {
                for (var e in events) {
                    if (e === 'function') {
                        if ($('#dialog-frame').length === 0) {
                            $('<div id="dialog-frame" class="modal hide"/>').appendTo('body');
                            var header = $('<div class="modal-header">');
                            header.append($('<button type="button" class="close" data-dismiss="modal">×</button>'));
                            header.append($('<h4/>').append(scope.widget.title));
                            header.appendTo('#dialog-frame');
                            $('<div class="modal-body"/>').appendTo('#dialog-frame');
                        }
                        element.bind('click', function(event) {
                            event.preventDefault();
                            event.stopPropagation();
                            var dialog = $('#dialog-frame');
                            var title = widget.title;
                            dialog.find('h4').html(title);
                            var dialogBody = dialog.find('.modal-body');
                            dialogBody.empty();

                            // display a checking for new data message when widget's value is 0
                            var checkingMessage = $('#wait-checking').html();
                            if (scope.widget.value === "0") {
                                dialogBody.html(checkingMessage);
                            // otherwise, display a loading message
                            } else {
                                dialogBody.html($('#wait-loading').html());
                            }

                            // center the dialog on the page
                            dialog.css({
                                width: '560px',
                                'margin-left': function() {
                                    return -($(this).width() / 2);
                                }
                            });

                            dialog.modal('show');
                            var container = dialogBody;
                            eval(events[e]);
                        });
                    } else if (e === "href") {
                        element.bind('click', function() {
                            location.href = events[e];
                        })
                    } else {
                        console.log('Event type "' + e + '" not supported.');
                    }
                }
            }
        }
    }
})
Empty Widgets Message
When there are no widgets for a particular type, we wanted to display a message telling the end user. To do this, I used the ngHide directive and passed in the array's length as an expression. I originally had this on a <li> in the respective widget list, but noticed it causes issues when dragging and dropping.
<div ng-hide="summaryWidgets.length" class="widgets-empty">
    No Summary Bar Widgets currently visible
</div>
Summary
This article has provided an overview of how I changed some of My Dashboard's features to use Angular instead of jQuery. I hope it's helped to show how powerful directives can be and how MVC works in Angular. I particularly enjoyed learning how to use the $dialog service. As a word of warning, its usage might change in future releases since it is currently being rewritten to be more maintainable.
In the next article, I'll talk about how I developed Services and integrated DWR. If you see any code that can be improved upon, or issues with the code/architecture in this article, please leave a comment.
Posted by Sakuraba on June 21, 2013 at 09:14 AM MDT #
Posted by Pjotr on June 21, 2013 at 10:07 AM MDT #
Although angular-seed provides a sensible default folder structure for a simple angular project it does not suite well for bigger projects with a bunch of business functionality. For example mixing of all the controllers in a single file can quickly become insupportable.
For large scale projects it is better to split the controllers, services, templates on a functional level.
An example of such project structure can be seen in ng-boilerplate project on github
Posted by Leonid on June 21, 2013 at 12:54 PM MDT #
Posted by Raible Designs on June 25, 2013 at 01:05 PM MDT #