Matt RaibleMatt Raible is a writer with a passion for software. Connect with him on LinkedIn.

The Angular Mini-Book The Angular Mini-Book is a guide to getting started with Angular. You'll learn how to develop a bare-bones application, test it, and deploy it. Then you'll move on to adding Bootstrap, Angular Material, continuous integration, and authentication.

Spring Boot is a popular framework for building REST APIs. You'll learn how to integrate Angular with Spring Boot and use security best practices like HTTPS and a content security policy.

For book updates, follow @angular_book on Twitter.

The JHipster Mini-Book The JHipster Mini-Book is a guide to getting started with hip technologies today: Angular, Bootstrap, and Spring Boot. All of these frameworks are wrapped up in an easy-to-use project called JHipster.

This book shows you how to build an app with JHipster, and guides you through the plethora of tools, techniques and options you can use. Furthermore, it explains the UI and API building blocks so you understand the underpinnings of your great application.

For book updates, follow @jhipster-book on Twitter.

10+ YEARS


Over 10 years ago, I wrote my first blog post. Since then, I've authored books, had kids, traveled the world, found Trish and blogged about it all.
You searched this site for "css". 327 entries found.

You can also try this same search on Google.

PhoneGap for Hybrid App Development

This afternoon, I attended Brian LeRoux's talk on PhoneGap for Hybrid App Development at Devoxx. You might remember that I tried PhoneGap last week and really enjoyed my experience. Below are my notes from Brian's talk.

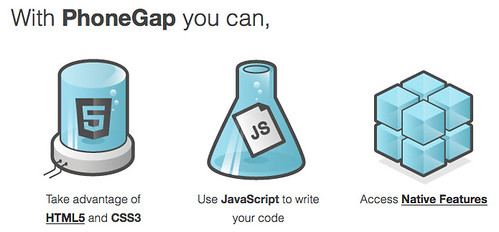
PhoneGap is a project for creating native applications using HTML, CSS and JavaScript. PhoneGap started out as a hack. In 2007, Apple shipped the iPhone and Steve Jobs told everyone they should develop webapps. PhoneGap started in 2008 as a lofty summertime hack and gained traction as a concept at Nitobi with Android and Blackberry implementations in the fall. In 2009, people started to pay attention when PhoneGap got rejected by Apple. They added Symbian and webOS support and Sony Ericsson started contributing to the project. They got rejected because all PhoneGap-developed apps were named "PhoneGap". This turned out to be good press for the project and Apple let them in shortly after.

In 2010, IBM began tag-teaming with Nitobi and added 5 developers to the project after meeting them at OSCON. In 2011, RIM started contributing as well as Microsoft. Then Adobe bought the company, so they're obviously contributing.

PhoneGaps Goals: the web is a first class platform, so let people create installable web apps. Their second goal is to cease to exist and get browsers to adopt their model.

PhoneGap is NOT a runtime or a compiler/transpiler. It's not an IDE or predefined framework or proprietary lockin. It's Apache, MIT and BSD licensed to guarantee it's as free as free software gets. You can do whatever you want to do with it. PhoneGap has recently been contributed to the Apache Software Foundation.

As far as Adobe vs. PhoneGap is concerned, the Nitobi team remains contributors to PhoneGap. Adobe is a software tools company and has Apache and WebKit contributors. PhoneGap/Build integration will be added to Creative Cloud.

The biggest issues with contributing PhoneGap to Apache is renaming the project and source control. I'm not sure why it needs to be renamed, but it's likely that Apache Callback is out. There seems to be some consensus on Apache Cordova. Apache likes SVN and the PhoneGap community currently uses Git. They're trying to find a medium road there, but would prefer to stay on Git.

The PhoneGap technique is colloquially called "the bridge". It's a 3 step process: they instantiate a WebView, then they call JavaScript from native code, then they call native code from JavaScript. Apparently, all device APIs are available via JavaScript in a WebView.

The primary platforms supported are iOS >= 3, Android >= 1.5 and BlackBerry >= 5.x. They also support webOS, Symbian, Samsung Bada and Windows Phone. No mobile dev platform supports as many deploy targets as PhoneGap. Primary contributors are Adobe, IBM, RIM and Microsoft.

Documentation for PhoneGap is available at http://docs.phonegap.com. Device APIs for PhoneGap 1.0 included sensors, data and outputs, which all devices have. Examples of sensors are geolocation and camera. Data examples are the filesystem, contacts and media. Outputs are screens, speakers and the speaker jack. All PhoneGap APIs are plugins, but any native API is permitted.

What about security? Brian recommends looking at the HTML5 Security Cheatsheet. PhoneGap has added a lot of security measures since they've found the native API pretty much opens up everything.

PhoneGap doesn't bundle a UI framework, but they support any JavaScript framework that works in the browser. PhoneGap is just a fancy browser, so your code run in less fancy web browsers too. This means you can develop and test your app in your desktop browser and only use PhoneGap to package and distribute your app.

Competition? PhoneGap has no competition.

PhoneGap/Build is for compiling your apps in the cloud and free for open source projects. The biggest reason they did this is because they couldn't redistribute all the SDKs and it was a pain for developers to download and install SDKs in training classes.

For mobile app development, you should have a singular goal. Do one thing really well if you want to be successful. Great UX happens iteratively. You know that the web works and has been widely successfully cross-platform. It's likely you've already invested in the web. Start by building a mobile web client and use PhoneGap as a progressive enhancement technique.

Shipping and unit testing should be a daily activity. Automate everything so you can have one-click builds (test/dev/release). For web client design, constraints are your ally in the battle against complexity and "clients who are not chill". Phones suck and consume a lot: cpu, ram, bandwidth, battery, network... everything! Start with a benchmark of app performance and monitor that benchmark. If you have tons and tons of features, consider splitting into multiple apps.

The mobile web is not WebKit! Opera is huge, Firefox is making strides and IE still happens. For layouts: use flex-box rules (anyone got a link to these?), css media queries and meta tags for viewport. You should try to develop your app without frameworks because they come with a ton of code and can effect the size of your app.

Looks can kill: aesthetics that can hurt performance: border-radius, box-shadow and gradients can slow down your apps. Chances are, you really don't need these features. Design your app for your brand, not for the device manufacturer. An app that looks like an iPhone app on Android doesn't give a positive impression.

For JavaScript libraries, start with your problem, not a generic solution like Sencha or jQuery Mobile. Zepto and its older brother XUI are all you need to start. Jo is a fantastic option. Backbone and Spine are worth watching.

For testing, QUnit and Jasmine are pretty popular. For deployment, concat, minify and obfuscate your JavaScript and CSS. Or you can inline everything into the markup to minimize HTTP chatter. Gmail inlines and comments all their JavaScript and then evals it.

From there, Brian recommended leveraging HTML5's AppCache and and using RESTful JSON endpoints for legacy systems. Next, he tried to show us a demo of a photo sharing application. Unfortunately, the Demo Gods were grumpy and Brian couldn't get his computer to recognize his Android phone. He did show us the client code and it's pretty impressive you can use 1 line of code to take a picture on a phone.

The last thing we looked at was debug.phonegap.com. This is an app that's powered by weinre. It lets you enter a line of JavaScript in your client and then remotely debug it in a tool that looks like Chrome's Web Inspector. Very cool stuff if you ask me.

Summary
I really enjoyed learning more about PhoneGap, particularly because Brain emphasized all my web development skills can be used. I don't have to learn Objective-C or Android to develop native apps and I don't even have to install an SDK if I use PhoneGap/Build. Of course, my mobile developer friends might disagree with this approach. In the meantime, I look forward to using PhoneGap to turn my mobile web clients into native apps and finding out if it's really as good as they say it is.

Posted in The Web at Nov 16 2011, 10:22:16 AM MST 2 Comments

Play 2.0, A web framework for a new era

This week, I'm in Antwerp, Belgium for the annual Devoxx conference. After traveling 21 hours door-to-door yesterday, I woke up and came to the conference to attend some talks on Play and PhoneGap. I just got out of the session on Play 2.0, which was presented by Sadek Drobi and Guillaume Bort. Below are my notes from this presentation.

The Play 2.0 beta is out! You can read more about this release on the mailing list. This beta includes native support for both Scala and Java, meaning you can use both in the same project. The release also bundles Akka and SBT by default.

In other news, Play 2.0 is now part of the Typesafe Stack. Typesafe is the Scala company, started by the founder of Scala (Martin Odersky) and the founder of Akka (Jonas Bonér). Guillaume is also joining the Typesafe Advisory Board.

Sadek and Guillaume both work at zenexity, where Play is the secret weapon for the web applications they've built for the last decade. Play was born in the real world. They kept listening to the market to see what they should add to the project. At some point, they realized they couldn't keep adding to the old model and they needed to create something new.

The web has evolved from static pages to dynamic pages (ASP, PHP). From there, we moved to structured web applications with frameworks and MVC. Then the web moved to Ajax and long-polling to more real-time, live features. And this changes everything.

Now we need to adapt our tools. We need to handle tremendous flows of data. Need to improve expressiveness for concurrent code. We need to pick the appropriate datastore for the problem (not only SQL). We need to integrate with rapidly-evolving client side technologies like JavaScript, CoffeeScript, and Dart. We need to use elastic deployment that allows scaling up and scaling down.

zenexity wanted to integrated all of these modern web needs into Play 2.0. But they also wanted to keep Play approachable. They wanted to maintain fast turnaround so you can change your code and hit reload to see the changes. They wanted to keep it as a full stack framework with support for JSON, XML, Web Services, Jobs, etc. And they wanted to continue to use and conventions over configuration.

At this point, Guillaume did a Play 2.0 Beta demo, show us how it uses SBT and has a console so everything so it runs really fast. You can have both Scala and Java files in the same project. Play 2.0 templates are based on Scala, but you don't need to know Scala to use them. You might have to learn how to write a for loop in Scala, but it's just a subset of Scala for templates and views. SBT is used for the build system, but you don't have to learn or know SBT. All the old play commands still work, they're just powered by a different system.

After the demo, Sadek took over and started discussing the key features of Play 2.0.

To handle tremendous amounts of data, you need to do chunking of data and be able to process a stream of data, not just wait until it's finished. Java's InputStream is outdated and too low level. Its read() method reads the next byte of data from the input and this method can block until input data is available.

To solve this, Play includes a reactive programming feature, which they borrowed from Haskell. It uses Iteratee/Enumerator IO and leverages inversion of control (not like dependency injection, but more like not micro-managing). The feature allows you to have control when you need it so you don't have to wait for the input stream to complete. The Enumerator is the component that sends data and the Iteratee is the component that receives data. The Iteratee does incremental processing and can tell the Enumerator when it's done. The Iteratee can also send back a continuation, where it tells the Enumerator it wants more data and how to give it. With this paradigm, you can do a lot of cool stuff without consuming resources and blocking data flow.

Akka is an actor system that is a great model for doing concurrent code. An Actor could be both an Enumerator and an Iteratee. This vastly improves the expressiveness for concurrent code. For example, here's how you'd use Akka in Play:

def search(keyword: String) = Action {
  AsyncResult {
    // do something with result
  }
}

Play does not try to abstract data access because datastores are different now. You don't want to think of everything as objects if you're using something like MongoDB or navigating a Social Graph. Play 2.0 will provide some default modules for the different datastores, but they also expect a lot of contributed modules. Anorm will be the default SQL implementation for Play Scala and Ebean will be the default ORM implementation for Play Java. The reason they've moved away from Hibernate is because they needed something that was more stateless.

On the client side, there's so many technologies (LESS, CoffeeScript, DART, Backbone.js, jQuery, SASS), they didn't want to bundle any because they move too fast. Instead, there's plugins you can add that help you leverage these technologies. There's a lot of richness you can take advantage of on the client side and you need to have the tools for that.

Lastly, there's a new type of deployment: container-less deployment to the cloud. Akka allows you to distribute your jobs across many servers and Heroku is an implementation of elastic deployment that has built-in support for Play.

They've explained what they tried to design and the results of this new, clean architecture have been suprising. Side effects include: type-safety everywhere for rock-solid applications. There's an awesome performance boost from Scala. There's easier integration with existing projects via SBT. And it only takes 10 lines of code to develop an HTTP Server that responds to web requests.

The memory consumption is amazing: only 2MB of heap is used when a Play 2.0 app is started. Tests on Guillaume's laptop have shown that it can handle up to 40,000 requests per second, without any optimization of the JVM. Not only that, but after the requests subside, garbage collection cleans up everything and reduces the memory consumption back to 2MB.

At this point, Guillaume did another demo, showing how everything is type-safe in 2.0, including the routes file. If you mistype (or comment one out) any routes, the compiler will find it and notify you. Play 2.0 also contains a compiled assets feature. This allows you to use Google's Closure Compiler, CoffeeScript and LESS. If you put your LESS files in app/assets/stylesheets, compilation errors will show up in your browser. If you put JavaScript files in app/assets/javascripts, the Closure compiler will be used and compilation errors will show up in your browser.

Play 2.0 ships with 3 different sample applications, all implemented in both Java and Scala. HelloWorld is more than just text in a browser, it includes a form that shows how validation works. Another app is computer-database. When Guillaume started it, we saw how evolutions were used to create the database schema from the browser. The Play Team has done their best to make the development process a browser-based experience rather than having to look in your console. The computer-database is a nice example of how to do CRUD and leverages Twitter's Bootstrap for its look and feel.

The last sample application is zentasks. It uses Ajax and implements security so you can see how to create a login form. It uses LESS for CSS and CoffeeScript and contains features like in-place editing. If you'd like to see any of these applications in action, you can stop by the Typesafe booth this week at Devoxx.

Unfortunately, there will be no migrating path for Play 1.x applications. The API seems very similar, but there are subtle changes that make this difficult. The biggest thing is how templating has changed from Groovy to Scala. To migrate from 1.2.x would be mostly a copy/paste, modify process. There are folks working on getting Groovy templates working in 2.0. The good news is zenexity has hundreds of 1.x applications in production, so 1.x will likely be maintained for many years.

Summary
This was a great talk on what's new in Play 2.0. I especially like the native support for LESS and CoffeeScript and the emphasis on trying to keep developers using two tools: their editor and the browser. The sample apps look great, but the documentation look sparse. I doubt I'll get a chance to migrate my Play 1.2.3 app to 2.0 this month, but I hope to try migrating sometime before the end of the year.

Posted in Java at Nov 16 2011, 05:58:09 AM MST 11 Comments

PhoneGap to the Rescue!

This is the 7th article in a series about my adventures developing a web application with HTML5, Play Scala, CoffeeScript and Jade. Previous articles can be found at:

  1. Integrating Scalate and Jade with Play 1.2.3
  2. Trying to make CoffeeScript work with Scalate and Play
  3. Integrating HTML5 Boilerplate with Scalate and Play
  4. Developing with HTML5, CoffeeScript and Twitter's Bootstrap
  5. Play Scala's Anorm, Heroku and PostgreSQL Issues
  6. More Scalate Goodness for Play
A few weeks ago, I wrote about Developing a Stopwatch and Trip Meter with HTML5. I mentioned I'd run into a major issue when I discovered HTML5 Geo's watchPosition() feature didn't run in the background. From that article:

I tried out the trip meter that evening on a bike ride and noticed it said I'd traveled 3 miles when I'd really gone 6. I quickly figured out it was only calculating start point to end point and not taking into account all the turns in between. To view what was happening, I integrated my odometer.coffee with my map using Google Maps Polylines. Upon finishing the integration, I discovered two things, 1) HTML5 geolocation was highly inaccurate and 2) geolocation doesn't run in the background.

At the time, I opted to ignore this issue and use my app by setting Auto-Lock to Never. This worked, but if I happened to bump my phone while exercising, the app would get closed. Not to mention it really drained the battery and seemed to crash every-so-often.

Last week, I realized things were getting down to the wire and I was running out of time to finish my app's functionality for my Devoxx Talk. On Wednesday afternoon, I asked my office-mates (2 iOS developers) about developing a native app and installing it on my phone. They told me I had to be a iOS Certified Developer ($99/year) or jailbreak my iPhone to get an app on it. On Thursday, I downloaded PhoneGap and installed Xcode 4. As you can tell from the following image, PhoneGap seemed to be exactly what I was looking for.

PhoneGap

I spent some time going through PhoneGap's Getting Started Guide and was able to get my app rendering in a short amount of time. I was able to copy the webapp's generated HTML into my PhoneGap project's www directory and launch the app in the iOS Simulator. The only change I had to make was to convert my inline CoffeeScript (that used coffee-script.js for in-browser compilation) to JavaScript. It's possible the in-browser compiler works, but when things didn't work and I didn't see any error messages, it was the first thing I changed.

For getting the app onto a phone for testing, I opted for the easiest route and applied for an iOS Developer Account on Thursday afternoon. While waiting for approval on Friday, I briefly tried to jailbreak my phone, but encountered all kinds of version issues and gave up after 30 minutes. 24 hours after I applied for my account, Apple emailed asking for a business document to prove I was legit. I was unable to download any from the Colorado Secretary of State that were e-certified, so expeditiously switched my application from a business account to an individual one. Apple was great in helping me out before the weekend started and I had everything I needed as we drove to our Ski Shack on Friday evening.

On Friday night, I upgraded Trish's iPhone 4 to iOS 5 to make sure I had the latest and greatest platform for my app. Saturday morning, I woke up around 8 and started trying to figure out how to get my app on her phone. It took about an hour of fumbling, grumbling and searching to figure out how to do this. All the while, the troops were getting restless, noting that they were hungry for breakfast and groaning about Daddy taking so long. At 9:30, I finally got my PhoneGap app installed on Trish's phone and we drove to breakfast at Sharkey's.

I started the app when we left and checked it 5 minutes later when we arrived for breakfast. The blood drained from my face when I saw the app had drawn a straight line from our condo to the breakfast joint. We had taken several turns along the way and my new native app ignored them all. I assumed I had failed and my talk's conclusion at Devoxx would be "You can't develop a reliable Fitness Tracker app with HTML5". However, after a delicious Eggs Benedict, I became determined to succeed and returned home for some more hacking.

This is when I discovered Joel Dare's Play an MP3 Audio Stream in PhoneGap tutorial and the "Required background modes" key. This was the knowledge that saved the day and I anxiously added the key and the values to get location updates and allow audio to run in the background.

Required Background Modes

Saturday afternoon, I strapped on my recently purchased GoPro Camera, shot some video for my demo at Devoxx and had a blast skiing with Abbie, Jack and Trish. I celebrated that evening with an executive workout (15 minutes each in hot tub, sauna and steam room) at the Fraser Rec Center and again on Sunday when the Broncos whooped the Kansas City Chiefs just like last year.

Last night, I stayed up late to put the finishing touches on my Devoxx presentation. Now I'm sitting at the Red Carpet Club in Chicago's O'Hare getting ready to depart for Belgium. It's been a fun journey learning about HTML5, Scala, Play, CoffeeScript and Jade. If you're at Devoxx this week, I think I've got a presentation you're really going to like. ;-)

Posted in Java at Nov 14 2011, 04:32:19 PM MST 2 Comments

More Scalate Goodness for Play

Scalate This article is the 6th in a series on about my adventures developing a web application with HTML5, Play Scala, CoffeeScript and Jade. Previous articles can be found at:

  1. Integrating Scalate and Jade with Play 1.2.3
  2. Trying to make CoffeeScript work with Scalate and Play
  3. Integrating HTML5 Boilerplate with Scalate and Play
  4. Developing with HTML5, CoffeeScript and Twitter's Bootstrap
  5. Play Scala's Anorm, Heroku and PostgreSQL Issues

Last week, I wrote about my adventures with Anorm and mentioned I'd made some improvements to Scalate Play interoperability. First of all, I've been using a Scalate trait and ScalateTemplate class to render Jade templates in my application. I described this setup in my first article on Scalate and Play.

Adding SiteMesh Features and Default Variables
When I started making my app look good with CSS, I started longing for a feature I've used in SiteMesh. That is, to have a body id or class that can identify the page and allow per-page CSS rules. To do this with SiteMesh, you'd have something like the following in your page:

  
<body id="signup"/>

And then read it in your decorator:

<body<decorator:getProperty property="body.class" writeEntireProperty="true"/>>

As I started looking into how to do this, I came across Play Scala's ScalaController and how it was populating Play's default variables (request, response, flash, params, etc.). Based on this newfound knowledge, I added a populateRenderArgs() method to set all the default variables and my desired bodyClass variable.

def populateRenderArgs(args: (Symbol, Any)*): Map[String, Any] = {
  val renderArgs = Scope.RenderArgs.current();

  args.foreach {
    o =>
      renderArgs.put(o._1.name, o._2)
  }

  renderArgs.put("session", Scope.Session.current())
  renderArgs.put("request", Http.Request.current())
  renderArgs.put("flash", Scope.Flash.current())
  renderArgs.put("params", Scope.Params.current())
  renderArgs.put("errors", validationErrors)
  renderArgs.put("config", Play.configuration)

  // CSS class to add to body
  renderArgs.put("bodyClass", Http.Request.current().action.replace(".", " ").toLowerCase)
  renderArgs.data.toMap
}

implicit def validationErrors:Map[String,play.data.validation.Error] = {
  import scala.collection.JavaConverters._
  Map.empty[String,play.data.validation.Error] ++ 
    Validation.errors.asScala.map( e => (e.getKey, e) )
}

After adding this method, I was able to access these values in my templates by defining them at the top:

-@ val bodyClass: String 
-@ val params: play.mvc.Scope.Params
-@ val flash: play.mvc.Scope.Flash

And then reading their values in my template:

body(class=bodyClass)
...
- if (flash.get("success") != null) {
  div(class="alert-message success" data-alert="alert")
    a(class="close" href="#") &×
    | #{flash.get("success")}
- }
...
  fieldset
    legend Leave a comment →
    div.clearfix
      label(for="author") Your name:
      input(type="text" name="author" class="xlarge" value={params.get("author")})
    div.clearfix
      label(for="content") Your message:
      textarea(name="content" class="xlarge") #{params.get("content")}
    div.actions
      button(type="submit" class="btn primary") Submit your comment
      button(type="reset" class="btn") Cancel

For a request like Home/index, the body tag is now rendered as:

<body class="home index">
This allows you to group CSS styles by Controller names as well as by method names.

Next, I started developing forms and validation logic. I quickly discovered I needed an action() method like the one defined in ScalaTemplate's TemplateMagic class.

def action(action: => Any) = {
  new play.mvc.results.ScalaAction(action).actionDefinition.url
}

Since TemplateMagic is an inner class, I determined that copying the method into my ScalateTemplate class was the easiest workaround. After doing this, I was able to import the method and use it in my templates.

-import controllers.ScalateTemplate._
...
form(method="post" class="form-stacked" id="commentForm"
     action={action(controllers.Profile.postComment(workout._1.id()))})

After getting the proper URL written into my form's action attribute, I encountered a new problem. The Play Scala Tutorial explains validation flow as follows:

if (Validation.hasErrors) {
  show(postId)
} else {
  Comment.create(Comment(postId, author, content))
  Action(show(postId))
}

However, when I had validation errors, I end up with the following error:

Could not load resource: [Timeline/postComment.jade]

To fix this, I added logic to my Scalate trait that looks for a "template" variable before using Http.Request.current().action.replace(".", "/") for the name. After making this change, I was able to use the following code to display validation errors.

if (Validation.hasErrors) {
  renderArgs.put("template", "Timeline/show")
  show(postId)
} else {
  Comment.create(Comment(postId, author, content))
  Action(show(postId))
}

Next, I wanted to give child pages the ability to set content in parent pages. With SiteMesh, I could use the <content> tag as follows:

<content tag="underground">
  HTML goes here
</content>

This HTML could then be retrieved in the decorator using the <decorator:getProperty> tag:

<decorator:getProperty property="page.underground"/>

With Scalate, I found it equally easy using the captureAttribute() method. For example, here's how I captured a list of an athlete's workouts for display in a sidebar.

- captureAttribute("sidebar")
  - Option(older).filterNot(_.isEmpty).map { workouts =>
    .older-workouts
      h3
        | Older workouts
        span.from from this app
      - workouts.map { workout =>
        - render("workout.jade", Map('workout -> workout, 'mode -> "teaser"))
      - }
  - }
- }

Then in my layout, I was able to retrieve this and display it. Below is a snippet from the layout I'm using (copied from Twitter's Bootstrap example). You can see how the sidebar is included in the .span4 at the end.

-@ val sidebar: String = ""
...
.container
  .content
    .page-header
      h1
        = pageHeader
        small
          = pageTagline
    .row
      .span10
        !~~ body
      .span4
        = unescape(sidebar)
  footer

View vs. Render in Scalate
In the sidebar code above, you might notice the render() call. This is the Scalate version of server-side includes. It works well, but there's also a view() shortcut you can use if you want to have templates for rendering your model objects. I quickly discovered it might be difficult to use this feature in my app because my object was Option[(models.Workout, models.Athlete, Seq[models.Comment])] instead of a simple object. You can read the view vs. render thread on the Scalate Google Group if you're interested in learning more.

Scalate as a Module
The last enhancement I attempted to make was to put Scalate support into a Play module. At first, I tried overriding Play's Template class but ran into compilation issues. Then Guillaume Bort (Play's lead developer) recommended I stick with the trait approach and I was able to get everything working. I looked at the outdated play-scalate module to figure out how to add Scala support to build.xml and copied its 500.scaml page for error reporting.

In order to get line-precise error reporting working, I had to wrap a try/catch around calling Scalate's TemplateEngine.layout() method. Again, most of this code was copied from the outdated play-scalate module.

case class Template(name: String) {
  
  def render(args: (Symbol, Any)*) = {
    val argsMap = populateRenderArgs(args: _*)
    
    val buffer = new StringWriter()
    var context = new DefaultRenderContext(name, scalateEngine, new PrintWriter(buffer))
    
    try {
      val templatePath = new File(Play.applicationPath+"/app/views","/"+name).toString
        .replace(new File(Play.applicationPath+"/app/views").toString,"")
      scalateEngine.layout(templatePath + scalateType, argsMap)
    } catch {
      case ex:TemplateNotFoundException => {
        if(ex.isSourceAvailable) {
          throw ex
        }
        val element = PlayException.getInterestingStrackTraceElement(ex)
        if (element != null) {
           throw new TemplateNotFoundException(name, 
             Play.classes.getApplicationClass(element.getClassName()), element.getLineNumber());
        } else {
           throw ex
        }
      }  
      case ex:InvalidSyntaxException => handleSpecialError(context,ex)
      case ex:CompilerException => handleSpecialError(context,ex)
      case ex:Exception => handleSpecialError(context,ex)
    } finally {
      if (buffer.toString.length > 0)
        throw new ScalateResult(buffer.toString,name)
    }
  }
}
...
private def handleSpecialError(context:DefaultRenderContext,ex:Exception) {
  context.attributes("javax.servlet.error.exception") = ex
  context.attributes("javax.servlet.error.message") = ex.getMessage
  try {
    scalateEngine.layout(scalateEngine.load(errorTemplate), context)
  } catch {
    case ex:Exception =>
      // TODO use logging API from Play here...
      println("Caught: " + ex)
      ex.printStackTrace
  }
}

private def errorTemplate:String = {
  val fullPath = new File(Play.applicationPath,"/app/views/errors/500.scaml").toString 
  fullPath.replace(new File(Play.applicationPath+"/app/views").toString,"")
}

Once I had this in place, error messages from Scalate are much better. Not only do I see the error in my browser, but I can click on the offending line to open it directly in TextMate.

Play Scalate Error Reporting

I've published my play-scalate module on GitHub so others can try it out. To give it a whirl, add the following to your dependencies.yml:

    - upgrades -> play-scalate 0.1

repositories:
    - upgrades:
        type: http
        artifact: "http://static.raibledesigns.com/[module]-[revision].zip"
        contains:
            - upgrades -> *

Then add with play.modules.scalate.Scalate to your controllers and call the render() method.

Summary
After using Scalate and Play for almost 3 months, I'm really enjoying the combination. When I first integrated Scalate with a simple trait, the error messages were always in the console. Now that I've borrowed some smarts from Play's ScalaController and play-scalate's error reporting, I feel like it's practically a built-in solution. I was easily able to integrate my desired SiteMesh features and it even allows reusable template blocks. In the end, it's just Scala and Scalate does a good job of allowing you to leverage that.

Other thoughts:

  • If you're writing a lot of Jade and familiar with HTML, Don Park's html2jade is a great tool that comes with Scalate support.
  • I'm really enjoying writing CSS with LESS, particularly the ability to nest rules and have programming features. The only issue I've seen is IntelliJ's LESS plugin only does code-completion for variables rather than CSS values.
  • The Play Framework Cookbook is a great reference for learning how to write modules. Not only does it explain how to create modules, it has some great real-world examples for doing bytecode enhancement, implementing message queues, using Solr and how to do production monitoring.

If this series of articles has intrigued you and you'll be at Devoxx next week, you should stop by my talk on Thursday afternoon. In addition, there's several other Play talks at Devoxx and a possible meetup on Wednesday. Check out the Devoxx, anyone? thread for more information.

Update: There's one thing I forgot to mention about the Play Scalate Module. When I had Scalate integrated in my app with a trait, I only included the scalate-core and scalate-util JARs in dependencies.yml:

- org.fusesource.scalate -> scalate-core 1.5.2-scala_2.8.1:
    transitive: false
- org.fusesource.scalate -> scalate-util 1.5.2-scala_2.8.1:
    transitive: false

However, when I created the play-scalate module, I allowed more dependencies.

- org.fusesource.scalate -> scalate-core 1.5.2-scala_2.8.1:
    exclude:
        - javax.servlet -> *
        - com.sun.jersey -> *
        - org.osgi -> *
- org.fusesource.scalate -> scalate-util 1.5.2-scala_2.8.1
Because Scalate depends on Logback, debug messages started showing up in my console. To fix this, I created conf/logback.xml in my project and filled it with the following XML.

<configuration>
  <appender name="STDOUT" class="ch.qos.logback.core.ConsoleAppender">
      <encoder>
          <pattern>%msg%n</pattern>
      </encoder>
  </appender>

  <root level="info">
    <appender-ref ref="STDOUT" />
  </root>
</configuration>

This reduces the logging and allows me to increase Scalate's logging if I ever have the need.

Posted in Java at Nov 07 2011, 02:07:40 PM MST Add a Comment

Developing with HTML5, CoffeeScript and Twitter's Bootstrap

HTML5 Logo This article is the fourth in a series about my adventures developing a Fitness Tracking application with HTML5, Play Scala, CoffeeScript and Jade. Previous articles can be found at:

  1. Integrating Scalate and Jade with Play 1.2.3
  2. Trying to make CoffeeScript work with Scalate and Play
  3. Integrating HTML5 Boilerplate with Scalate and Play

Developing Features
After getting my desired infrastructure setup, I started coding like a madman. The first feature I needed was a stopwatch to track the duration of a workout, so I started writing one with CoffeeScript. After spending 20 minutes playing with dates and setTimeout, I searched and found a stopwatch jQuery plug-in. I added this to my app, deployed it to Heroku, brought up the app on my iPhone 3G, clicked Start and started riding my bike to work.

When I arrived, I unlocked my phone and discovered that the time had stopped. At first, I thought this was a major setback. My disappointed disappeared when I found a Super Neat JavaScript Stopwatch and KĂĄre Byberg's version that worked just fine. This stopwatch used setTimeout, so by keeping the start time, the app on the phone would catch up as soon as you unlocked it. I ported KĂĄre's script to CoffeeScript and rejoiced in my working stopwatch.

# Created by Kåre Byberg © 21.01.2005. Please acknowledge if used 
# on other domains than http://www.timpelen.com.
# Ported to CoffeeScript by Matt Raible. Also added hours support.
flagClock = 0
flagStop = 0
stopTime = 0
refresh = null
clock = null

start = (button, display) ->
  clock = display
  startDate = new Date()
  startTime = startDate.getTime()
  if flagClock == 0
    $(button).html("Stop")
    flagClock = 1
    counter startTime, display
  else
    $(button).html("Start")
    flagClock = 0
    flagStop = 1

counter = (startTime) ->
  currentTime = new Date()
  timeDiff = currentTime.getTime() - startTime
  timeDiff = timeDiff + stopTime  if flagStop == 1
  if flagClock == 1
    $(clock).val formatTime timeDiff, ""
    callback = -> counter startTime
    refresh = setTimeout callback, 10
  else
    window.clearTimeout refresh
    stopTime = timeDiff

formatTime = (rawTime, roundType) ->
  if roundType == "round"
    ds = Math.round(rawTime / 100) + ""
  else
    ds = Math.floor(rawTime / 100) + ""
  sec = Math.floor(rawTime / 1000)
  min = Math.floor(rawTime / 60000)
  hour = Math.floor(rawTime / 3600000)
  ds = ds.charAt(ds.length - 1)
  start() if hour >= 24
  sec = sec - 60 * min + ""
  sec = prependZeroCheck sec
  min = min - 60 * hour + ""
  min = prependZeroCheck min
  hour = prependZeroCheck hour
  hour + ":" + min + ":" + sec + "." + ds

prependZeroCheck = (time) ->
  time = time + "" # convert from int to string
  unless time.charAt(time.length - 2) == ""
    time = time.charAt(time.length - 2) + time.charAt(time.length - 1)
  else
    time = 0 + time.charAt(time.length - 1)

reset = ->
  flagStop = 0
  stopTime = 0
  window.clearTimeout refresh
  if flagClock == 1
    resetDate = new Date()
    resetTime = resetDate.getTime()
    counter resetTime
  else
    $(clock).val "00:00:00.0"

@StopWatch = {
  start: start
  reset: reset
}

The Scalate/Jade template to render this stopwatch looks as follows:

script(type="text/javascript" src={uri("/public/javascripts/stopwatch.coffee")})

#display
  input(id="clock" class="xlarge" type="text" value="00:00:00.0" readonly="readonly")
#controls
  button(id="start" type="button" class="btn primary") Start
  button(id="reset" type="button" class="btn :disabled") Reset

:plain
  <script type="text/coffeescript">
    $(document).ready ->
      $('#start').click ->
        StopWatch.start this, $('#clock')

      $('#reset').click ->
        StopWatch.reset()
  </script>

Next, I wanted to create a map that would show your location. For this, I used Merge Design's HTML 5 Geolocation Demo as a guide. The HTML5 Geo API is pretty simple, containing only three methods:

// Gets the users current position
navigator.geolocation.getCurrentPosition(successCallback,
                                         errorCallback,
                                         options);
// Request repeated updates of position
watchId = navigator.geolocation.watchPosition(successCallback, errorCallback);

// Cancel the updates
navigator.geolocation.clearWatch(watchId);

After rewriting the geolocation example in CoffeeScript, I ended up with the following code in my map.coffee script. You'll notice it uses Google Maps JavaScript API to show an actual map with a marker.

# Geolocation with HTML 5 and Google Maps API based on example from maxheapsize: 
# http://maxheapsize.com/2009/04/11/getting-the-browsers-geolocation-with-html-5/
# This script is by Merge Database and Design, http://merged.ca/ -- if you use some, 
# all, or any of this code, please offer a return link.

map = null
mapCenter = null
geocoder = null
latlng = null
timeoutId = null

initialize = ->
  if Modernizr.geolocation
    navigator.geolocation.getCurrentPosition showMap

showMap = (position) ->
  latitude = position.coords.latitude
  longitude = position.coords.longitude
  mapOptions = {
    zoom: 15,
    mapTypeId: google.maps.MapTypeId.ROADMAP
  }
  map = new google.maps.Map(document.getElementById("map"), mapOptions)
  latlng = new google.maps.LatLng(latitude, longitude)
  map.setCenter(latlng)

  geocoder = new google.maps.Geocoder()
  geocoder.geocode({'latLng': latlng}, addAddressToMap)

addAddressToMap = (results, status) ->
  if (status == google.maps.GeocoderStatus.OK) 
    if (results[1]) 
      marker = new google.maps.Marker({
          position: latlng,
          map: map
      })
      $('#location').html('Your location: ' + results[0].formatted_address)
  else 
    alert "Sorry, we were unable to geocode that address."

start = ->
  timeoutId = setTimeout initialize, 500

reset = ->
  if (timeoutId)
    clearTimeout timeoutId

@Map = {
  start: start
  reset: reset
}

The template to show the map is a mere 20 lines of Jade:

script(type="text/javascript" src="//www.google.com/jsapi")
script(type="text/javascript" src="//maps.googleapis.com/maps/api/js?sensor=false")

:css
  .demo-map {
    border: 1px solid silver;
    height: 200px;
    margin: 10px auto;
    width: 280px;
  }

#map(class="demo-map")

p(id="location")
  span(class="label success") New
  | Fetching your location with HTML 5 geolocation...

script(type="text/javascript" src={uri("/public/javascripts/map.coffee")})
:javascript
    Map.start();

The last two features I wanted were 1) distance traveled and 2) drawing the route taken on the map. For this I learned from A Simple Trip Meter using the Geolocation API. As I was beginning to port the JS to CoffeeScript, I thought, "there's got to be a better way." I searched and found Js2coffee to do most of the conversion for me. If you know JavaScript and you're learning CoffeeScript, this is an invaluable tool.

I tried out the trip meter that evening on a bike ride and noticed it said I'd traveled 3 miles when I'd really gone 6. I quickly figured out it was only calculating start point to end point and not taking into account all the turns in between. To view what was happening, I integrated my odometer.coffee with my map using Google Maps Polylines. Upon finishing the integration, I discovered two things, 1) HTML5 geolocation was highly inaccurate and 2) geolocation doesn't run in the background.

I was able to solve the first problem by passing in {enableHighAccuracy: true} to navigator.geolocation.watchPosition(). Below are two screenshots showing before high accuracy and after. Both screenshots are from the same two-block walk.

Without {enableHighAccuracy: true} With {enableHighAccuracy: true}

The second issue is a slight show-stopper. PhoneGap might be able to solve the problem, but I'm currently using a workaround → turning off auto-lock and keeping Safari in the foreground.

Making it look good
After I got all my desired features developed, I moved onto making the app look good. I started by using SASS for my CSS and installed Play's SASS module. I then switched to LESS when I discovered and added Twitter's Bootstrap to my project. At first I used Play's LESS module (version 0.3), but ran into compilation issues. I then tried Play's GreenScript module, but gave up on it when I found it was incompatible with the CoffeeScript module. Switching back to the LESS module and using the "0.3.compatibility" version solved all remaining issues.

You might remember that I integrated HTML5 Boilerplate and wondering why I have both Bootstrap and Boilerplate in my project. At this point, I don't think Boilerplate is needed, but I've kept it just in case it's doing something for HTML5 cross-browser compatibility. I've renamed its style.css to style.less and added the following so it has access to Bootstrap's variables.

/* Variables from Bootstrap */
@import "libs/variables.less";

Then I made my app look a lot better with layouts, stylish forms, a fixed topbar and alerts. For example, here's the CoffeeScript I wrote to display geolocation errors:

geolocationError = (error) ->
  msg = 'Unable to locate position. '
  switch error.code
    when error.TIMEOUT then msg += 'Timeout.'
    when error.POSITION_UNAVAILABLE then msg += 'Position unavailable.'
    when error.PERMISSION_DENIED then msg += 'Please turn on location services.'
    when error.UNKNOWN_ERROR then msg += error.code
  $('.alert-message').remove()
  alert = $('<div class="alert-message error fade in" data-alert="alert">')
  alert.html('<a class="close" href="#">×</a>' + msg);
  alert.insertBefore($('.span10'))

Then I set about styling up the app so it looked good on a smartphone with CSS3 Media Queries. Below is the LESS code I used to hide elements and squish the widths for smaller devices.

@media all and (max-device-width: 480px) {
  /* hide scrollbar on mobile */
  html { overflow-y:hidden }
  /* hide sidebar on mobile */
  .home .span4, .home .page-header, .topbar form {
    display: none
  }
  .home .container {
    width: 320px;
  } 
  .about {
    .container, .span10 {
      width: 280px;
    }
    .span10 {
      padding-top: 0px;
    }
  }

Tools
In the process of developing a stopwatch, odometer, displaying routes and making everything look good, I used a number of tools. I started out primarily with TextMate and its bundles for LESS, CoffeeScript and Jade. When I started writing more Scala, I installed the Scala TextMate Bundle. When I needed some debugging, I switched to IntelliJ and installed its Scala plugin. CoffeeScript, LESS and HAML plugins (for Jade) were already installed by default. I also used James Ward's Setup Play Framework with Scala in IntelliJ.

Issues
I think it's obvious that my biggest issue so far is the fact that a webapp can't multitask in the background like a native app can. Beyond that, there's accuracy issues with HTML5's geolocation that I haven't seen in native apps.

I also ran into a caching issue when calling getCurrentPosition(). It only worked the first time and I had to refresh my browser to get it to work again. Strangely enough, this only happened on my desktop (in Safari and Firefox) and worked fine on my iPhone. Unfortunately, it looks like PhoneGap has issues similar to this.

My workaround for no webapp multitasking is turning off auto-lock and leaving the browser in the foreground while I exercise. The downside to this is it really drains the battery quickly (~ 3 hours). I constantly have to charge my phone if I'm testing it throughout the day. The testing is a real pain too. I have to deploy to Heroku (which is easy enough), then go on a walk or bike ride. If something's broke, I have to return home, tweak some things, redeploy and go again. Also, there's been a few times where Safari crashes halfway through and I lose all the tracking data. This happens with native apps too, but seemingly not as often.

If you'd like to try the app on your mobile phone and see if you experience these issues, checkout play-more.com.

Summary
Going forward, there's still more HTML5 features I'd like to use. In particular, I'd like to play music while the fitness tracker is running. I'd love it if cloud music services (e.g. Pandora or Spotify) had an API I could use to play music in a webapp. Soundcloud might be an option, but I've also thought of just uploading some MP3s and playing them with the <audio> tag.

I've really enjoyed developing with all these technologies and haven't experienced much frustration so far. The majority has come from integrating Scalate into Play, but I've resolved most problems. Next, I'll talk about how I've improved Play's Scalate support and my experience working with Anorm.

Posted in Java at Oct 20 2011, 02:47:36 PM MDT 3 Comments

Integrating HTML5 Boilerplate with Scalate and Play

HTML5 Boilerplate is a project that provides a number of basic files to help you build an HTML5 application. At its core, it's an HTML template that puts CSS at the top, JavaScript at the bottom, installs Chrome Frame for IE6 users and leverages Modernizr for legacy browser support. It also includes jQuery with the download. One of the major benefits of HTML5 Boilerplate is it ships with a build system (powered by Ant) that concatenates and minimizes CSS and JS for maximum performance. From html5boilerplate.com:

Boilerplate is not a framework, nor does it prescribe any philosophy of development, it's just got some tricks to get your project off the ground quickly and right-footed.

I like the idea of its build system to minify and gzip, but I'd probably only use it if I was working on a project that uses Ant. Since I'm using it in a Play project, the whole Ant build system doesn't help me. Besides, I prefer something like wro4j. Wro4j allows you to specify a group of files and then it compiles, minimizes and gzips them all on-the-fly. As far as I know, Play doesn't have any support for Servlet Filters, so using wro4j in Play is not trivial.

The good news is Play has a GreenScript module that contains much of the wro4j functionality. However, since I'm using Scalate in my project, this goodness is unavailable to me. In the future, the Scalate Team is considering adding better wro4j, JavaScript and CSS integration. In the meantime, I'm going to pretend I don't care about concatenation and minimization and trundle along without this feature.

To add HTML5 Boilerplate to my Play project, I performed the following steps:

  • Downloaded the 2.0 Zipball.
  • Copied all the static files to my project. Below are the commands I used (where $boilerplate-download is the expanded download directory and ~/dev/play-more is my project):
    cd $boilerplate-download
    cp 404.html ~/dev/play-more/app/views/errors/404.html
    cp *.png ~/dev/play-more/public/.
    cp crossdomain.xml ~/dev/play-more/public/.
    cp -r css ~/dev/play-more/public/stylesheets/.
    cp favicon.ico ~/dev/play-more/public/.
    cp humans.txt ~/dev/play-more/public/.
    cp -r js/libs ~/dev/play-more/public/javascripts/.
    cp robots.txt ~/dev/play-more/public/.
    
  • Copied the index.html to ~/dev/play-more/app/templates/layouts/default.jade and modified it to use Jade syntax. Since I downloaded the comments-heavy version, I modified many of them to be hidden in the final output.
    -@ val body: String 
    -@ var title: String = "Play More"
    -@ var header: String = ""
    -@ var footer: String = ""
    !!! 5
    / paulirish.com/2008/conditional-stylesheets-vs-css-hacks-answer-neither/ 
    <!--[if lt IE 7]> <html class="no-js ie6 oldie" lang="en"> <![endif]-->
    <!--[if IE 7]>    <html class="no-js ie7 oldie" lang="en"> <![endif]-->
    <!--[if IE 8]>    <html class="no-js ie8 oldie" lang="en"> <![endif]-->
    -# Consider adding an manifest.appcache: h5bp.com/d/Offline 
    <!--[if gt IE 8]><!--> <html class="no-js" lang="en"> <!--<![endif]-->
    head
      meta(charset="utf-8")
    
      -# Use the .htaccess and remove these lines to avoid edge case issues. More info: h5bp.com/b/378 
      meta(http-equiv="X-UA-Compatible" content="IE=edge,chrome=1")
    
      title=title
      meta(name="description" content="")
      meta(name="author" content="Matt Raible ~ [email protected]")
    
      -# Mobile viewport optimized: j.mp/bplateviewport 
      meta(name="viewport" content="width=device-width,initial-scale=1")
    
      -# Place favicon.ico and apple-touch-icon.png in the root directory: mathiasbynens.be/notes/touch-icons
    
      -# CSS: implied media=all
      link(rel="stylesheet" href={uri("/public/stylesheets/style.css")})
      -# end CSS
    
      -# More ideas for your <head> here: h5bp.com/d/head-Tips 
      -#
        All JavaScript at the bottom, except for Modernizr / Respond.
        Modernizr enables HTML5 elements & feature detects; Respond is a polyfill for min/max-width CSS3 Media Queries
        For optimal performance, use a custom Modernizr build: www.modernizr.com/download/ 
    
      script(type="text/javascript" src={uri("/public/javascripts/libs/modernizr-2.0.6.min.js")})
    body
      #container
        header = header
        #main(role="main")
          != body
        footer = footer
    
      -# JavaScript at the bottom for fast page loading 
      
      / Grab Google CDN's jQuery, with a protocol relative URL; fall back to local if offline 
      script(type="text/javascript" src="//ajax.googleapis.com/ajax/libs/jquery/1.6.2/jquery.min.js")
      :javascript
        window.jQuery || document.write('<script src={uri("/public/javascripts/libs/jquery-1.6.2.min.js")}><\/script>')
    
      -# Change UA-XXXXX-X to be your site's ID 
      :javascript
        window._gaq = [['_setAccount','UA-25859875-1'],['_trackPageview'],['_trackPageLoadTime']];
        Modernizr.load({
          load: ('https:' == location.protocol ? '//ssl' : '//www') + '.google-analytics.com/ga.js'
        });
    
      -# Prompt IE 6 users to install Chrome Frame. Remove this if you want to support IE 6. 
      -# http://chromium.org/developers/how-tos/chrome-frame-getting-started 
      /[if lt IE 7]
        script(src="//ajax.googleapis.com/ajax/libs/chrome-frame/1.0.3/CFInstall.min.js")
        :javascript
          window.attachEvent('onload',function(){CFInstall.check({mode:'overlay'})})
            
    != "</html>"
    
  • Next, I had to add support for layouts to my homegrown Scalate support. I did this by specifying a layoutStrategy when initializing the TemplateEngine. From play-more/app/controllers/ScalateTemplate.scala:
    engine.classLoader = Play.classloader
    engine.layoutStrategy = new DefaultLayoutStrategy(engine, 
      Play.getFile("/app/templates/layouts/default" + scalateType).getAbsolutePath)
    engine
    

That's it! Now I have HTML5 Boilerplate integrated into my Play/Scalate/Jade application. To set the title and header in my index.jade, I simply added the following lines at the top:

- attributes("title") = "Counting"
- attributes("header") = "HTML5 Rocks!"

CoffeeScript Tip
Yesterday, I mentioned that I was having issues getting CoffeeScript to work with Scalate and that I was going to try and get the in-browser compiler working. First of all, reverting to Scalate 1.4.1 didn't work because there is no CoffeeScript support in 1.4.1. So I stayed with 1.5.2 and used PandaWood's Running CoffeeScript In-Browser Tutorial. I copied coffee-script.js to ~/dev/play-more/public/javascripts/libs and added a reference to it in my default.jade layout:

-# JavaScript at the bottom for fast page loading 
script(type="text/javascript" src={uri("/public/javascripts/libs/coffee-script.js")})

Then I was able to write CoffeeScript in a .jade template using the following syntax:

:plain
  <script type="text/coffeescript">
    alert "hello world"
  </script>

Summary
If you've integrated HTML5 Boilerplate into your Play application, I'd love to hear about it. Now that I have all the infrastructure in place (Jade, CoffeeScript, HTML5 Boilerplate), I'm looking forward to getting some development done. Who knows, maybe I'll even come up with my own Play Un-Features That Really Irk My Inner Geek.

Posted in Java at Sep 28 2011, 08:49:35 AM MDT 2 Comments

Trying to make CoffeeScript work with Scalate and Play

A few weeks ago, I wrote about integrating Scalate with Play.

The next steps in my Play Scala adventure will be trying to get the CoffeeScript module to work. I also hope to integrate HTML5 Boilerplate with Jade and Scalate Layouts.

Since my last writing, the Scalate Team has created a new branch for Scala 2.8.x (that's compatible with Play) and released 1.5.2. To upgrade my Play application to use this version, I changed my dependencies.yml to have the following:

  - org.fusesource.scalate -> scalate-core 1.5.2-scala_2.8.1:
      transitive: false
  - org.fusesource.scalate -> scalate-util 1.5.2-scala_2.8.1:
      transitive: false

Unfortunately, this release breaks Scalate's CoffeeScript support because it wraps the code with illegal comments. This has been fixed in the latest snapshot, but no new release has been cut. However, even if it did work, it's not quite what I'm looking for. The 1.5.2 release allows for compiling inline CoffeeScript on-the-fly, but I'd rather store my .coffee files external to the page.

To try and figure out how to do this, I sent a message to the Scalate Google Group asking Does Scalate allow for referencing (and compiling) CoffeeScript files like the plugin for Play? My email prompted the Scalate Team to do some modifications that seemed to do exactly what I was looking for.

FWIW I've just checked in a couple of coffeescript examples. To run it, grab the code & do a local build...

http://scalate.fusesource.org/source.html
http://scalate.fusesource.org/building.html

then run this...
cd samples/scalate-example 
mvn jetty:run
then open http://localhost:8080/coffee/index

there are 2 sample jade files which use embedded coffee or a separate coffee file (using the .js extension in the <script src attribute>

https://github.com/scalate/scalate/tree/master/samples/scalate-exampl...

e.g. here's a jade file references a separate .js file for a coffee script which gets converted to .js on the server...

https://github.com/scalate/scalate/blob/master/samples/scalate-exampl...

To try out the improved CoffeeScript support, I checked out the source and fumbled with Git branches for a bit before I got latest version of Scalate to build. Unfortunately, it didn't work because Play doesn't know how to process the .js and .css files.

@67o8fflce 
Application.foo.js action not found 
Action not found 
Action Application.foo.js could not be found. Error raised is 
Controller controllers.Application.foo not found 
play.exceptions.ActionNotFoundException: Action Application.foo.js not 
found 
        at play.mvc.ActionInvoker.getActionMethod(ActionInvoker.java: 
588) 
        at play.mvc.ActionInvoker.resolve(ActionInvoker.java:85) 
        at Invocation.HTTP Request(Play!) 
Caused by: java.lang.Exception: Controller controllers.Application.foo 
not found 
        ... 3 more 
08:20:21,133 ERROR ~

Based on this error, I assumed I needed a Controller to do receive the .js and .css requests and compile them accordingly with Scalate. I changed my Jade template to have the following:

script(src="/assets/foo.js" type="text/javascript") 

Then I added a new route to my Play application:

  GET     /                           Application.index
  GET     /assets/{template}          ScalateResource.process

My ScalateResource.scala class is as follows:

package controllers 

import play.mvc._ 

object ScalateResource extends Controller { 

  def process(args: (Symbol, Any)*) = { 
    var template = params.get("template") 
    // replace .js with .coffee 
    template = template.replace(".js", ".coffee") 
    // replace .css with .scss 
    template = template.replace(".css", ".scss") 
    ScalateTemplate(template).render(); 
  } 
} 

Unfortunately, when I tried to access http://localhost:9000/assets/foo.js, I received the following error:

TemplateException occured : Not a template file extension (md | markdown | ssp | scaml | mustache | jade), you requested: coffee

At this point, I still haven't figured out how to solve this. I can only assume that the reason this works in the example application is because it uses a TemplateEngineFilter that's mapped to /*.

As I see it, I have a few choices if I want to continue using CoffeeScript and Scalate in my application:

  1. Revert to an older build of Scalate that uses the in-browser CoffeeScript compiler.
  2. Try to get a new version released that fixes the comment bug and use inline CoffeeScript.
  3. Keep trying to figure out how to get external files compiled by Scalate.

Obviously, I'd like to do #3 the most, but with the lack of responses from the Scalate group, this seems like the most challenging. Since #1 is the easiest (and I can complete without anyone's help), I'll be going that route for now. With any luck, the 2nd and third solutions will surface as options before my talk in November.

Update Oct 4, 2011: I was able to get external CoffeeScript files working! It was rather simple actually. I just tried the Play CoffeeScript module again, using Scalate's {uri("/path")} helper. For example, in a Jade template:

script(type="text/javascript" src={uri("/public/javascripts/script.coffee")})

This compiles the CoffeeScript file on the server and returns JavaScript. Sweet!

Posted in Java at Sep 27 2011, 01:59:18 PM MDT 3 Comments

How do you get started in programming?

I recently received the email below from someone asking how he might get started in programming. I think this is a popular topic, especially given the current economic situation in the US (unemployment is high, but not in the tech industry). For that reason, I figured I'd post my response here and allow others to chime in with their advice.

I read about you on LinkedIn, forgive my intrusion. Since you seem like an expert in the field of designing websites I wanted to know your thoughts on switching into this field late in life. I am 41 and looking to make the move from an unrelated field (finance) to programming. So far I have learned HTML, CSS and some Javascript. I have taken classes on C and Java. I have made some basic Android phone apps.

What languages do you think I should focus on? What is the fastest way to get up to speed to make a career of it? Classes? Take a entry level job? Study on my own?

Thanks for any insights….

My reply:

It's interesting that you're switching from finance to programming. I did the same thing early on in my career, but I was fortunate enough to do it in college (I have degrees in Russian, International Business and Finance) and therefore able to audit some CS classes before I graduated.

I think the most valuable skills these days are front-end skills (HTML, CSS and JavaScript). If you can combine those skills with the ability to design websites, you'll go along way. I've taken a different approach where I have excellent front-end skills, but also know a lot about the backend.

While it helps to have a Java background these days, the real sweat spot is the JVM and the containers that run on it like Tomcat and Jetty. A lot of Java developers are learning Groovy and Scala, but unfortunately a lot of their documentation/books are targeted towards Java developers.

The fastest way to get up-to-speed on it is to start your own project (if you can't get a company to hire you to do it). I'd suggest creating a webapp that solves a problem that you have, makes your life easier, etc. If you open source it and build a community around it, that's just as good as working for a company as far as experience goes. Combine this with studying on your own and you can likely come up to speed very quickly.

As a programmer, what advice do you have for someone looking to switch careers, or get into our industry fresh out of college?

Posted in Java at Jul 28 2011, 11:12:09 AM MDT 8 Comments

Integrating OAuth with AppFuse and its REST API

One of the new features in AppFuse 2.1 is an appfuse-ws archetype. This archetype leverages Enunciate and CXF to create a project with a REST API and generated HTML documentation. Enunciate is a very useful tool, allowing you to develop web services with JAX-RS and JAX-WS annotations and have all types of client libraries generated. For me, it seems very useful for developing the backend of SOFEA (a.k.a. modern) applications.

Back in March, Ryan Heaton published a nice article on Securing Web Services in an Enunciate application. I decided to take his tutorial a step further and not only secure my web services, but also to integrate with OAuth 2. In this tutorial, I'll show you how to create a new application with AppFuse WS, secure it, add OAuth support, and then use a client app to authenticate and retrieve data.

Create a New AppFuse WS Project
To begin, I visited the Create AppFuse Archetypes page and created a new application using the "Web Services Only" option in the Web Framework dropdown. Below is the command I used to create the "appfuse-oauth" project.

mvn archetype:generate -B -DarchetypeGroupId=org.appfuse.archetypes \
-DarchetypeArtifactId=appfuse-ws-archetype -DarchetypeVersion=2.1.0 \
-DgroupId=org.appfuse.example -DartifactId=appfuse-oauth 

After doing this, I started the app using mvn jetty:run and confirmed it started OK. At this point, I was able to view the generated documentation for the application at http://localhost:8080. The screenshot below shows what the app looks like at this point.

AppFuse WS Homepage

NOTE: You might notice the REST endpoint of /{username}. This is a bug in AppFuse 2.1.0 and has been fixed in SVN. It does not affect this tutorial.

Integrate Spring Security and OAuth
I originally tried to integrate Spring Security with Enunciate's Securing Web Services Tutorial. However, it only secures endpoints and doesn't do enough filtering for OAuth support, so I ended up using a custom web.xml. I put this file in src/main/resources and loaded it in my enunciate.xml file. I also upgraded Spring Security and imported my security.xml file.

  <?xml version="1.0"?>
  <enunciate xmlns:xsi="http://www.w3.org/2001/XMLSchema-instance"
             xsi:noNamespaceSchemaLocation="http://enunciate.codehaus.org/schemas/enunciate-1.22.xsd">
      ...
      <webapp mergeWebXML="src/main/resources/web.xml"/>
      <modules>
      ...
          <spring-app disabled="false" springVersion="3.0.5.RELEASE">
              <springImport uri="classpath:/applicationContext-resources.xml"/>
              <springImport uri="classpath:/applicationContext-dao.xml"/>
              <springImport uri="classpath:/applicationContext-service.xml"/>
              <springImport uri="classpath:/applicationContext.xml"/>
              <springImport uri="classpath:/security.xml"/>
          </spring-app>
      </modules>
  </enunciate>

Then I created src/main/resources/web.xml with a filter for Spring Security and a DispatcherServlet for OAuth support.

<?xml version="1.0" encoding="UTF-8"?>
<web-app xmlns="http://java.sun.com/xml/ns/javaee"
         xmlns:xsi="http://www.w3.org/2001/XMLSchema-instance"
         xsi:schemaLocation="http://java.sun.com/xml/ns/javaee http://java.sun.com/xml/ns/javaee/web-app_3_0.xsd"
         version="3.0">

    <filter>
        <filter-name>securityFilter</filter-name>
        <filter-class>org.springframework.web.filter.DelegatingFilterProxy</filter-class>
        <init-param>
            <param-name>targetBeanName</param-name>
            <param-value>springSecurityFilterChain</param-value>
        </init-param>
    </filter>

    <filter-mapping>
        <filter-name>securityFilter</filter-name>
        <url-pattern>/*</url-pattern>
    </filter-mapping>

    <servlet>
        <servlet-name>appfuse-oauth</servlet-name>
        <servlet-class>org.springframework.web.servlet.DispatcherServlet</servlet-class>
        <load-on-startup>1</load-on-startup>
    </servlet>

    <servlet-mapping>
        <servlet-name>appfuse-oauth</servlet-name>
        <url-pattern>/oauth/*</url-pattern>
    </servlet-mapping>
</web-app>

Next, I created a src/main/resources/security.xml and used it to secure my API, specify a login page, supply the users and integrate OAuth (see the last 4 beans below).

<?xml version="1.0" encoding="UTF-8"?>
<beans:beans xmlns="http://www.springframework.org/schema/security"
             xmlns:xsi="http://www.w3.org/2001/XMLSchema-instance"
             xmlns:beans="http://www.springframework.org/schema/beans"
             xmlns:oauth="http://www.springframework.org/schema/security/oauth2"
             xsi:schemaLocation="http://www.springframework.org/schema/beans http://www.springframework.org/schema/beans/spring-beans.xsd
                           http://www.springframework.org/schema/security http://www.springframework.org/schema/security/spring-security.xsd
                           http://www.springframework.org/schema/security/oauth2 http://www.springframework.org/schema/security/spring-security-oauth2.xsd">

    <http auto-config="true">
        <intercept-url pattern="/api/**" access="ROLE_USER"/>
        <intercept-url pattern="/oauth/**" access="ROLE_USER"/>
        <intercept-url pattern="/**" access="IS_AUTHENTICATED_ANONYMOUSLY"/>
        <form-login login-page="/login.jsp" authentication-failure-url="/login.jsp?error=true"
                    login-processing-url="/j_security_check"/>
    </http>

    <authentication-manager>
        <authentication-provider>
            <user-service>
                <user name="admin" password="admin" authorities="ROLE_USER,ROLE_ADMIN"/>
                <user name="user" password="user" authorities="ROLE_USER"/>
            </user-service>
        </authentication-provider>
    </authentication-manager>

    <!--hook up the spring security filter chain-->
    <beans:alias name="springSecurityFilterChain" alias="securityFilter"/>

    <beans:bean id="tokenServices"
                class="org.springframework.security.oauth2.provider.token.InMemoryOAuth2ProviderTokenServices">
        <beans:property name="supportRefreshToken" value="true"/>
    </beans:bean>

    <oauth:provider client-details-service-ref="clientDetails" token-services-ref="tokenServices">
        <oauth:verification-code user-approval-page="/oauth/confirm_access"/>
    </oauth:provider>

    <oauth:client-details-service id="clientDetails">
        <!--<oauth:client clientId="my-trusted-client" authorizedGrantTypes="password,authorization_code,refresh_token"/>
        <oauth:client clientId="my-trusted-client-with-secret"
                      authorizedGrantTypes="password,authorization_code,refresh_token" secret="somesecret"/>
        <oauth:client clientId="my-less-trusted-client" authorizedGrantTypes="authorization_code"/>-->
        <oauth:client clientId="ajax-login" authorizedGrantTypes="authorization_code"/>
    </oauth:client-details-service>
</beans:beans>

I used the OAuth for Spring Security sample apps to figure this out. In this example, I used authorizedGrantTypes="authorization_code", but you can see from the commented <oauth:client> elements above that there's a few different options. You should also note that the clientId is hard-coded to "ajax-login", signifying I only want to allow a single application to authenticate.

At this point, I'd like to give a shoutout to Ryan Heaton for creating both Enunciate and Spring Security's OAuth support. Nice work Ryan!

At this point, I needed to do a number of additional tasks to finish integrating oauth. The first was to modify the Jetty Plugin's configuration to 1) run on port 9000, 2) load my custom files and 3) allow jetty:run to recognize Enunciate's generated files. Below is the final configuration in my pom.xml.

<plugin>
    <groupId>org.mortbay.jetty</groupId>
    <artifactId>maven-jetty-plugin</artifactId>
    <version>6.1.26</version>
    <configuration>
        <connectors>
            <connector implementation="org.mortbay.jetty.nio.SelectChannelConnector">
                <port>9000</port>
                <maxIdleTime>60000</maxIdleTime>
            </connector>
        </connectors>
        <webAppConfig>
            <baseResource implementation="org.mortbay.resource.ResourceCollection">
                <resourcesAsCSV>
                    ${basedir}/src/main/webapp,
                    ${project.build.directory}/${project.build.finalName}
                </resourcesAsCSV>
            </baseResource>
            <contextPath>/appfuse-oauth</contextPath>
        </webAppConfig>
        <webXml>${project.build.directory}/${project.build.finalName}/WEB-INF/web.xml</webXml>
    </configuration>
</plugin>

Next, I added the necessary OAuth dependencies for Spring Security to my pom.xml. Since the latest release is a milestone release, I had to add Spring's milestone repo too.

<repository>
    <id>spring-milestone</id>
    <url>http://s3.amazonaws.com/maven.springframework.org/milestone</url>
</repository>
...
<dependency>
    <groupId>org.springframework.security</groupId>
    <artifactId>spring-security-taglibs</artifactId>
    <version>${spring.version}</version>
    <exclusions>
        <exclusion>
            <groupId>org.springframework</groupId>
            <artifactId>spring-web</artifactId>
        </exclusion>
        <exclusion>
            <groupId>org.springframework</groupId>
            <artifactId>spring-support</artifactId>
        </exclusion>
    </exclusions>
</dependency>
<dependency>
    <groupId>org.springframework.security.oauth</groupId>
    <artifactId>spring-security-oauth</artifactId>
    <version>1.0.0.M3</version>
    <exclusions>
        <exclusion>
            <groupId>org.springframework</groupId>
            <artifactId>spring-beans</artifactId>
        </exclusion>
        <exclusion>
            <groupId>org.springframework</groupId>
            <artifactId>spring-context</artifactId>
        </exclusion>
        <exclusion>
            <groupId>org.springframework</groupId>
            <artifactId>spring-core</artifactId>
        </exclusion>
    </exclusions>
</dependency>
<dependency>
    <groupId>org.springframework</groupId>
    <artifactId>spring-webmvc</artifactId>
    <version>${spring.version}</version>
</dependency>
<dependency>
    <groupId>javax.servlet</groupId>
    <artifactId>servlet-api</artifactId>
    <version>2.5</version>
    <scope>provided</scope>
</dependency>
<dependency>
    <groupId>javax.servlet</groupId>
    <artifactId>jstl</artifactId>
    <version>1.1.2</version>
</dependency>
<dependency>
    <groupId>taglibs</groupId>
    <artifactId>standard</artifactId>
    <version>1.1.2</version>
</dependency>

Since I named my DispatcherServlet "appfuse-oauth" in web.xml, I created a src/main/webapp/WEB-INF/appfuse-oauth-servlet.xml to configure Spring MVC. I had to create the src/main/webapp/WEB-INF directory.

<?xml version="1.0" encoding="UTF-8"?>
<beans xmlns="http://www.springframework.org/schema/beans"
       xmlns:xsi="http://www.w3.org/2001/XMLSchema-instance"
       xmlns:context="http://www.springframework.org/schema/context"
       xmlns:mvc="http://www.springframework.org/schema/mvc"
       xsi:schemaLocation="http://www.springframework.org/schema/beans http://www.springframework.org/schema/beans/spring-beans-3.0.xsd
                http://www.springframework.org/schema/context http://www.springframework.org/schema/context/spring-context-3.0.xsd
                http://www.springframework.org/schema/mvc http://www.springframework.org/schema/mvc/spring-mvc-3.0.xsd">

    <!-- Scans the classpath of this application for @Components to deploy as beans -->
    <context:component-scan base-package="org.appfuse.examples.webapp"/>

    <!-- Configures the @Controller programming model -->
    <mvc:annotation-driven/>

    <!-- Resolves view names to protected .jsp resources within the /WEB-INF/views directory -->
    <bean class="org.springframework.web.servlet.view.InternalResourceViewResolver">
        <property name="viewClass" value="org.springframework.web.servlet.view.JstlView"/>
        <property name="prefix" value="/"/>
        <property name="suffix" value=".jsp"/>
    </bean>
</beans>

In order to show the OAuth confirmation page, I needed to create src/main/java/org/appfuse/examples/webapp/AccessConfirmationController.java and map it to /oauth/confirm_access. I copied this from one of the sample projects and modified to use Spring's annotations.

package org.appfuse.examples.webapp;

import org.springframework.beans.factory.annotation.Autowired;
import org.springframework.security.oauth2.provider.ClientAuthenticationToken;
import org.springframework.security.oauth2.provider.ClientDetails;
import org.springframework.security.oauth2.provider.ClientDetailsService;
import org.springframework.security.oauth2.provider.verification.ClientAuthenticationCache;
import org.springframework.security.oauth2.provider.verification.DefaultClientAuthenticationCache;
import org.springframework.stereotype.Controller;
import org.springframework.web.bind.annotation.RequestMapping;
import org.springframework.web.bind.annotation.RequestMethod;
import org.springframework.web.servlet.ModelAndView;

import javax.servlet.http.HttpServletRequest;
import javax.servlet.http.HttpServletResponse;
import java.util.TreeMap;

/**
 * Controller for retrieving the model for and displaying the confirmation page
 * for access to a protected resource.
 *
 * @author Ryan Heaton
 */
@Controller
@RequestMapping("/confirm_access")
public class AccessConfirmationController {

    private ClientAuthenticationCache authenticationCache = new DefaultClientAuthenticationCache();
    @Autowired
    private ClientDetailsService clientDetailsService;

    @RequestMapping(method = RequestMethod.GET)
    protected ModelAndView confirm(HttpServletRequest request, HttpServletResponse response) throws Exception {
        ClientAuthenticationToken clientAuth = authenticationCache.getAuthentication(request, response);
        if (clientAuth == null) {
            throw new IllegalStateException("No client authentication request to authorize.");
        }

        TreeMap<String, Object> model = new TreeMap<String, Object>();
        ClientDetails client = clientDetailsService.loadClientByClientId(clientAuth.getClientId());
        model.put("auth_request", clientAuth);
        model.put("client", client);

        return new ModelAndView("access_confirmation", model);
    }
}

This controller delegates to src/main/webapp/access_confirmation.jsp. I created this file and filled it with code to display Accept and Deny buttons.

<%@ page import="org.springframework.security.core.AuthenticationException" %>
<%@ page import="org.springframework.security.oauth2.common.exceptions.UnapprovedClientAuthenticationException" %>
<%@ page import="org.springframework.security.oauth2.provider.verification.BasicUserApprovalFilter" %>
<%@ page import="org.springframework.security.oauth2.provider.verification.VerificationCodeFilter" %>
<%@ page import="org.springframework.security.web.WebAttributes" %>
<%@ taglib prefix="authz" uri="http://www.springframework.org/security/tags" %>
<%@ taglib uri="http://java.sun.com/jsp/jstl/core" prefix="c" %>
<html>
<head>
    <title>Confirm Access</title>
    <link rel="stylesheet" type="text/css" media="all"
          href="http://demo.appfuse.org/appfuse-struts/styles/simplicity/theme.css"/>
    <style type="text/css">
        h1 {
            margin-left: -300px;
            margin-top: 50px
        }
    </style>
</head>

<body>

<h1>Confirm Access</h1>

<div id="content">

    <% if (session.getAttribute(WebAttributes.AUTHENTICATION_EXCEPTION) != null && 
                 !(session.getAttribute(WebAttributes.AUTHENTICATION_EXCEPTION) instanceof UnapprovedClientAuthenticationException)) { %>
    <div class="error">
        <h2>Woops!</h2>

        <p>Access could not be granted.
            (<%= ((AuthenticationException) session.getAttribute(WebAttributes.AUTHENTICATION_EXCEPTION)).getMessage() %>)</p>
    </div>
    <% } %>
    <c:remove scope="session" var="SPRING_SECURITY_LAST_EXCEPTION"/>

    <authz:authorize ifAnyGranted="ROLE_USER,ROLE_ADMIN">
        <h2>Please Confirm</h2>

        <p>You hereby authorize "<c:out value="${client.clientId}" escapeXml="true"/>" to access your protected resources.</p>

        <form id="confirmationForm" name="confirmationForm"
              action="<%=request.getContextPath() + VerificationCodeFilter.DEFAULT_PROCESSING_URL%>" method="POST">
            <input name="<%=BasicUserApprovalFilter.DEFAULT_APPROVAL_REQUEST_PARAMETER%>"
                   value="<%=BasicUserApprovalFilter.DEFAULT_APPROVAL_PARAMETER_VALUE%>" type="hidden"/>
            <label><input name="authorize" value="Authorize" type="submit"></label>
        </form>
        <form id="denialForm" name="denialForm"
              action="<%=request.getContextPath() + VerificationCodeFilter.DEFAULT_PROCESSING_URL%>" method="POST">
            <input name="<%=BasicUserApprovalFilter.DEFAULT_APPROVAL_REQUEST_PARAMETER%>"
                   value="not_<%=BasicUserApprovalFilter.DEFAULT_APPROVAL_PARAMETER_VALUE%>" type="hidden"/>
            <label><input name="deny" value="Deny" type="submit"></label>
        </form>
    </authz:authorize>
</div>
</body>
</html>

Finally, I needed to create src/main/webapp/login.jsp to allow users to login.

<%@ page language="java" pageEncoding="UTF-8" contentType="text/html;charset=utf-8" %>
<%@ taglib uri="http://java.sun.com/jsp/jstl/core" prefix="c" %>
<%@ taglib uri="http://java.sun.com/jsp/jstl/fmt" prefix="fmt" %>
<%@ taglib uri="http://java.sun.com/jsp/jstl/core" prefix="c" %>

<html>
<head>
    <title>Login</title>
    <link rel="stylesheet" type="text/css" media="all"
          href="http://demo.appfuse.org/appfuse-struts/styles/simplicity/theme.css"/>
    <style type="text/css">
        h1 {
            margin-left: -300px;
            margin-top: 50px
        }
    </style>
</head>
<body>
<h1>Login</h1>

<form method="post" id="loginForm" action="<c:url value='/j_security_check'/>">
    <fieldset style="padding-bottom: 0">
        <ul>
            <c:if test="${param.error != null}">
                <li class="error">
                    ${sessionScope.SPRING_SECURITY_LAST_EXCEPTION.message}
                </li>
            </c:if>
            <li>
                <label for="j_username" class="required desc">
                    Username <span class="req">*</span>
                </label>
                <input type="text" class="text medium" name="j_username"
                       id="j_username" tabindex="1"/>
            </li>

            <li>
                <label for="j_password" class="required desc">
                    Password <span class="req">*</span>
                </label>
                <input type="password" class="text medium" name="j_password"
                       id="j_password" tabindex="2"/>
            </li>
            <li>
                <input type="submit" class="button" name="login" value="Login"
                       tabindex="3"/>
            </li>
        </ul>
    </fieldset>
</form>
</body>
</html>

All the changes described in the above section are necessary to implement OAuth if you create a project with AppFuse WS 2.1. It may seem like a lot of code, but I was able to copy/paste and get it all working in an app in under 5 minutes. Hopefully you can do the same. I'm also considering adding it by default to the next version of AppFuse. Now let's look at integrating OAuth into a client to authenticate and retrieve data from this application.

Authenticate and Retrieve Data with Client
I originally thought my GWT OAuth application would provide a nice client. However, after 30 minutes of trying to get GWT 1.7.1 and the GWT Maven plugin (1.1) working with my 64-bit Java 6 JDK on OS X, I gave up. So I opted to use the Ajax Login application I've been using in my recent security tutorials.

In this example, I used OAuth2RestTemplate from Spring Security OAuth. While this works, and works well, I'd still like to get things working with GWT (or jQuery) to demonstrate how to do it from a pure client-side perspective.

To begin, I got the latest source of Ajax Login from GitHub (as of this morning) and made some changes. First of all, I added the Spring Security OAuth dependencies to pom.xml:

<repository>
    <id>spring-milestone</id>
    <url>http://s3.amazonaws.com/maven.springframework.org/milestone</url>
</repository>
...
<dependency>
    <groupId>org.springframework.security.oauth</groupId>
    <artifactId>spring-security-oauth</artifactId>
    <version>1.0.0.M3</version>
    <exclusions>
        <exclusion>
            <groupId>org.springframework</groupId>
            <artifactId>spring-beans</artifactId>
        </exclusion>
        <exclusion>
            <groupId>org.springframework</groupId>
            <artifactId>spring-context</artifactId>
        </exclusion>
        <exclusion>
            <groupId>org.springframework</groupId>
            <artifactId>spring-core</artifactId>
        </exclusion>
    </exclusions>
</dependency>

Then I modified src/main/webapp/WEB-INF/security.xml and added an OAuth Token Service and defined the location of the OAuth server.

<?xml version="1.0" encoding="UTF-8"?>
<beans:beans xmlns="http://www.springframework.org/schema/security"
             xmlns:xsi="http://www.w3.org/2001/XMLSchema-instance"
             xmlns:beans="http://www.springframework.org/schema/beans"
             xmlns:oauth="http://www.springframework.org/schema/security/oauth2"
             xsi:schemaLocation="http://www.springframework.org/schema/beans http://www.springframework.org/schema/beans/spring-beans-3.0.xsd
              http://www.springframework.org/schema/security http://www.springframework.org/schema/security/spring-security-3.0.xsd
              http://www.springframework.org/schema/security/oauth2 http://www.springframework.org/schema/security/spring-security-oauth2.xsd">

...
    <oauth:client token-services-ref="oauth2TokenServices"/>

    <beans:bean id="oauth2TokenServices"
                class="org.springframework.security.oauth2.consumer.token.InMemoryOAuth2ClientTokenServices"/>

    <oauth:resource id="appfuse" type="authorization_code" clientId="ajax-login"
                    accessTokenUri="http://localhost:9000/appfuse-oauth/oauth/authorize"
                    userAuthorizationUri="http://localhost:9000/appfuse-oauth/oauth/user/authorize"/>

Next, I created a Controller that uses OAuth2RestTemplate to make the request and get the data from the AppFuse OAuth application's API. I created src/main/java/org/appfuse/examples/webapp/oauth/UsersApiController.java and filled it with the following code:

package org.appfuse.examples.webapp.oauth;

import org.appfuse.model.User;
import org.springframework.beans.factory.annotation.Autowired;
import org.springframework.beans.factory.annotation.Qualifier;
import org.springframework.security.core.context.SecurityContextHolder;
import org.springframework.security.oauth2.common.exceptions.InvalidTokenException;
import org.springframework.security.oauth2.consumer.*;
import org.springframework.security.oauth2.consumer.token.OAuth2ClientTokenServices;
import org.springframework.stereotype.Controller;
import org.springframework.web.bind.annotation.RequestMapping;
import org.springframework.web.bind.annotation.RequestMethod;
import org.springframework.web.bind.annotation.ResponseBody;

import java.util.ArrayList;
import java.util.List;

@RequestMapping("/appfuse/users")
@Controller
public class UsersApiController {

    private OAuth2RestTemplate apiRestTemplate;
    @Autowired
    private OAuth2ClientTokenServices tokenServices;

    private static final String REMOTE_DATA_URL = "http://localhost:9000/appfuse-oauth/api/users";

    @Autowired
    public UsersApiController(OAuth2ProtectedResourceDetails resourceDetails) {
        this.apiRestTemplate = new OAuth2RestTemplate(resourceDetails);
    }

    @RequestMapping(method = RequestMethod.GET)
    @ResponseBody
    public List<User> getUsers() {
        try {
            List users = apiRestTemplate.getForObject(REMOTE_DATA_URL, List.class);
            return new ArrayList<User>(users);
        } catch (InvalidTokenException badToken) {
            //we've got a bad token, probably because it's expired.
            OAuth2ProtectedResourceDetails resource = apiRestTemplate.getResource();
            OAuth2SecurityContext context = OAuth2SecurityContextHolder.getContext();
            if (context != null) {
                // this one is kind of a hack for this application
                // the problem is that the sparklr photos page doesn't remove the 'code=' request parameter.
                ((OAuth2SecurityContextImpl) context).setVerificationCode(null);
            }
            //clear any stored access tokens...
            tokenServices.removeToken(SecurityContextHolder.getContext().getAuthentication(), resource);
            //go get a new access token...
            throw new OAuth2AccessTokenRequiredException(resource);
        }
    }
}

At this point, I thought everything would work and I spent quite some time banging my head against the wall when it didn't. As I was composing an email to the Enunciate users mailing list, I realized the issue. It appeared to be working, but from the server side, and the redirect back to the client was not happening. The Ajax Login app uses UrlRewriteFilter (for pretty URLs) to redirect from /app/* to /$1 and this redirect was losing the code parameter in the URL.

<rule>
    <from>/app/**</from>
    <to last="true" type="redirect">%{context-path}/$1</to>
</rule>

To fix this, I added use-query-string="true" to the root element in src/main/webapp/WEB-INF/urlrewrite.xml:

<urlrewrite default-match-type="wildcard" use-query-string="true">

After making all these changes, I ran mvn jetty:run on both apps and opened http://localhost:8080/appfuse/users in my browser. It all worked and a smile crept across my face. I've checked in the client changes into ajax-login on GitHub and the appfuse-oauth example into AppFuse Demos on Google Code. If you'd like to see this example in action, I'd encourage you to checkout both projects and let me know if you find any issues.

Posted in Java at Jul 05 2011, 10:56:48 AM MDT 4 Comments

Java Web Application Security - Part II: Spring Security Login Demo

Last week, I wrote a tutorial on how to implement Security in Java EE 6. This week, I'd like to show you how to implement the same features using Spring Security. Before I begin, I'd like to explain my reason for writing this article.

Last month, I presented a talk on Java Web Application Security at the Utah JUG (UJUG). As part of that presentation, I did a number of demos about how to implement security with Java EE 6, Spring Security and Apache Shiro. I told the audience that I would post the presentation and was planning on recording screencasts of the various demos so the online version of the presentation would make more sense.

Today, I've finished the second screencast showing how to implement security with Spring Security. Below is the presentation (with the screencast embedded on slide 16) as well as a step-by-step tutorial.


Spring Security Login Tutorial

Download and Run the Application
To begin, download the application you'll be implementing security in. This app is a stripped-down version of the Ajax Login application I wrote for my article on Implementing Ajax Authentication using jQuery, Spring Security and HTTPS. You'll need Java 6 and Maven installed to run the app. Run it using mvn jetty:run and open http://localhost:8080 in your browser. You'll see it's a simple CRUD application for users and there's no login required to add or delete users.

Implement Basic Authentication
The first step is to protect the list screen so people have to login to view users. To do this, you'll need to create a Spring context file that contains Spring Security's configuration. Create src/main/webapp/WEB-INF/security.xml and populate it with the contents below:

  <?xml version="1.0" encoding="UTF-8"?>
  <beans:beans xmlns="http://www.springframework.org/schema/security"
               xmlns:xsi="http://www.w3.org/2001/XMLSchema-instance"
               xmlns:beans="http://www.springframework.org/schema/beans"
               xsi:schemaLocation="http://www.springframework.org/schema/beans http://www.springframework.org/schema/beans/spring-beans-3.0.xsd
                http://www.springframework.org/schema/security http://www.springframework.org/schema/security/spring-security-3.0.xsd">

      <!-- New in Spring Security 3.1 -->
      <!-- <http pattern="/css/**" security="none"/> -->

      <http auto-config="true">
          <intercept-url pattern="/app/users" access="ROLE_USER,ROLE_ADMIN"/>
          <http-basic/>
      </http>

      <authentication-manager alias="authenticationManager">
          <authentication-provider>
              <password-encoder hash="sha"/>
              <user-service>
                  <user name="user" password="12dea96fec20593566ab75692c9949596833adc9" authorities="ROLE_USER"/>
                  <user name="admin" password="d033e22ae348aeb5660fc2140aec35850c4da997" authorities="ROLE_ADMIN"/>
              </user-service>
          </authentication-provider>
      </authentication-manager>

      <!-- Override userSecurityAdvice bean in appfuse-service to allow any role to update a user. -->
      <beans:bean id="userSecurityAdvice" class="org.appfuse.examples.webapp.security.UserSecurityAdvice"/>
  </beans:beans>

The last bean, userSecurityAdvice, is an aspect that's needed to override some behavior in AppFuse. You won't need this normally when implementing Spring Security.

Next, open src/main/webapp/WEB-INF/web.xml and add Spring's DelegatingFilterProxy:

<filter>
    <filter-name>securityFilter</filter-name>
    <filter-class>org.springframework.web.filter.DelegatingFilterProxy</filter-class>
    <init-param>
        <param-name>targetBeanName</param-name>
        <param-value>springSecurityFilterChain</param-value>
    </init-param>
</filter>

And add its filter-mapping just after the rewriteFilter in the filter-mappings section (order is important!):

<filter-mapping>
    <filter-name>rewriteFilter</filter-name>
    <url-pattern>/*</url-pattern>
</filter-mapping>
<filter-mapping>
    <filter-name>securityFilter</filter-name>
    <url-pattern>/*</url-pattern>
    <dispatcher>REQUEST</dispatcher>
    <dispatcher>FORWARD</dispatcher>
    <dispatcher>INCLUDE</dispatcher>
</filter-mapping>

You don't need to add any dependencies in your pom.xml is because this project depends on AppFuse, which already contains these dependencies.

At this point, if you restart Jetty (Ctrl+C and jetty:run again), you should be prompted to login when you click on the "Users" tab. Enter admin/admin to login. Spring Security is a bit easier to configure than Java EE 6 out-of-the-box, mostly because it doesn't require you to configure your container.

After logging in, you can try to logout by clicking the "Logout" link in the top-right corner. This calls a LogoutController with the following code that logs the user out.

public void logout(HttpServletResponse response) throws ServletException, IOException {
    request.getSession().invalidate();
    response.sendRedirect(request.getContextPath()); 
}

NOTE: Spring Security has a way to configure "logout" to match a URL and get rid of a class like LogoutController. Since it was already in the project, I don't cover that in this tutorial.

You'll notice that clicking this link doesn't log you out, even though the session is invalidated. The only way to logout with basic authentication is to close the browser. In order to get the ability to logout, as well as to have more control over the look-and-feel of the login, you can implement form-based authentication. Before you implement form-based authentication, I'd like to show you how easy it is to force SSL with Spring Security.

Force SSL
Spring Security allows you to switch between secure (https) and non-secure (http) protocols using a simple requires-channel attribute on the <intercept-url> element. Possible values are "http", "https" and "any". Add requires-channel="https" to your security.xml file:

<intercept-url pattern="/app/users" access="ROLE_USER,ROLE_ADMIN" requires-channel="https"/>

In order for this to work, you have to configure Jetty to listen on an SSL port. Add the following just after the jetty-maven-plugin's </webAppConfig> element in your pom.xml:

<connectors>
    <connector implementation="org.eclipse.jetty.server.nio.SelectChannelConnector">
        <forwarded>true</forwarded>
        <port>8080</port>
    </connector>
    <connector implementation="org.eclipse.jetty.server.ssl.SslSelectChannelConnector">
        <forwarded>true</forwarded>
        <port>8443</port>
        <maxIdleTime>60000</maxIdleTime>
        <keystore>${project.build.directory}/ssl.keystore</keystore>
        <password>appfuse</password>
        <keyPassword>appfuse</keyPassword>
    </connector>
</connectors>

The keystore must be generated for Jetty to start successfully, so add the keytool-maven-plugin just above the jetty-maven-plugin in pom.xml.

<plugin>
    <groupId>org.codehaus.mojo</groupId>
    <artifactId>keytool-maven-plugin</artifactId>
    <version>1.0</version>
    <executions>
        <execution>
            <phase>generate-resources</phase>
            <id>clean</id>
            <goals>
                <goal>clean</goal>
            </goals>
        </execution>
        <execution>
            <phase>generate-resources</phase>
            <id>genkey</id>
            <goals>
                <goal>genkey</goal>
            </goals>
        </execution>
    </executions>
    <configuration>
        <keystore>${project.build.directory}/ssl.keystore</keystore>
        <dname>cn=localhost</dname>
        <keypass>appfuse</keypass>
        <storepass>appfuse</storepass>
        <alias>appfuse</alias>
        <keyalg>RSA</keyalg>
    </configuration>
</plugin>

Now if you restart Jetty, go to http://localhost:8080 and click on the "Users" tab, you'll be prompted to accept the Untrusted Certificate and then redirected to https://localhost:8443/users after logging in. This is an improvement on Java EE's user-data-constraint for two reasons:

  • You can switch between http and https protocols. With Java EE, you can only force https. You have to write a custom filter to switch back to http.
  • Redirecting to https actually works. With Java EE (on Jetty at least), a 403 is returned instead of redirecting the request.

Now let's look at how to have more control over the look-and-feel of the login screen, as well as how to make logout work with form-based authentication.

Implement Form-based Authentication
To change from basic to form-based authentication, you simply have to add a <form-login> element in security.xml's <http> element:

<http auto-config="true">
    <intercept-url pattern="/app/users" access="ROLE_USER,ROLE_ADMIN" requires-channel="https"/>
    <form-login login-page="/login" authentication-failure-url="/login?error=true"
                login-processing-url="/j_security_check"/>
    <http-basic/>
</http>

You can leave the <http-basic> element since Spring Security is smart enough to serve up the form for browsers and use Basic Authentication for clients such as web services. The login.jsp page (that /login forwards to) already exists in the project, in the src/main/webapp directory. The forwarding is done by the UrlRewriteFilter with the following configuration in src/main/webapp/WEB-INF/urlrewrite.xml.

<rule>
    <from>/login</from>
    <to>/login.jsp</to>
</rule>

This JSP has 3 important elements: 1) a form that submits to "/j_security_check", 2) an input element named "j_username" and 3) an input element named "j_password". If you restart Jetty, you'll now be prompted to login with this JSP instead of the basic authentication dialog.

Add Remember Me
Remember Me is a feature you see in many web applications today. It's usually a checkbox on the login form that allows you to auto-login the next time you visit a site. This feature doesn't exist in Java EE security, but it does exist in Spring Security. To enable it, add the following just below <form-login> in security.xml:

<remember-me user-service-ref="userDao" key="e37f4b31-0c45-11dd-bd0b-0800200c9a66"/>

Next, open src/main/webapp/login.jsp and change the name of the "remember me" checkbox to be _spring_security_remember_me:

<input type="checkbox" name="_spring_security_remember_me" id="rememberMe"/>

After making these changes, you should be able to restart Jetty, go to http://localhost:8080/users, enter admin/adminjdbc, check the Remember Me checkbox and login. Then close your browser, and repeat the process. This time, you won't be prompted to login. For more information on this feature, see Spring Security's Remember Me documentation.

While storing usernames and passwords in a file is convenient for demos, it's not very real-world-ish. The next section shows you how to configure Spring Security to use a database for its user store.

Store Users in a Database
To store your users in a database instead of file, you'll need to add a user-service-ref attribute to the <authentication-provider> element. You can also delete the <user-service> element.

<authentication-manager alias="authenticationManager">
    <authentication-provider user-service-ref="userDao">
        <password-encoder hash="sha"/>
    </authentication-provider>
</authentication-manager>

The "userDao" bean is provided by AppFuse and its UserDaoHibernate.java class. This class implements Spring Security's UserDetailsService interface. With Java EE, I had to configure a database connection and make sure the JDBC Driver was in my container's classpath. With Spring Security, you can talk to the database you already have configured in your application.

Of course, you could do this with Java EE too. One thing I neglected to show in my last tutorial was that 1) the app uses H2 and 2) I had to configure Java EE's database to be MySQL. This was because when I tried to access my H2 instance, I got an error about two threads trying to access it at once.
2011-05-13 08:47:29.081:WARN::UserRealm Java EE Login could not connect to database; will try later
org.h2.jdbc.JdbcSQLException: Database may be already in use: "Locked by another process". 
        Possible solutions: close all other connection(s); use the server mode [90020-154]
	at org.h2.message.DbException.getJdbcSQLException(DbException.java:327)
	at org.h2.message.DbException.get(DbException.java:167)
	at org.h2.message.DbException.get(DbException.java:144)
	at org.h2.store.FileLock.getExceptionAlreadyInUse(FileLock.java:443)
	at org.h2.store.FileLock.lockFile(FileLock.java:338)
	at org.h2.store.FileLock.lock(FileLock.java:134)
	at org.h2.engine.Database.open(Database.java:535)
	at org.h2.engine.Database.openDatabase(Database.java:218)

The password for the "admin" user is configured in src/test/resources/sample-data.xml and it's loaded by DbUnit before the application starts. You can view your pom.xml and the dbunit-maven-plugin's configuration if you're interested in learning how this is done. The password is currently configured to "adminjdbc", but you can reset it by generating a new password and modifying sample-data.xml.

Now if you restart Jetty, you should be able to login with admin/adminjdbc and view the list of users.

Summary
In this tutorial, you learned how to implement authentication using Spring Security 3.0.5. In addition to the basic XML configuration, Spring Security also provides a AOP support and annotations you can use to secure methods. It also has many more features than standard Java EE Security. In my opinion, it's the most mature security framework we have in Java today. Currently, I think its reference documentation is the best place to learn more.

There are a few limitations I found with Spring Security:

  • The authentication mechanism (file, database, ldap, etc.) is contained in the WAR
  • Securing methods only works on Spring beans
  • Remember Me doesn't work in my screencast (because I forgot to rename the checkbox in login.jsp)

Of course, you can configure Spring to load its configuration from outside the WAR (e.g. a file or JNDI), but it's not as easy as including the configuration in your app.

In the next couple weeks, I'll post Part III of this series, where I'll show you how to implement this same set of features using Apache Shiro. In the meantime, please let me know if you have any questions.

I created the screencasts with Camtasia. For small screens, and embedding in the presentation, I created it at 50% and used the SmartFocus feature to zoom in and out during the demo. For larger screens, I published another screencast at 100%, in HD. If you have a preference for which screencast is better, I'd love to hear about it.

Posted in Java at May 13 2011, 09:20:51 AM MDT 10 Comments