Matt RaibleMatt Raible is a writer with a passion for software. Connect with him on LinkedIn.

The Angular Mini-Book The Angular Mini-Book is a guide to getting started with Angular. You'll learn how to develop a bare-bones application, test it, and deploy it. Then you'll move on to adding Bootstrap, Angular Material, continuous integration, and authentication.

Spring Boot is a popular framework for building REST APIs. You'll learn how to integrate Angular with Spring Boot and use security best practices like HTTPS and a content security policy.

For book updates, follow @angular_book on Twitter.

The JHipster Mini-Book The JHipster Mini-Book is a guide to getting started with hip technologies today: Angular, Bootstrap, and Spring Boot. All of these frameworks are wrapped up in an easy-to-use project called JHipster.

This book shows you how to build an app with JHipster, and guides you through the plethora of tools, techniques and options you can use. Furthermore, it explains the UI and API building blocks so you understand the underpinnings of your great application.

For book updates, follow @jhipster-book on Twitter.

10+ YEARS


Over 10 years ago, I wrote my first blog post. Since then, I've authored books, had kids, traveled the world, found Trish and blogged about it all.
You searched this site for "beans". 112 entries found.

You can also try this same search on Google.

Converting an Application to JHipster

I've been intrigued by JHipster ever since I first tried it last September. I'd worked with AngularJS and Spring Boot quite a bit, and I liked the idea that someone had combined them, adding some nifty features along the way. When I spoke about AngularJS earlier this month, I included a few slides on JHipster near the end of the presentation.

This week, I received an email from someone who attended that presentation.

Hey Matt,
We met a few weeks back when you presented at DOSUG. You were talking about JHipster which I had been eyeing for a few months and wanted your quick .02 cents.

I have built a pretty heavy application over the last 6 months that is using mostly the same tech as JHipster.

  • Java
  • Spring
  • JPA
  • AngularJS
  • Compass
  • Grunt

It's ridiculously close for most of the tech stack. So, I was debating rolling it over into a JHipster app to make it a more familiar stack for folks. My concern is that it I will spend months trying to shoehorn it in for not much ROI. Any thoughts on going down this path? What are the biggest issues you've seen in using JHipster? It seems pretty straightforward except for the entity generators. I'm concerned they are totally different than what I am using.

The main difference in what I'm doing compared to JHipster is my almost complete use of groovy instead of old school Java in the app. I would have to be forced into going back to regular java beans... Thoughts?

I replied with the following advice:

JHipster is great for starting a project, but I don't know that it buys you much value after the first few months. I would stick with your current setup and consider JHipster for your next project. I've only prototyped with it, I haven't created any client apps or put anything in production. I have with Spring Boot and AngularJS though, so I like that JHipster combines them for me.

JHipster doesn't generate Scala or Groovy code, but you could still use them in a project as long as you had Maven/Gradle configured properly.

You might try generating a new app with JHipster and examine how they're doing this. At the very least, it can be a good learning tool, even if you're not using it directly.

Java Hipsters: Do you agree with this advice? Have you tried migrating an existing app to JHipster? Are any of you using Scala or Groovy in your JHipster projects?

Posted in Java at Feb 12 2015, 09:28:59 AM MST 4 Comments

Developing Services with Apache Camel - Part III: Integrating Spring 4 and Spring Boot

Spring Boot This article is the third in a series on Apache Camel and how I used it to replace IBM Message Broker for a client. I used Apache Camel for several months this summer to create a number of SOAP services. These services performed various third-party data lookups for our customers. For previous articles, see Part I: The Inspiration and Part II: Creating and Testing Routes.

In late June, I sent an email to my client's engineering team. Its subject: "External Configuration and Microservices". I recommended we integrate Spring Boot into the Apache Camel project I was working on. I told them my main motivation was its external configuration feature. I also pointed out its container-less WAR feature, where Tomcat (or Jetty) is embedded in the WAR and you can start your app with "java -jar appname.war". I mentioned microservices and that Spring Boot would make it easy to split the project into a project-per-service structure if we wanted to go that route. I then asked two simple questions:

  1. Is it OK to integrate Spring Boot?
  2. Should I split the project into microservices?

Both of these suggestions were well received, so I went to work.

[Read More]

Posted in Java at Oct 08 2014, 07:13:18 AM MDT 3 Comments

Developing Services with Apache Camel - Part II: Creating and Testing Routes

Apache Camel This article is the second in a series on Apache Camel and how I used it to replace IBM Message Broker for a client. The first article, Developing Services with Apache Camel - Part I: The Inspiration, describes why I chose Camel for this project.

To make sure these new services correctly replaced existing services, a 3-step approach was used:

  1. Write an integration test pointing to the old service.
  2. Write the implementation and a unit test to prove it works.
  3. Write an integration test pointing to the new service.

I chose to start by replacing the simplest service first. It was a SOAP Service that talked to a database to retrieve a value based on an input parameter. To learn more about Camel and how it works, I started by looking at the CXF Tomcat Example. I learned that Camel is used to provide routing of requests. Using its CXF component, it can easily produce SOAP web service endpoints. An end point is simply an interface, and Camel takes care of producing the implementation.

[Read More]

Posted in Java at Sep 30 2014, 10:05:38 AM MDT 9 Comments

A Webapp Makeover with Spring 4 and Spring Boot

A typical Maven and Spring web application has a fair amount of XML and verbosity to it. Add in Jersey and Spring Security and you can have hundreds of lines of XML before you even start to write your Java code. As part of a recent project, I was tasked with upgrading a webapp like this to use Spring 4 and Spring Boot. I also figured I'd try to minimize the XML.

This is my story on how I upgraded to Spring 4, Jersey 2, Java 8 and Spring Boot 0.5.0 M6.

When I started, the app was using Spring 3.2.5, Spring Security 3.1.4 and Jersey 1.18. The pom.xml had four Jersey dependencies, three Spring dependencies and three Spring Security dependencies, along with a number of exclusions for "jersey-spring".

Upgrading to Spring 4
Upgrading to Spring 4 was easy, I changed the version property to 4.0.0.RC2 and added the new Spring bill of materials to my pom.xml. I also add the Spring milestone repo since Spring 4 won't be released to Maven central until tomorrow.

<dependencyManagement>
    <dependencies>
        <dependency>
            <groupId>org.springframework</groupId>
            <artifactId>spring-framework-bom</artifactId>
            <version>${spring.framework.version}</version>
            <type>pom</type>
            <scope>import</scope>
        </dependency>
    </dependencies>
</dependencyManagement>

<repositories>
    <repository>
        <id>spring-milestones</id>
        <url>http://repo.spring.io/milestone</url>
        <snapshots>
            <enabled>true</enabled>
        </snapshots>
    </repository>
</repositories>
[Read More]

Posted in Java at Dec 11 2013, 12:47:15 PM MST 7 Comments

Integrating OAuth with AppFuse and its REST API

One of the new features in AppFuse 2.1 is an appfuse-ws archetype. This archetype leverages Enunciate and CXF to create a project with a REST API and generated HTML documentation. Enunciate is a very useful tool, allowing you to develop web services with JAX-RS and JAX-WS annotations and have all types of client libraries generated. For me, it seems very useful for developing the backend of SOFEA (a.k.a. modern) applications.

Back in March, Ryan Heaton published a nice article on Securing Web Services in an Enunciate application. I decided to take his tutorial a step further and not only secure my web services, but also to integrate with OAuth 2. In this tutorial, I'll show you how to create a new application with AppFuse WS, secure it, add OAuth support, and then use a client app to authenticate and retrieve data.

Create a New AppFuse WS Project
To begin, I visited the Create AppFuse Archetypes page and created a new application using the "Web Services Only" option in the Web Framework dropdown. Below is the command I used to create the "appfuse-oauth" project.

mvn archetype:generate -B -DarchetypeGroupId=org.appfuse.archetypes \
-DarchetypeArtifactId=appfuse-ws-archetype -DarchetypeVersion=2.1.0 \
-DgroupId=org.appfuse.example -DartifactId=appfuse-oauth 

After doing this, I started the app using mvn jetty:run and confirmed it started OK. At this point, I was able to view the generated documentation for the application at http://localhost:8080. The screenshot below shows what the app looks like at this point.

AppFuse WS Homepage

NOTE: You might notice the REST endpoint of /{username}. This is a bug in AppFuse 2.1.0 and has been fixed in SVN. It does not affect this tutorial.

Integrate Spring Security and OAuth
I originally tried to integrate Spring Security with Enunciate's Securing Web Services Tutorial. However, it only secures endpoints and doesn't do enough filtering for OAuth support, so I ended up using a custom web.xml. I put this file in src/main/resources and loaded it in my enunciate.xml file. I also upgraded Spring Security and imported my security.xml file.

  <?xml version="1.0"?>
  <enunciate xmlns:xsi="http://www.w3.org/2001/XMLSchema-instance"
             xsi:noNamespaceSchemaLocation="http://enunciate.codehaus.org/schemas/enunciate-1.22.xsd">
      ...
      <webapp mergeWebXML="src/main/resources/web.xml"/>
      <modules>
      ...
          <spring-app disabled="false" springVersion="3.0.5.RELEASE">
              <springImport uri="classpath:/applicationContext-resources.xml"/>
              <springImport uri="classpath:/applicationContext-dao.xml"/>
              <springImport uri="classpath:/applicationContext-service.xml"/>
              <springImport uri="classpath:/applicationContext.xml"/>
              <springImport uri="classpath:/security.xml"/>
          </spring-app>
      </modules>
  </enunciate>

Then I created src/main/resources/web.xml with a filter for Spring Security and a DispatcherServlet for OAuth support.

<?xml version="1.0" encoding="UTF-8"?>
<web-app xmlns="http://java.sun.com/xml/ns/javaee"
         xmlns:xsi="http://www.w3.org/2001/XMLSchema-instance"
         xsi:schemaLocation="http://java.sun.com/xml/ns/javaee http://java.sun.com/xml/ns/javaee/web-app_3_0.xsd"
         version="3.0">

    <filter>
        <filter-name>securityFilter</filter-name>
        <filter-class>org.springframework.web.filter.DelegatingFilterProxy</filter-class>
        <init-param>
            <param-name>targetBeanName</param-name>
            <param-value>springSecurityFilterChain</param-value>
        </init-param>
    </filter>

    <filter-mapping>
        <filter-name>securityFilter</filter-name>
        <url-pattern>/*</url-pattern>
    </filter-mapping>

    <servlet>
        <servlet-name>appfuse-oauth</servlet-name>
        <servlet-class>org.springframework.web.servlet.DispatcherServlet</servlet-class>
        <load-on-startup>1</load-on-startup>
    </servlet>

    <servlet-mapping>
        <servlet-name>appfuse-oauth</servlet-name>
        <url-pattern>/oauth/*</url-pattern>
    </servlet-mapping>
</web-app>

Next, I created a src/main/resources/security.xml and used it to secure my API, specify a login page, supply the users and integrate OAuth (see the last 4 beans below).

<?xml version="1.0" encoding="UTF-8"?>
<beans:beans xmlns="http://www.springframework.org/schema/security"
             xmlns:xsi="http://www.w3.org/2001/XMLSchema-instance"
             xmlns:beans="http://www.springframework.org/schema/beans"
             xmlns:oauth="http://www.springframework.org/schema/security/oauth2"
             xsi:schemaLocation="http://www.springframework.org/schema/beans http://www.springframework.org/schema/beans/spring-beans.xsd
                           http://www.springframework.org/schema/security http://www.springframework.org/schema/security/spring-security.xsd
                           http://www.springframework.org/schema/security/oauth2 http://www.springframework.org/schema/security/spring-security-oauth2.xsd">

    <http auto-config="true">
        <intercept-url pattern="/api/**" access="ROLE_USER"/>
        <intercept-url pattern="/oauth/**" access="ROLE_USER"/>
        <intercept-url pattern="/**" access="IS_AUTHENTICATED_ANONYMOUSLY"/>
        <form-login login-page="/login.jsp" authentication-failure-url="/login.jsp?error=true"
                    login-processing-url="/j_security_check"/>
    </http>

    <authentication-manager>
        <authentication-provider>
            <user-service>
                <user name="admin" password="admin" authorities="ROLE_USER,ROLE_ADMIN"/>
                <user name="user" password="user" authorities="ROLE_USER"/>
            </user-service>
        </authentication-provider>
    </authentication-manager>

    <!--hook up the spring security filter chain-->
    <beans:alias name="springSecurityFilterChain" alias="securityFilter"/>

    <beans:bean id="tokenServices"
                class="org.springframework.security.oauth2.provider.token.InMemoryOAuth2ProviderTokenServices">
        <beans:property name="supportRefreshToken" value="true"/>
    </beans:bean>

    <oauth:provider client-details-service-ref="clientDetails" token-services-ref="tokenServices">
        <oauth:verification-code user-approval-page="/oauth/confirm_access"/>
    </oauth:provider>

    <oauth:client-details-service id="clientDetails">
        <!--<oauth:client clientId="my-trusted-client" authorizedGrantTypes="password,authorization_code,refresh_token"/>
        <oauth:client clientId="my-trusted-client-with-secret"
                      authorizedGrantTypes="password,authorization_code,refresh_token" secret="somesecret"/>
        <oauth:client clientId="my-less-trusted-client" authorizedGrantTypes="authorization_code"/>-->
        <oauth:client clientId="ajax-login" authorizedGrantTypes="authorization_code"/>
    </oauth:client-details-service>
</beans:beans>

I used the OAuth for Spring Security sample apps to figure this out. In this example, I used authorizedGrantTypes="authorization_code", but you can see from the commented <oauth:client> elements above that there's a few different options. You should also note that the clientId is hard-coded to "ajax-login", signifying I only want to allow a single application to authenticate.

At this point, I'd like to give a shoutout to Ryan Heaton for creating both Enunciate and Spring Security's OAuth support. Nice work Ryan!

At this point, I needed to do a number of additional tasks to finish integrating oauth. The first was to modify the Jetty Plugin's configuration to 1) run on port 9000, 2) load my custom files and 3) allow jetty:run to recognize Enunciate's generated files. Below is the final configuration in my pom.xml.

<plugin>
    <groupId>org.mortbay.jetty</groupId>
    <artifactId>maven-jetty-plugin</artifactId>
    <version>6.1.26</version>
    <configuration>
        <connectors>
            <connector implementation="org.mortbay.jetty.nio.SelectChannelConnector">
                <port>9000</port>
                <maxIdleTime>60000</maxIdleTime>
            </connector>
        </connectors>
        <webAppConfig>
            <baseResource implementation="org.mortbay.resource.ResourceCollection">
                <resourcesAsCSV>
                    ${basedir}/src/main/webapp,
                    ${project.build.directory}/${project.build.finalName}
                </resourcesAsCSV>
            </baseResource>
            <contextPath>/appfuse-oauth</contextPath>
        </webAppConfig>
        <webXml>${project.build.directory}/${project.build.finalName}/WEB-INF/web.xml</webXml>
    </configuration>
</plugin>

Next, I added the necessary OAuth dependencies for Spring Security to my pom.xml. Since the latest release is a milestone release, I had to add Spring's milestone repo too.

<repository>
    <id>spring-milestone</id>
    <url>http://s3.amazonaws.com/maven.springframework.org/milestone</url>
</repository>
...
<dependency>
    <groupId>org.springframework.security</groupId>
    <artifactId>spring-security-taglibs</artifactId>
    <version>${spring.version}</version>
    <exclusions>
        <exclusion>
            <groupId>org.springframework</groupId>
            <artifactId>spring-web</artifactId>
        </exclusion>
        <exclusion>
            <groupId>org.springframework</groupId>
            <artifactId>spring-support</artifactId>
        </exclusion>
    </exclusions>
</dependency>
<dependency>
    <groupId>org.springframework.security.oauth</groupId>
    <artifactId>spring-security-oauth</artifactId>
    <version>1.0.0.M3</version>
    <exclusions>
        <exclusion>
            <groupId>org.springframework</groupId>
            <artifactId>spring-beans</artifactId>
        </exclusion>
        <exclusion>
            <groupId>org.springframework</groupId>
            <artifactId>spring-context</artifactId>
        </exclusion>
        <exclusion>
            <groupId>org.springframework</groupId>
            <artifactId>spring-core</artifactId>
        </exclusion>
    </exclusions>
</dependency>
<dependency>
    <groupId>org.springframework</groupId>
    <artifactId>spring-webmvc</artifactId>
    <version>${spring.version}</version>
</dependency>
<dependency>
    <groupId>javax.servlet</groupId>
    <artifactId>servlet-api</artifactId>
    <version>2.5</version>
    <scope>provided</scope>
</dependency>
<dependency>
    <groupId>javax.servlet</groupId>
    <artifactId>jstl</artifactId>
    <version>1.1.2</version>
</dependency>
<dependency>
    <groupId>taglibs</groupId>
    <artifactId>standard</artifactId>
    <version>1.1.2</version>
</dependency>

Since I named my DispatcherServlet "appfuse-oauth" in web.xml, I created a src/main/webapp/WEB-INF/appfuse-oauth-servlet.xml to configure Spring MVC. I had to create the src/main/webapp/WEB-INF directory.

<?xml version="1.0" encoding="UTF-8"?>
<beans xmlns="http://www.springframework.org/schema/beans"
       xmlns:xsi="http://www.w3.org/2001/XMLSchema-instance"
       xmlns:context="http://www.springframework.org/schema/context"
       xmlns:mvc="http://www.springframework.org/schema/mvc"
       xsi:schemaLocation="http://www.springframework.org/schema/beans http://www.springframework.org/schema/beans/spring-beans-3.0.xsd
                http://www.springframework.org/schema/context http://www.springframework.org/schema/context/spring-context-3.0.xsd
                http://www.springframework.org/schema/mvc http://www.springframework.org/schema/mvc/spring-mvc-3.0.xsd">

    <!-- Scans the classpath of this application for @Components to deploy as beans -->
    <context:component-scan base-package="org.appfuse.examples.webapp"/>

    <!-- Configures the @Controller programming model -->
    <mvc:annotation-driven/>

    <!-- Resolves view names to protected .jsp resources within the /WEB-INF/views directory -->
    <bean class="org.springframework.web.servlet.view.InternalResourceViewResolver">
        <property name="viewClass" value="org.springframework.web.servlet.view.JstlView"/>
        <property name="prefix" value="/"/>
        <property name="suffix" value=".jsp"/>
    </bean>
</beans>

In order to show the OAuth confirmation page, I needed to create src/main/java/org/appfuse/examples/webapp/AccessConfirmationController.java and map it to /oauth/confirm_access. I copied this from one of the sample projects and modified to use Spring's annotations.

package org.appfuse.examples.webapp;

import org.springframework.beans.factory.annotation.Autowired;
import org.springframework.security.oauth2.provider.ClientAuthenticationToken;
import org.springframework.security.oauth2.provider.ClientDetails;
import org.springframework.security.oauth2.provider.ClientDetailsService;
import org.springframework.security.oauth2.provider.verification.ClientAuthenticationCache;
import org.springframework.security.oauth2.provider.verification.DefaultClientAuthenticationCache;
import org.springframework.stereotype.Controller;
import org.springframework.web.bind.annotation.RequestMapping;
import org.springframework.web.bind.annotation.RequestMethod;
import org.springframework.web.servlet.ModelAndView;

import javax.servlet.http.HttpServletRequest;
import javax.servlet.http.HttpServletResponse;
import java.util.TreeMap;

/**
 * Controller for retrieving the model for and displaying the confirmation page
 * for access to a protected resource.
 *
 * @author Ryan Heaton
 */
@Controller
@RequestMapping("/confirm_access")
public class AccessConfirmationController {

    private ClientAuthenticationCache authenticationCache = new DefaultClientAuthenticationCache();
    @Autowired
    private ClientDetailsService clientDetailsService;

    @RequestMapping(method = RequestMethod.GET)
    protected ModelAndView confirm(HttpServletRequest request, HttpServletResponse response) throws Exception {
        ClientAuthenticationToken clientAuth = authenticationCache.getAuthentication(request, response);
        if (clientAuth == null) {
            throw new IllegalStateException("No client authentication request to authorize.");
        }

        TreeMap<String, Object> model = new TreeMap<String, Object>();
        ClientDetails client = clientDetailsService.loadClientByClientId(clientAuth.getClientId());
        model.put("auth_request", clientAuth);
        model.put("client", client);

        return new ModelAndView("access_confirmation", model);
    }
}

This controller delegates to src/main/webapp/access_confirmation.jsp. I created this file and filled it with code to display Accept and Deny buttons.

<%@ page import="org.springframework.security.core.AuthenticationException" %>
<%@ page import="org.springframework.security.oauth2.common.exceptions.UnapprovedClientAuthenticationException" %>
<%@ page import="org.springframework.security.oauth2.provider.verification.BasicUserApprovalFilter" %>
<%@ page import="org.springframework.security.oauth2.provider.verification.VerificationCodeFilter" %>
<%@ page import="org.springframework.security.web.WebAttributes" %>
<%@ taglib prefix="authz" uri="http://www.springframework.org/security/tags" %>
<%@ taglib uri="http://java.sun.com/jsp/jstl/core" prefix="c" %>
<html>
<head>
    <title>Confirm Access</title>
    <link rel="stylesheet" type="text/css" media="all"
          href="http://demo.appfuse.org/appfuse-struts/styles/simplicity/theme.css"/>
    <style type="text/css">
        h1 {
            margin-left: -300px;
            margin-top: 50px
        }
    </style>
</head>

<body>

<h1>Confirm Access</h1>

<div id="content">

    <% if (session.getAttribute(WebAttributes.AUTHENTICATION_EXCEPTION) != null && 
                 !(session.getAttribute(WebAttributes.AUTHENTICATION_EXCEPTION) instanceof UnapprovedClientAuthenticationException)) { %>
    <div class="error">
        <h2>Woops!</h2>

        <p>Access could not be granted.
            (<%= ((AuthenticationException) session.getAttribute(WebAttributes.AUTHENTICATION_EXCEPTION)).getMessage() %>)</p>
    </div>
    <% } %>
    <c:remove scope="session" var="SPRING_SECURITY_LAST_EXCEPTION"/>

    <authz:authorize ifAnyGranted="ROLE_USER,ROLE_ADMIN">
        <h2>Please Confirm</h2>

        <p>You hereby authorize "<c:out value="${client.clientId}" escapeXml="true"/>" to access your protected resources.</p>

        <form id="confirmationForm" name="confirmationForm"
              action="<%=request.getContextPath() + VerificationCodeFilter.DEFAULT_PROCESSING_URL%>" method="POST">
            <input name="<%=BasicUserApprovalFilter.DEFAULT_APPROVAL_REQUEST_PARAMETER%>"
                   value="<%=BasicUserApprovalFilter.DEFAULT_APPROVAL_PARAMETER_VALUE%>" type="hidden"/>
            <label><input name="authorize" value="Authorize" type="submit"></label>
        </form>
        <form id="denialForm" name="denialForm"
              action="<%=request.getContextPath() + VerificationCodeFilter.DEFAULT_PROCESSING_URL%>" method="POST">
            <input name="<%=BasicUserApprovalFilter.DEFAULT_APPROVAL_REQUEST_PARAMETER%>"
                   value="not_<%=BasicUserApprovalFilter.DEFAULT_APPROVAL_PARAMETER_VALUE%>" type="hidden"/>
            <label><input name="deny" value="Deny" type="submit"></label>
        </form>
    </authz:authorize>
</div>
</body>
</html>

Finally, I needed to create src/main/webapp/login.jsp to allow users to login.

<%@ page language="java" pageEncoding="UTF-8" contentType="text/html;charset=utf-8" %>
<%@ taglib uri="http://java.sun.com/jsp/jstl/core" prefix="c" %>
<%@ taglib uri="http://java.sun.com/jsp/jstl/fmt" prefix="fmt" %>
<%@ taglib uri="http://java.sun.com/jsp/jstl/core" prefix="c" %>

<html>
<head>
    <title>Login</title>
    <link rel="stylesheet" type="text/css" media="all"
          href="http://demo.appfuse.org/appfuse-struts/styles/simplicity/theme.css"/>
    <style type="text/css">
        h1 {
            margin-left: -300px;
            margin-top: 50px
        }
    </style>
</head>
<body>
<h1>Login</h1>

<form method="post" id="loginForm" action="<c:url value='/j_security_check'/>">
    <fieldset style="padding-bottom: 0">
        <ul>
            <c:if test="${param.error != null}">
                <li class="error">
                    ${sessionScope.SPRING_SECURITY_LAST_EXCEPTION.message}
                </li>
            </c:if>
            <li>
                <label for="j_username" class="required desc">
                    Username <span class="req">*</span>
                </label>
                <input type="text" class="text medium" name="j_username"
                       id="j_username" tabindex="1"/>
            </li>

            <li>
                <label for="j_password" class="required desc">
                    Password <span class="req">*</span>
                </label>
                <input type="password" class="text medium" name="j_password"
                       id="j_password" tabindex="2"/>
            </li>
            <li>
                <input type="submit" class="button" name="login" value="Login"
                       tabindex="3"/>
            </li>
        </ul>
    </fieldset>
</form>
</body>
</html>

All the changes described in the above section are necessary to implement OAuth if you create a project with AppFuse WS 2.1. It may seem like a lot of code, but I was able to copy/paste and get it all working in an app in under 5 minutes. Hopefully you can do the same. I'm also considering adding it by default to the next version of AppFuse. Now let's look at integrating OAuth into a client to authenticate and retrieve data from this application.

Authenticate and Retrieve Data with Client
I originally thought my GWT OAuth application would provide a nice client. However, after 30 minutes of trying to get GWT 1.7.1 and the GWT Maven plugin (1.1) working with my 64-bit Java 6 JDK on OS X, I gave up. So I opted to use the Ajax Login application I've been using in my recent security tutorials.

In this example, I used OAuth2RestTemplate from Spring Security OAuth. While this works, and works well, I'd still like to get things working with GWT (or jQuery) to demonstrate how to do it from a pure client-side perspective.

To begin, I got the latest source of Ajax Login from GitHub (as of this morning) and made some changes. First of all, I added the Spring Security OAuth dependencies to pom.xml:

<repository>
    <id>spring-milestone</id>
    <url>http://s3.amazonaws.com/maven.springframework.org/milestone</url>
</repository>
...
<dependency>
    <groupId>org.springframework.security.oauth</groupId>
    <artifactId>spring-security-oauth</artifactId>
    <version>1.0.0.M3</version>
    <exclusions>
        <exclusion>
            <groupId>org.springframework</groupId>
            <artifactId>spring-beans</artifactId>
        </exclusion>
        <exclusion>
            <groupId>org.springframework</groupId>
            <artifactId>spring-context</artifactId>
        </exclusion>
        <exclusion>
            <groupId>org.springframework</groupId>
            <artifactId>spring-core</artifactId>
        </exclusion>
    </exclusions>
</dependency>

Then I modified src/main/webapp/WEB-INF/security.xml and added an OAuth Token Service and defined the location of the OAuth server.

<?xml version="1.0" encoding="UTF-8"?>
<beans:beans xmlns="http://www.springframework.org/schema/security"
             xmlns:xsi="http://www.w3.org/2001/XMLSchema-instance"
             xmlns:beans="http://www.springframework.org/schema/beans"
             xmlns:oauth="http://www.springframework.org/schema/security/oauth2"
             xsi:schemaLocation="http://www.springframework.org/schema/beans http://www.springframework.org/schema/beans/spring-beans-3.0.xsd
              http://www.springframework.org/schema/security http://www.springframework.org/schema/security/spring-security-3.0.xsd
              http://www.springframework.org/schema/security/oauth2 http://www.springframework.org/schema/security/spring-security-oauth2.xsd">

...
    <oauth:client token-services-ref="oauth2TokenServices"/>

    <beans:bean id="oauth2TokenServices"
                class="org.springframework.security.oauth2.consumer.token.InMemoryOAuth2ClientTokenServices"/>

    <oauth:resource id="appfuse" type="authorization_code" clientId="ajax-login"
                    accessTokenUri="http://localhost:9000/appfuse-oauth/oauth/authorize"
                    userAuthorizationUri="http://localhost:9000/appfuse-oauth/oauth/user/authorize"/>

Next, I created a Controller that uses OAuth2RestTemplate to make the request and get the data from the AppFuse OAuth application's API. I created src/main/java/org/appfuse/examples/webapp/oauth/UsersApiController.java and filled it with the following code:

package org.appfuse.examples.webapp.oauth;

import org.appfuse.model.User;
import org.springframework.beans.factory.annotation.Autowired;
import org.springframework.beans.factory.annotation.Qualifier;
import org.springframework.security.core.context.SecurityContextHolder;
import org.springframework.security.oauth2.common.exceptions.InvalidTokenException;
import org.springframework.security.oauth2.consumer.*;
import org.springframework.security.oauth2.consumer.token.OAuth2ClientTokenServices;
import org.springframework.stereotype.Controller;
import org.springframework.web.bind.annotation.RequestMapping;
import org.springframework.web.bind.annotation.RequestMethod;
import org.springframework.web.bind.annotation.ResponseBody;

import java.util.ArrayList;
import java.util.List;

@RequestMapping("/appfuse/users")
@Controller
public class UsersApiController {

    private OAuth2RestTemplate apiRestTemplate;
    @Autowired
    private OAuth2ClientTokenServices tokenServices;

    private static final String REMOTE_DATA_URL = "http://localhost:9000/appfuse-oauth/api/users";

    @Autowired
    public UsersApiController(OAuth2ProtectedResourceDetails resourceDetails) {
        this.apiRestTemplate = new OAuth2RestTemplate(resourceDetails);
    }

    @RequestMapping(method = RequestMethod.GET)
    @ResponseBody
    public List<User> getUsers() {
        try {
            List users = apiRestTemplate.getForObject(REMOTE_DATA_URL, List.class);
            return new ArrayList<User>(users);
        } catch (InvalidTokenException badToken) {
            //we've got a bad token, probably because it's expired.
            OAuth2ProtectedResourceDetails resource = apiRestTemplate.getResource();
            OAuth2SecurityContext context = OAuth2SecurityContextHolder.getContext();
            if (context != null) {
                // this one is kind of a hack for this application
                // the problem is that the sparklr photos page doesn't remove the 'code=' request parameter.
                ((OAuth2SecurityContextImpl) context).setVerificationCode(null);
            }
            //clear any stored access tokens...
            tokenServices.removeToken(SecurityContextHolder.getContext().getAuthentication(), resource);
            //go get a new access token...
            throw new OAuth2AccessTokenRequiredException(resource);
        }
    }
}

At this point, I thought everything would work and I spent quite some time banging my head against the wall when it didn't. As I was composing an email to the Enunciate users mailing list, I realized the issue. It appeared to be working, but from the server side, and the redirect back to the client was not happening. The Ajax Login app uses UrlRewriteFilter (for pretty URLs) to redirect from /app/* to /$1 and this redirect was losing the code parameter in the URL.

<rule>
    <from>/app/**</from>
    <to last="true" type="redirect">%{context-path}/$1</to>
</rule>

To fix this, I added use-query-string="true" to the root element in src/main/webapp/WEB-INF/urlrewrite.xml:

<urlrewrite default-match-type="wildcard" use-query-string="true">

After making all these changes, I ran mvn jetty:run on both apps and opened http://localhost:8080/appfuse/users in my browser. It all worked and a smile crept across my face. I've checked in the client changes into ajax-login on GitHub and the appfuse-oauth example into AppFuse Demos on Google Code. If you'd like to see this example in action, I'd encourage you to checkout both projects and let me know if you find any issues.

Posted in Java at Jul 05 2011, 10:56:48 AM MDT 4 Comments

Hyperproductive JSF 2.0 with Ed Burns at Jazoon

This morning, I attended Ed Burn's Talk on Hyperproductive JSF 2.0 at Jazoon. As you might know, I've been a critic of JSF for many years. However, it is one of the most used Java web frameworks, so I was hoping to learn how it's improved in the latest version. Below are my notes from Ed's presentation.

Ed's Plan for our Time Investment:

  1. Define a productive development environment
  2. JSF for greenfield and brownfield projects
  3. List the top 9 productivity killers with JSF projects and solutions

"I am always doing that which I cannot do, in order that I may learn how to do it." -- Pablo Picasso

Software is an executable representation of knowledge, a byproduct of learning how to solve a problem. Knowledge is something that changes as more information comes in. A productive environment makes it as easy as possible to learn how to solve a problem. Learning is an iterative process. Early iterations don't need to be optimal. Later iterations do ... and they need to be maintainable. First is the hardest. Fast iterations are they key. Spring Roo and Play are examples of frameworks that make the first iteration very fast.

You should use a tool to jumpstart JSF development: copy from an old project, use a Maven archetype or use your IDE. With greenfield development, you don't have to bother learning the byproduct of other people's learning. It's a great opportunity to pad your resume with the latest hot technologies. With brownfield development, it's vitally important to understand the existing solution and hidden assumptions. You're also much more constrained in your technology choices. If you want to change, you'll need to come up with a migration strategy, which can be difficult. JSF works well for both because it's not just a runtime framework, it's also a conceptual framework. You need to understand how your framework handles data conversion, validation, page flow, persistence integration, I18N, L10N, A11Y, Web standards and user friendliness.

Top 9 JSF Productivity Killers:

  1. Time wasting deployment step
  2. The perils of "there's more than one way to do it"
  3. Lengthy and painful developer on-boarding process
  4. Misused logging and misunderstood error messages
  5. Phantoms
  6. Under-utilized developer tools
  7. Premature optimization
  8. Difficulty in doing TDD
  9. Lack of an app framework

Time wasting deployment step
ZeroTurnaround solves this problem with JRebel, but there's other ways to do it. Some of the killers of flow state: 1) one large war file, 2) underutilizing dynamic language features, 3) complex server environment and 4) build process is redoing work unnecessarily. To stop the time wasting deployment step, the most important things you can do are as follows:

  • Configure your IDE correctly. In Eclipse, compile directly into WEB-INF/classes and use continuous compilation. With NetBeans, use GlassFish.
  • Don't do control-flow programming in XML.

Ed then showed a simple demo that showed how you can use Groovy to create a JSF UI Component. He also mentioned that Groovy can be used to author any JSF artifact. The benefit of this is you can simply edit and save a .groovy file without having to recompile or redeploy. Unfortunately, using Groovy didn't eliminate the XML syntax for pages or the XML for defining UI components.

The perils of "there's more than one way to do it"
JSF is very flexible, but flexibility is, more often than not, abused. There's a lack of convention for common things (e.g. master-detail, JSF concepts like converter, validator, etc.). The best way to fix this is to establish the norms for a project and stick with them. For example, Neil Griffin has a good blog entry for the different kind of managed beans you can create. Develop recommendations like Neil's and use them on all your projects.

Lengthy developer on-boarding process
Stick with standards when possible (at least have a common project description and build system across projects). Be committed to periodic cleanup cycles, including documenting for re-use. Pick one JSF component library and stick with it. Support for mixing and switching component libraries has improved with JSF 2, but it's still recommended you use only one.

Misused logging and misunderstood error messages
JSF is notorious for cryptic error messages and very long stack traces. It's still a problem, but the JSF Team is still working on improving them. Good tip: use the <ui:debug> tag. Its recordStateSize="true" attribute can be especially useful. If you're using PrimeFaces, add trace=true to request URLs.

Phantoms
Phantoms is when running code is not the same as the code you are modifying or wrong version of library gets picked up. You should have the capability to hit breakpoints anywhere in your entire software stack, including core Java sources. This is one of the most useful things about open source software. Solutions to phantoms: 1) put a timestamp on every redeploy and have the timestamp appear in the system log 2) write the running library stack to the system log (each library and version being used) and make it easy to compare one developer's runtime stack with another's 3) consider doing all work in tightly controlled VMs (checkout the VM at the beginning of the day, do your work, commit your changes and throw your VM away at the end of the day).

Under-utilizing developer tools
Make sure everyone has the fastest machines available and as much screen real estate as desired. Hardware is much cheaper than developer time. Another tip is to use Hudson as your butler. It's not just the team CI server. In other words, take advantage of automation wherever you can.

Premature Optimization
Keep in mind the trade-offs between readability and performance. When using frameworks such as JSF, don't try to outsmart the implementation. Rather, use the framework as intended and use open-source contributions to treat performance problems. Example, EL expressions got a lot faster between EE5 and EE6. If you spent time trying to optimize EL expressions, you might've been wasting your time.

Difficulty in doing TDD
Try to figure out why TDD is difficult in your company. For JSF, strongly consider JBoss's JSFUnit. Write your testcases to extend from Cactus ServletTestCase and leverage HtmlUnit (JSFUnit does this for you).

Lack of an app framework
Create common components: login panel, CRUD components, etc. If you don't have an app framework, build one over time.

Conclusion
This was an interesting talk by Ed. The dynamics of the room where a bit interesting. Jazoon is held in a movie theater, much like Devoxx. However, it appears there's a spotlight on the speaker that makes it very difficult to see the audience. I don't remember having this problem at Devoxx. Ed asked the audience quite a few questions, but it seemed he had a lot of difficulty in seeing if folks raised their hands. This made for some periods of awkward silence.

Personally, I was hoping to learn some new whizbang tips about JSF that I was not aware of. Unfortunately, I didn't learn anything new and wasn't that impressed with the Groovy demo.

I think Ed's tips about things outside of JSF were good, especially buying developers good hardware. I've seen many companies, including my current client, skimp on developer hardware and cause developer frustration because of it. I think it's great when companies provide developers top-of-the-line hardware and eliminate frustration over CPU and memory resources. LinkedIn and Time Warner Cable both provide their developers with Mac Pros and MacBook Pros as well as huge monitors. IMO, this is one of the best benefits you can provide your engineers.

Posted in Java at Jun 23 2011, 04:53:10 AM MDT 3 Comments

Java Web Application Security - Part II: Spring Security Login Demo

Last week, I wrote a tutorial on how to implement Security in Java EE 6. This week, I'd like to show you how to implement the same features using Spring Security. Before I begin, I'd like to explain my reason for writing this article.

Last month, I presented a talk on Java Web Application Security at the Utah JUG (UJUG). As part of that presentation, I did a number of demos about how to implement security with Java EE 6, Spring Security and Apache Shiro. I told the audience that I would post the presentation and was planning on recording screencasts of the various demos so the online version of the presentation would make more sense.

Today, I've finished the second screencast showing how to implement security with Spring Security. Below is the presentation (with the screencast embedded on slide 16) as well as a step-by-step tutorial.


Spring Security Login Tutorial

Download and Run the Application
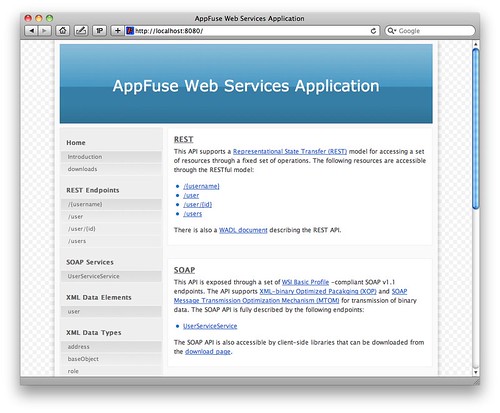
To begin, download the application you'll be implementing security in. This app is a stripped-down version of the Ajax Login application I wrote for my article on Implementing Ajax Authentication using jQuery, Spring Security and HTTPS. You'll need Java 6 and Maven installed to run the app. Run it using mvn jetty:run and open http://localhost:8080 in your browser. You'll see it's a simple CRUD application for users and there's no login required to add or delete users.

Implement Basic Authentication
The first step is to protect the list screen so people have to login to view users. To do this, you'll need to create a Spring context file that contains Spring Security's configuration. Create src/main/webapp/WEB-INF/security.xml and populate it with the contents below:

  <?xml version="1.0" encoding="UTF-8"?>
  <beans:beans xmlns="http://www.springframework.org/schema/security"
               xmlns:xsi="http://www.w3.org/2001/XMLSchema-instance"
               xmlns:beans="http://www.springframework.org/schema/beans"
               xsi:schemaLocation="http://www.springframework.org/schema/beans http://www.springframework.org/schema/beans/spring-beans-3.0.xsd
                http://www.springframework.org/schema/security http://www.springframework.org/schema/security/spring-security-3.0.xsd">

      <!-- New in Spring Security 3.1 -->
      <!-- <http pattern="/css/**" security="none"/> -->

      <http auto-config="true">
          <intercept-url pattern="/app/users" access="ROLE_USER,ROLE_ADMIN"/>
          <http-basic/>
      </http>

      <authentication-manager alias="authenticationManager">
          <authentication-provider>
              <password-encoder hash="sha"/>
              <user-service>
                  <user name="user" password="12dea96fec20593566ab75692c9949596833adc9" authorities="ROLE_USER"/>
                  <user name="admin" password="d033e22ae348aeb5660fc2140aec35850c4da997" authorities="ROLE_ADMIN"/>
              </user-service>
          </authentication-provider>
      </authentication-manager>

      <!-- Override userSecurityAdvice bean in appfuse-service to allow any role to update a user. -->
      <beans:bean id="userSecurityAdvice" class="org.appfuse.examples.webapp.security.UserSecurityAdvice"/>
  </beans:beans>

The last bean, userSecurityAdvice, is an aspect that's needed to override some behavior in AppFuse. You won't need this normally when implementing Spring Security.

Next, open src/main/webapp/WEB-INF/web.xml and add Spring's DelegatingFilterProxy:

<filter>
    <filter-name>securityFilter</filter-name>
    <filter-class>org.springframework.web.filter.DelegatingFilterProxy</filter-class>
    <init-param>
        <param-name>targetBeanName</param-name>
        <param-value>springSecurityFilterChain</param-value>
    </init-param>
</filter>

And add its filter-mapping just after the rewriteFilter in the filter-mappings section (order is important!):

<filter-mapping>
    <filter-name>rewriteFilter</filter-name>
    <url-pattern>/*</url-pattern>
</filter-mapping>
<filter-mapping>
    <filter-name>securityFilter</filter-name>
    <url-pattern>/*</url-pattern>
    <dispatcher>REQUEST</dispatcher>
    <dispatcher>FORWARD</dispatcher>
    <dispatcher>INCLUDE</dispatcher>
</filter-mapping>

You don't need to add any dependencies in your pom.xml is because this project depends on AppFuse, which already contains these dependencies.

At this point, if you restart Jetty (Ctrl+C and jetty:run again), you should be prompted to login when you click on the "Users" tab. Enter admin/admin to login. Spring Security is a bit easier to configure than Java EE 6 out-of-the-box, mostly because it doesn't require you to configure your container.

After logging in, you can try to logout by clicking the "Logout" link in the top-right corner. This calls a LogoutController with the following code that logs the user out.

public void logout(HttpServletResponse response) throws ServletException, IOException {
    request.getSession().invalidate();
    response.sendRedirect(request.getContextPath()); 
}

NOTE: Spring Security has a way to configure "logout" to match a URL and get rid of a class like LogoutController. Since it was already in the project, I don't cover that in this tutorial.

You'll notice that clicking this link doesn't log you out, even though the session is invalidated. The only way to logout with basic authentication is to close the browser. In order to get the ability to logout, as well as to have more control over the look-and-feel of the login, you can implement form-based authentication. Before you implement form-based authentication, I'd like to show you how easy it is to force SSL with Spring Security.

Force SSL
Spring Security allows you to switch between secure (https) and non-secure (http) protocols using a simple requires-channel attribute on the <intercept-url> element. Possible values are "http", "https" and "any". Add requires-channel="https" to your security.xml file:

<intercept-url pattern="/app/users" access="ROLE_USER,ROLE_ADMIN" requires-channel="https"/>

In order for this to work, you have to configure Jetty to listen on an SSL port. Add the following just after the jetty-maven-plugin's </webAppConfig> element in your pom.xml:

<connectors>
    <connector implementation="org.eclipse.jetty.server.nio.SelectChannelConnector">
        <forwarded>true</forwarded>
        <port>8080</port>
    </connector>
    <connector implementation="org.eclipse.jetty.server.ssl.SslSelectChannelConnector">
        <forwarded>true</forwarded>
        <port>8443</port>
        <maxIdleTime>60000</maxIdleTime>
        <keystore>${project.build.directory}/ssl.keystore</keystore>
        <password>appfuse</password>
        <keyPassword>appfuse</keyPassword>
    </connector>
</connectors>

The keystore must be generated for Jetty to start successfully, so add the keytool-maven-plugin just above the jetty-maven-plugin in pom.xml.

<plugin>
    <groupId>org.codehaus.mojo</groupId>
    <artifactId>keytool-maven-plugin</artifactId>
    <version>1.0</version>
    <executions>
        <execution>
            <phase>generate-resources</phase>
            <id>clean</id>
            <goals>
                <goal>clean</goal>
            </goals>
        </execution>
        <execution>
            <phase>generate-resources</phase>
            <id>genkey</id>
            <goals>
                <goal>genkey</goal>
            </goals>
        </execution>
    </executions>
    <configuration>
        <keystore>${project.build.directory}/ssl.keystore</keystore>
        <dname>cn=localhost</dname>
        <keypass>appfuse</keypass>
        <storepass>appfuse</storepass>
        <alias>appfuse</alias>
        <keyalg>RSA</keyalg>
    </configuration>
</plugin>

Now if you restart Jetty, go to http://localhost:8080 and click on the "Users" tab, you'll be prompted to accept the Untrusted Certificate and then redirected to https://localhost:8443/users after logging in. This is an improvement on Java EE's user-data-constraint for two reasons:

  • You can switch between http and https protocols. With Java EE, you can only force https. You have to write a custom filter to switch back to http.
  • Redirecting to https actually works. With Java EE (on Jetty at least), a 403 is returned instead of redirecting the request.

Now let's look at how to have more control over the look-and-feel of the login screen, as well as how to make logout work with form-based authentication.

Implement Form-based Authentication
To change from basic to form-based authentication, you simply have to add a <form-login> element in security.xml's <http> element:

<http auto-config="true">
    <intercept-url pattern="/app/users" access="ROLE_USER,ROLE_ADMIN" requires-channel="https"/>
    <form-login login-page="/login" authentication-failure-url="/login?error=true"
                login-processing-url="/j_security_check"/>
    <http-basic/>
</http>

You can leave the <http-basic> element since Spring Security is smart enough to serve up the form for browsers and use Basic Authentication for clients such as web services. The login.jsp page (that /login forwards to) already exists in the project, in the src/main/webapp directory. The forwarding is done by the UrlRewriteFilter with the following configuration in src/main/webapp/WEB-INF/urlrewrite.xml.

<rule>
    <from>/login</from>
    <to>/login.jsp</to>
</rule>

This JSP has 3 important elements: 1) a form that submits to "/j_security_check", 2) an input element named "j_username" and 3) an input element named "j_password". If you restart Jetty, you'll now be prompted to login with this JSP instead of the basic authentication dialog.

Add Remember Me
Remember Me is a feature you see in many web applications today. It's usually a checkbox on the login form that allows you to auto-login the next time you visit a site. This feature doesn't exist in Java EE security, but it does exist in Spring Security. To enable it, add the following just below <form-login> in security.xml:

<remember-me user-service-ref="userDao" key="e37f4b31-0c45-11dd-bd0b-0800200c9a66"/>

Next, open src/main/webapp/login.jsp and change the name of the "remember me" checkbox to be _spring_security_remember_me:

<input type="checkbox" name="_spring_security_remember_me" id="rememberMe"/>

After making these changes, you should be able to restart Jetty, go to http://localhost:8080/users, enter admin/adminjdbc, check the Remember Me checkbox and login. Then close your browser, and repeat the process. This time, you won't be prompted to login. For more information on this feature, see Spring Security's Remember Me documentation.

While storing usernames and passwords in a file is convenient for demos, it's not very real-world-ish. The next section shows you how to configure Spring Security to use a database for its user store.

Store Users in a Database
To store your users in a database instead of file, you'll need to add a user-service-ref attribute to the <authentication-provider> element. You can also delete the <user-service> element.

<authentication-manager alias="authenticationManager">
    <authentication-provider user-service-ref="userDao">
        <password-encoder hash="sha"/>
    </authentication-provider>
</authentication-manager>

The "userDao" bean is provided by AppFuse and its UserDaoHibernate.java class. This class implements Spring Security's UserDetailsService interface. With Java EE, I had to configure a database connection and make sure the JDBC Driver was in my container's classpath. With Spring Security, you can talk to the database you already have configured in your application.

Of course, you could do this with Java EE too. One thing I neglected to show in my last tutorial was that 1) the app uses H2 and 2) I had to configure Java EE's database to be MySQL. This was because when I tried to access my H2 instance, I got an error about two threads trying to access it at once.
2011-05-13 08:47:29.081:WARN::UserRealm Java EE Login could not connect to database; will try later
org.h2.jdbc.JdbcSQLException: Database may be already in use: "Locked by another process". 
        Possible solutions: close all other connection(s); use the server mode [90020-154]
	at org.h2.message.DbException.getJdbcSQLException(DbException.java:327)
	at org.h2.message.DbException.get(DbException.java:167)
	at org.h2.message.DbException.get(DbException.java:144)
	at org.h2.store.FileLock.getExceptionAlreadyInUse(FileLock.java:443)
	at org.h2.store.FileLock.lockFile(FileLock.java:338)
	at org.h2.store.FileLock.lock(FileLock.java:134)
	at org.h2.engine.Database.open(Database.java:535)
	at org.h2.engine.Database.openDatabase(Database.java:218)

The password for the "admin" user is configured in src/test/resources/sample-data.xml and it's loaded by DbUnit before the application starts. You can view your pom.xml and the dbunit-maven-plugin's configuration if you're interested in learning how this is done. The password is currently configured to "adminjdbc", but you can reset it by generating a new password and modifying sample-data.xml.

Now if you restart Jetty, you should be able to login with admin/adminjdbc and view the list of users.

Summary
In this tutorial, you learned how to implement authentication using Spring Security 3.0.5. In addition to the basic XML configuration, Spring Security also provides a AOP support and annotations you can use to secure methods. It also has many more features than standard Java EE Security. In my opinion, it's the most mature security framework we have in Java today. Currently, I think its reference documentation is the best place to learn more.

There are a few limitations I found with Spring Security:

  • The authentication mechanism (file, database, ldap, etc.) is contained in the WAR
  • Securing methods only works on Spring beans
  • Remember Me doesn't work in my screencast (because I forgot to rename the checkbox in login.jsp)

Of course, you can configure Spring to load its configuration from outside the WAR (e.g. a file or JNDI), but it's not as easy as including the configuration in your app.

In the next couple weeks, I'll post Part III of this series, where I'll show you how to implement this same set of features using Apache Shiro. In the meantime, please let me know if you have any questions.

I created the screencasts with Camtasia. For small screens, and embedding in the presentation, I created it at 50% and used the SmartFocus feature to zoom in and out during the demo. For larger screens, I published another screencast at 100%, in HD. If you have a preference for which screencast is better, I'd love to hear about it.

Posted in Java at May 13 2011, 09:20:51 AM MDT 10 Comments

Adding Search to AppFuse with Compass

Over 5 years ago, I recognized that AppFuse needed to have a search feature and entered an issue in JIRA. Almost 4 years later, a Compass Tutorial was created and shortly after Shay Banon (Compass Founder), sent in a patch. From the message he sent me:

A quick breakdown of enabling search:

  1. Added Searchable annotations to the User and Address.
  2. Defined Compass bean, automatically scanning the model package for mapped searchable classes. It also automatically integrates with Spring transaction manager, and stores the index on the file system ([work dir]/target/test-index).
  3. Defined CompassTemplate (similar in concept to HibernateTemplate).
  4. Defined CompassSearchHelper. Really helps to perform search since it does pagination and so on.
  5. Defined CompassGps, basically it allows for index operation allowing to completely reindex the data from the database. JPA and Hiberante also automatically mirror changes done through their API to the index. iBatis uses AOP.

Fast forward 2 years and I finally found the time/desire to put a UI on the backend Compass implementation that Shay provided. Yes, I realize that Compass is being replaced by ElasticSearch. I may change to use ElasticSearch in the future; now that the search feature exists, I hope to see it evolve and improve.

Since Shay's patch integrated the necessary Spring beans for indexing and searching, the only thing I had to do was to implement the UI. Rather than having an "all objects" results page, I elected to implement it so you could search on an entity's list screen. I started with Spring MVC and added a search() method to the UserController:

@RequestMapping(method = RequestMethod.GET)
public ModelAndView handleRequest(@RequestParam(required = false, value = "q") String query) throws Exception {
    if (query != null && !"".equals(query.trim())) {
        return new ModelAndView("admin/userList", Constants.USER_LIST, search(query));
    } else {
        return new ModelAndView("admin/userList", Constants.USER_LIST, mgr.getUsers());
    }
}

public List<User> search(String query) {
    List<User> results = new ArrayList<User>();
    CompassDetachedHits hits = compassTemplate.findWithDetach(query);
    log.debug("No. of results for '" + query + "': " + hits.length());
    for (int i = 0; i < hits.length(); i++) {
        results.add((User) hits.data(i));
    }
    return results;
}

At first, I used compassTemplate.find(), but got an error because I wasn't using an OpenSessionInViewFilter. I decided to go with findWithDetach() and added the following search form to the top of the userList.jsp page:

<div id="search">
<form method="get" action="${ctx}/admin/users" id="searchForm">
    <input type="text" size="20" name="q" id="query" value="${param.q}"
           placeholder="Enter search terms"/>
    <input type="submit" value="<fmt:message key="button.search"/>"/>
</form>
</div>

NOTE: I tried using HTML5's <input type="search">, but found Canoo WebTest doesn't support it.

Next, I wrote a unit test to verify everything worked as expected. I found I had to call compassGps.index() as part of my test to make sure my index was created and up-to-date.

public class UserControllerTest extends BaseControllerTestCase {
    @Autowired
    private CompassGps compassGps;
    @Autowired
    private UserController controller;

    public void testSearch() throws Exception {
        compassGps.index();
        ModelAndView mav = controller.handleRequest("admin");
        Map m = mav.getModel();
        List results = (List) m.get(Constants.USER_LIST);
        assertNotNull(results);
        assertTrue(results.size() >= 1);
        assertEquals("admin/userList", mav.getViewName());
    }
}

After getting this working, I started integrating similar code into AppFuse's other web framework modules (Struts, JSF and Tapestry). When I was finished, they all looked pretty similar from a UI perspective.

Struts:

<div id="search">
<form method="get" action="${ctx}/admin/users" id="searchForm">
    <input type="text" size="20" name="q" id="query" value="${param.q}"
           placeholder="Enter search terms..."/>
    <input type="submit" value="<fmt:message key="button.search"/>"/>
</form>
</div>

JSF:

<div id="search">
<h:form id="searchForm">
    <h:inputText id="q" name="q" size="20" value="#{userList.query}"/>
    <h:commandButton value="#{text['button.search']}" action="#{userList.search}"/>
</h:form>
</div>

Tapestry:

<div id="search">
<t:form method="get" t:id="searchForm">
    <t:textfield size="20" name="q" t:id="q"/>
    <input t:type="submit" value="${message:button.search}"/>
</t:form>
</div>

One frustrating thing I found was that Tapestry doesn't support method="get" and AFAICT, neither does JSF 2. With JSF, I had to make my UserList bean session-scoped or the query parameter would be null when it listed the results. Tapestry took me the longest to implement, mainly because I had issues figuring out how it's easy-to-understand-once-you-know onSubmit() handlers worked and I had the proper @Property and @Persist annotations on my "q" property. This tutorial was the greatest help for me. Of course, now that it's all finished, the code looks pretty intuitive.

Feeling proud of myself for getting this working, I started integrating this feature into AppFuse's code generation and found I had to add quite a bit of code to the generated list pages/controllers.

So I went on a bike ride...

While riding, I thought of a much better solution and added the following search method to AppFuse's GenericManagerImpl.java. In the code I added to pages/controllers previously, I'd already refactored to use CompassSearchHelper and I continued to do so in the service layer implementation.

@Autowired
private CompassSearchHelper compass;

public List<T> search(String q, Class clazz) {
    if (q == null || "".equals(q.trim())) {
        return getAll();
    }

    List<T> results = new ArrayList<T>();

    CompassSearchCommand command = new CompassSearchCommand(q);
    CompassSearchResults compassResults = compass.search(command);
    CompassHit[] hits = compassResults.getHits();

    if (log.isDebugEnabled() && clazz != null) {
        log.debug("Filtering by type: " + clazz.getName());
    }

    for (CompassHit hit : hits) {
        if (clazz != null) {
            if (hit.data().getClass().equals(clazz)) {
                results.add((T) hit.data());
            }
        } else {
            results.add((T) hit.data());
        }
    }

    if (log.isDebugEnabled()) {
        log.debug("Number of results for '" + q + "': " + results.size());
    }

    return results;
}

This greatly simplified my page/controller logic because now all I had to do was call manager.search(query, User.class) instead of doing the Compass login in the controller. Of course, it'd be great if I didn't have to pass in the Class to filter by object, but that's the nature of generics and type erasure.

Other things I learned along the way:

  • To index on startup, I added compassGps.index() to the StartupListener..
  • In unit tests that leveraged transactions around methods, I had to call compassGps.index() before any transactions started.
  • To scan multiple packages for searchable classes, I had to add a LocalCompassBeanPostProcessor.

But more than anything, I was reminded it always helps to take a bike ride when you don't like the design of your code. ;-)

This feature and many more will be in AppFuse 2.1, which I hope to finish by the end of the month. In the meantime, please feel free to try out the latest snapshot.

Posted in Java at Mar 15 2011, 05:11:12 PM MDT 1 Comment

What's New in Spring 3.0

This morning, I attended Rod Johnson's What's New in Spring 3.0 keynote at TSSJS. Rod ditched his slides for the talk and mentioned that this might be risky. Especially since he was pretty jetlagged (flew in from Paris at 11pm last night). Below are my notes from his talk.

The most important thing for the future of Java is productivity and cloud computing. The focus at SpringSource is heavily on productivity and not just on improving the Spring codebase. If you look at the comparisons out there between Rails and Spring, it's not an apples-to-apples comparison. The philosophy with Spring has always been the developer is always right. However, if you look at something like Rails, you'll see it's far more prescriptive. That layer of opinionated frameworks is important in that it improves your productivity greatly.

SpringSource is putting a lot of emphasis on improving developer productivity with two opinionated frameworks: Grails and Spring Roo. To show how productive developers can be, Rod started to build a web app with Spring Roo. As part of this demo, he mentioned we'd see many of the new features of Spring 3: RestTemplate, @Value and Spring EL.

Rod used STS to write the application and built a Twitter client. After creating a new project using File -> New Roo Project, a Roo Shell tab shows up at the bottom. Typing "hint" tells you what you should do write away. The initial message is "Roo requires the installation of a JPA provider and associated database." The initial command is "persistence setup --provider HIBERNATE --database HYPERSONIC_IN_MEMORY". After running this, a bunch of log messages are shown on the console, most of them indicating that pom.xml has been modified.

The first file that Rod shows is src/main/resources/META-INF/spring/applicationContext.xml. It's the only XML file you'll need in your application and includes a PropertyPlaceHolderConfigurer, a context:component-scan for finding annotations and a transaction manager.

After typing "hint" again, Roo indicates that Rod should create entities. He does this by running "ent --class ~.domain.Term --testAutomatically". A Term class (with a bunch of annotations) is created, as well as a number of *.aj files and an integration test. Most of the files don't have anything in them but annotations. The integration test uses @RooIntegrationTest(entity=Term.class) on its class to fire up a Spring container in the test and do dependency injection (if necessary). From there, Rod demonstrated that he could easily modify the test to verify the database existed.

private SimpleJdbcTemplate jt;

@Autowired
public void init(DataSource ds) {
    this.jt = new SimpleJdbcTemplate(ds);
}

@Test 
public void testDb() {
    jt.queryForInt("SELECT COUNT(0) FROM TERM");
}

Interestingly, after running the test, you could see a whole bunch of tests being run, not just the one that was in the class itself. From there, he modified the Term class to add two new properties: name and searchTerms. He also used JSR 303's @NotNull annotation to make the fields required.

@Entity
@RooJavaBean
@RooToString
@RooEntity
public class Term {

    @NotNull
    private String name;

    @NotNull
    private String searchTerms;
}

Next, Rod added a new test and showed that the setters for these properties were automatically created and he never had to write getters and setters. This is done by aspects that are generated beside your Java files. Roo is smart enough that if you write toString() methods in your Java code, it will delete the aspect that normally generates the toString() method.

To add fields to an entity from the command lie, you can run commands like "field string --fieldName text --notNull" and "field number --type java.lang.Long --fieldName twitterId --notNull". The Roo Shell is also capable of establishing relationships between entities.

After successfully modifying his Entities, Rod started creating code to talk to Twitter's API. He used RestTemplate to do this and spent a good 5 minutes trying to get Eclipse to import the class properly. The best part of this demo was watching him do what most developers do: searching Google for RestTemplate to get the package name to import.

After awkward silence and some fumbling, he opened an existing project (that had the dependencies properly configured) and used Java Config to configure beans for the project. This was done with a @Configuration annotation on the class, @Value annotations on properties (that read from a properties file) and @Bean annotations for the beans to expose. The first time Rod tried to run the test it failed because a twitter.properties file didn't exist. After creating it, he successfully ran the test and successfully searched Twitter's API.

The nice thing about @Configuration is the classes are automatically picked up and you don't need to configure any XML to recognize them. Also, in your Java classes, you don't have to use @Autowired to get @Bean references injected.

After this, Rod attempted to show a web interface of the application. He started the built-in SpringSource tc Server and proceeded to show us Tomcat's 404 page. Unfortunately, Tomcat seemed to startup OK (no errors in the logs), but obviously something didn't work well. For the next few silent moments, we watched him try to delete web.xml from Eclipse. Unfortunately, this didn't work and we weren't able to see the scaffolding the entities that Rod created.

At this point, Rod opened a completed version of the app and was able to show it to us in a browser. You could hear the murmur of the crowd as everyone realized he was about to show the the Twitter search results for #tssjs. Most of the tweets displayed were from folks commenting about how some things didn't work in the demo.

In summary, there's some really cool things in Spring 3: @Configuration, @Value, task scheduling with @Scheduled and one-way methods with @Async.

Final points of SpringSource and VMWare: they're committed to Java and middleware. Their big focus is providing an integrated experience from productivity to cloud. There's other languages that are further along than Java and SpringSource is trying to fix that. One thing they're working on is a private Java cloud that companies can use and leverage as a VMWare appliance.

I think there's a lot of great things in Spring 3 and most users of Roo seem to be happy with it. It's unfortunate that the Demo Gods frowned upon Rod, but it was cool to see him do the "no presentation" approach.

Posted in Java at Mar 19 2010, 11:46:25 AM MDT 2 Comments

Highly Interactive Software with Java and Flex

This morning at TSSJS, I attended James Ward's talk about Highly Interactive Software with Java and Flex. Below are my notes from his talk.

Application have moved from mainframes (hard to deploy, limited clients) to client/server (hard to deploy, full client capabilities) to web applications (easy to deploy, limited clients) to rich internet applications (easy to deploy, full client capabilities).

Shortly after showing a diagram of how applications have changed, James showed a demo of a sample Flex app for an automobile insurance company. It was very visually appealing, kinda like using an iPhone app. It was a multi-form application that slides right-to-left as you progress through the wizard. It also allowed you to interact with a picture of your car (to indicate where the damage happened) and a map (to indicate how the accident happened). Both of these interactive dialogs still performed data entry, they just did it in more of a visual way.

Adobe's developer technology for building RIAs is Flex. There's two different languages in Flex: ActionScript and MXML. ActionScript was originally based on JavaScript, but now (in ActionScript 3) uses features from Java and C#. On top of ActionScript is MXML. It's a declarative language, but unlike JSP taglibs. All you can do with MXML is instantiate objects and set properties. It's merely a convenience language, but also allows tooling. The open source SDK compiler takes Flex files and compiles it into a *.swf file. This file can then be executed using the Flash Player (in browser) or Air (desktop).

The reason Adobe developed two different runtimes was because they didn't want to bloat the Flash Player. Once the applications are running client-side, the application talks to the web server. Protocols that can be used for communication: SOAP, HTTP/S, AMF/S and RTMP/S. The web server can be composed of REST or SOAP Web Services, as well as BlazeDS or LC Data Services to talk directly to Java classes.

To see all the possible Flex components, see Tour de Flex. It contains a number of components: core components, data access controls, AIR capabilities, cloud APIs, data visualization. The IBM ILOG Elixir real-time dashboard is particularly interesting, as is Doug McCune's Physics Form.

Next James showed us some code. He used Flex Builder to create a new Flex project with BlazeDS. The backend for this application was a JSP page that talks to a database and displays the results in XML. In the main .mxml file, he used <s:HTTPService> with a URL pointing to the URI of the JSP. Then he added an <mx:DataGrid> and the data binding feature of Flex. To do this, he added dataProvider="{srv.lastResult.items.item}" to the DataGrid tag, where "srv" is the id of the HTTPService. Then he added a Button with click="srv.send()" and set the layout to VerticalLayout. This was a simple demo to show how to hook in a backend with XML.

To show that Flex can interact with more than XML over HTTP, James wrote a SOAP service and changed <s:HTTPService> to <s:WebService> and changed the "url" attribute to "wsdl" (and adjusted the value as appropriate). Then rather than using {srv.lastResult.*}, he had to bind to a particular method and change it to {srv.getElements.lastResults}. The Button's click value also had to change to "srv.getElements(0, 2000)" (since the method takes 2 parameters).

After doing coding in Flex Builder, James switched to his Census to compare server-execution times. In the first example (Flash XML AS), most of the time was spent gzipping the 1MB XML file, but the transfer time is reduced because of this. The server execution time is around 800ms. Compare this to the Flex AMF3 example where the server execution time is 49ms. This is because the AMF (binary) protocol streamlines the data and doesn't include repeated metadata.

To integrate BlazeDS in your project, you add the dependencies and then map the MessageBrokerServlet in your web.xml. Then you use a services-config.xml to define the protocol and remoting-config.xml to define what Java classes to export as services. To use this in the Flex aplication, James changed <s:WebService> to <s:RemoteObject>. He changed the "wsdl" attribute to "endpoint" and added a "destination" attribute to specify the name of the aliased Java class to talk to. Next, James ran the demo and showed that he could change the number of rows from 2,000 to 20,000 and the load time was still much, much faster than the XML and SOAP versions.

There's also a Spring BlazeDS Integration project that allows you to simply annotate beans to expose them as AMF services.

BlazeDS also includes a messaging service that you can use to create publishers and subscribers. The default channels in BlazeDS uses HTTP Streaming and HTTP Long Polling (comet), but it can be configurable (e.g. to use JMS). There's also an Adobe commercial product that keeps a connection open using NIO on the server and has a binary protocol. This is useful for folks that need more real-time data in their applications (e.g. trading floors).

I thought this was a really good talk by James. It had some really cool visual demos and the demo was interesting in showing how easy it was to switch between different web services and protocols. This afternoon, I'll be duking it out with James at the Flex vs. GWT Smackdown. If you have deficiencies of Flex you'd like me to share during that talk, please let me know.

Posted in Java at Mar 18 2010, 12:29:26 PM MDT 4 Comments