Secure JSON Services with Play Scala and SecureSocial
 Last November, I traveled to Antwerp to speak at Devoxx. After my talk on HTML5 with Play Scala, Mattias Karlsson approached me and we had a chat about doing the same talk at Jfokus in Stockholm. I agreed and we began talking details after Trish and I returned to the US.

I wrote this article on a plane between Denver and Seattle and will be hopping over the North Pole to Stockholm via Iceland tonight. For the past couple of weeks, I've been updating my Play More! HTML5/mobile app to add some new features. Most notably, I wanted to upgrade to Play 2.0, create JSON services and add authentication.
Upgrading to Play 2.0
My attempt to upgrade to Play 2.0 involved checking out the source from GitHub, building and installing the RC1 snapshot. As I tried to upgrade my app and started getting failed imports, I turned to the internet (specifically StackOverflow) to see if it was a good idea. The first answer for that question suggested I stay with 1.x.
If it's a critical project, to be finished before next March 2012, I would go with Play 1.x. If it's a less important project, which could be delayed, and that in any case won't be released before March 2012, try Play 2.0.
While I didn't plan on releasing Play More! before Jfokus, I decided upgrading didn't add a whole lot to the talk. Also, I couldn't find a Play Scala 0.9.1 to Play 2.0 upgrade guide and I didn't have enough time to create one. So I decided to stick with Play 1.2.4 and add some JSON services for my iPhone client.
JSON Servers
I found Manuel Bernhardt's Play! Scala and JSON. This led me to Jerkson, built by the now infamous @coda.
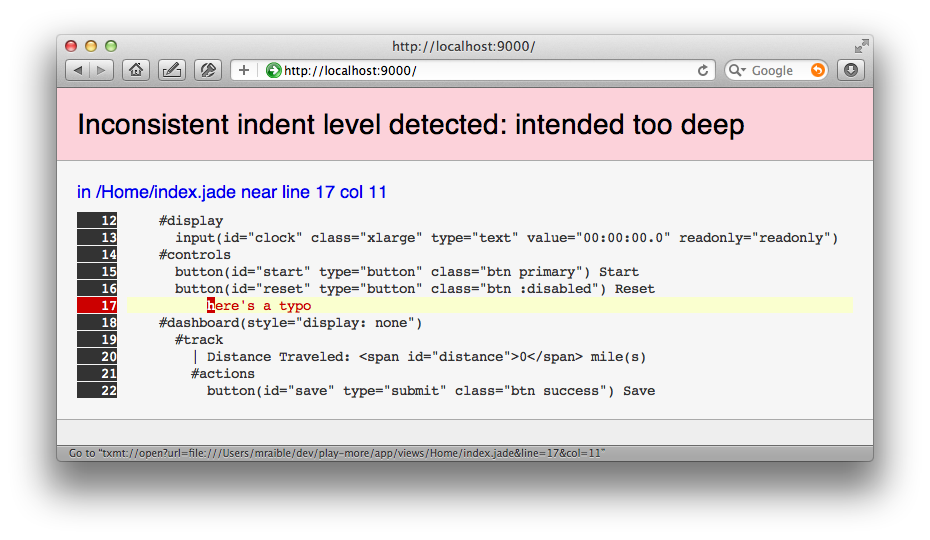
I was able to easily get things working fairly quickly and wrote the following WorkoutService.scala:
package controllers.api

import play.mvc.Controller
import models._
import com.codahale.jerkson.Json._

object WorkoutService extends Controller {

  def workouts = {
    response.setContentTypeIfNotSet("application/json")
    generate(Workout.find().list())
  }
  def edit(id: Long) = {
    generate(Workout.byIdWithAthleteAndComments(id))
  }

  def create() = {
    var workout = params.get("workout", classOf[Workout])
    Workout.create(workout)
  }

  def save(id: Option[Long]) = {
    var workout = params.get("workout", classOf[Workout])
    Workout.update(workout)
  }

  def delete(id: Long) = {
    Workout.delete("id={id}").on("id" -> id).executeUpdate()
  }
}
Next, I added routes for my new API to conf/routes:
GET     /api/workouts               api.WorkoutService.workouts
GET     /api/workout/{id}           api.WorkoutService.edit
POST    /api/workout                api.WorkoutService.create
PUT     /api/workout/{id}           api.WorkoutService.save
DELETE  /api/workout/{id}           api.WorkoutService.delete
Then I created an ApiTest.scala class that verifies the first method works as expected.
import play.test.FunctionalTest
import play.test.FunctionalTest._
import org.junit._

class ApiTests extends FunctionalTest {

    @Test
    def testGetWorkouts() {
        var response = GET("/api/workouts");
        assertStatus(200, response);
        assertContentType("application/json", response)
        println(response.out)
    }
}
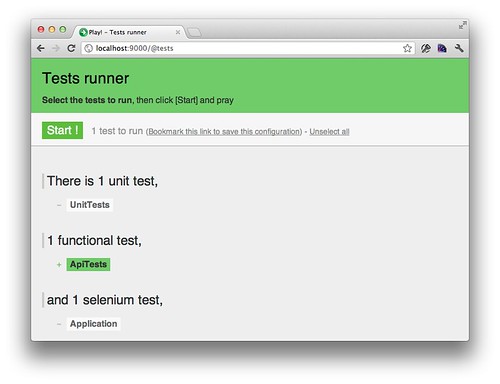
I ran "play test", opened my browser to http://localhost:9000/@tests and clicked ApiTests -> Start to verify it worked. All the green made me happy.
Finally, I wrote some CoffeeScript and jQuery to allow users to delete workouts and make sure delete functionality worked.
$('#delete').click ->
  $.ajax
    type: 'POST'
    url: $(this).attr('rel')
    error: ->
      alert('Delete failed, please try again.')
    success: (data) ->
      location.href = "/more"
I was very impressed with how easy Play made it to create JSON services and I smiled as my CoffeeScript skills got a refresher.
The Friday before we left for Devoxx, I saw the module registration request for SecureSocial.
SecureSocial allows you to add an authentication UI to your app that works with services based on OAuth1, OAuth2, OpenID and OpenID+OAuth hybrid protocols.
It also provides a Username and Password mechanism for users that do not wish to use existing accounts in other networks.
The following services are supported in this release:
- Twitter (OAuth1)
- Facebook (OAuth2)
- Google (OpenID + OAuth Hybrid)
- Yahoo (OpenID + OAuth Hybrid)
- LinkedIn (OAuth1)
- Foursquare (OAuth2)
- MyOpenID (OpenID)
- Wordpress (OpenID)
- Username and Password
In other words, it sounded like a dream come true and I resolved to try it once I found the time. That time found me last Monday evening and I sent a direct message to @jaliss (the module's author) via Twitter.
Does Secure Social work with Play Scala? I'd like to use it in my Play More! project.
Jorge responded 16 minutes later saying that he hadn't used Play Scala and he'd need to do some research. At 8 o'clock that night (1.5 hours after my original DM), Jorge had a sample working and emailed it to me. 10 minutes later I was adding a Secure trait to my project.
package controllers

import play.mvc._
import controllers.securesocial.SecureSocial

/*
 * @author Jorge Aliss <[email protected]> of Secure Social fame.
 */
trait Secure {
  self: Controller =>

  @Before def checkAccess() {
    SecureSocial.DeadboltHelper.beforeRoleCheck()
  }

  def currentUser = {
    SecureSocial.getCurrentUser
  }
}
I configured Twitter and Username + Password as my providers by adding the following to conf/application.conf.
securesocial.providers=twitter,userpass
I also had to configure a number of securesocial.twitter.* properties. Next, I made sure my routes were aware of SecureSocial by adding the following to the top of conf/routes:
* /auth module:securesocial
Then I specified it as a dependency in conf/dependencies.yml and ran "play deps".
- play -> securesocial 0.2.4
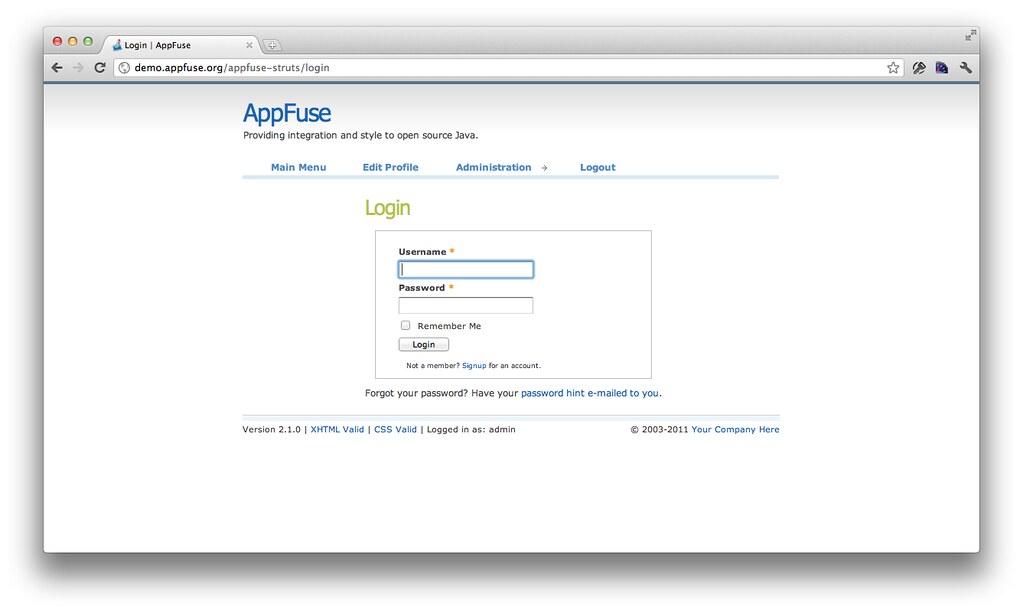
After adding "with Secure" to my Profile.scala controller, I tried to access its route and was prompted to login. Right off the bat, I was shown an error about a missing jQuery 1.5.2 file in my "javascripts" folder, so I added it and rejoiced when I was presented with a login screen. I had to add the app on Twitter to use its OAuth servers, but I was pumped when both username/password authentication worked (complete with signup!) as well as Twitter.
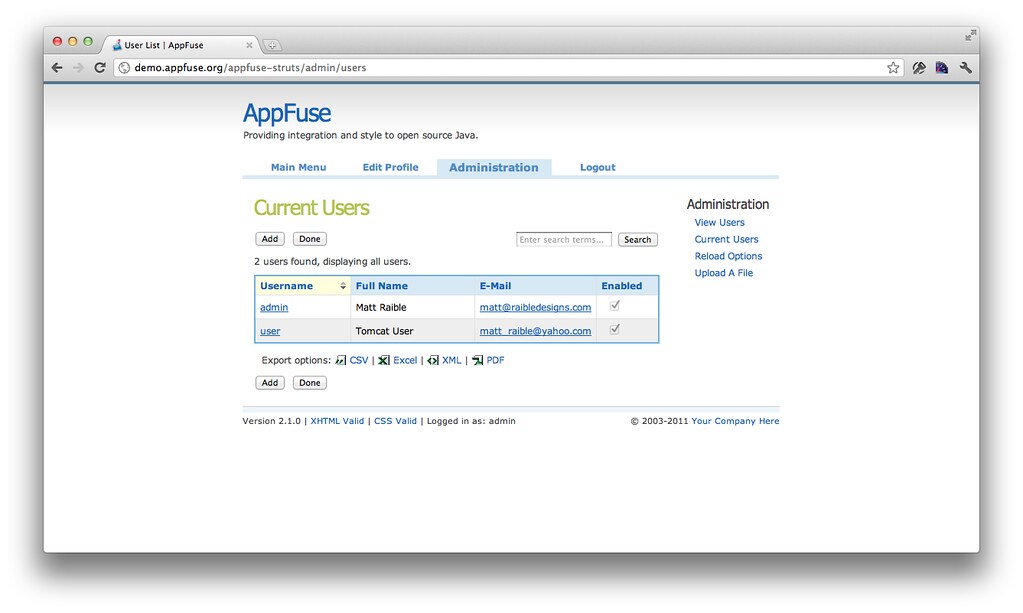
The only issue I ran into with SecureSocial was that it didn't find the default implementation of SecureSocial's UserService.Service when running in prod mode. I was able to workaround this by adding a SecureService.scala implementation to my project and coding it to talk to my Athlete model. I didn't bother to hook in creating a new user when they logged in from Twitter, but that's something I'll want to do in the future. I was also pleased to find out customizing SecureSocial's views was a breeze. I simply copied them from the module into my app's views and voila!
package services

import play.db.anorm.NotAssigned
import play.libs.Codec
import collection.mutable.{SynchronizedMap, HashMap}
import models.Athlete
import securesocial.provider.{ProviderType, UserService, SocialUser, UserId}

class SecureService extends UserService.Service {
  val activations = new HashMap[String, SocialUser] with SynchronizedMap[String, SocialUser]

  def find(userId: UserId): SocialUser = {
    val user = Athlete.find("email={email}").on("email" -> userId.id).first()

    user match {
      case Some(user) => {
        val socialUser = new SocialUser
        socialUser.id = userId
        socialUser.displayName = user.firstName
        socialUser.email = user.email
        socialUser.isEmailVerified = true
        socialUser.password = user.password
        socialUser
      }
      case None => {
        if (!userId.provider.eq(ProviderType.userpass)) {
          var socialUser = new SocialUser
          socialUser.id = userId
          socialUser
        } else {
          null
        }
      }
    }
  }

  def save(user: SocialUser) {
    if (find(user.id) == null) {
      val firstName = user.displayName
      val lastName = user.displayName
      Athlete.create(Athlete(NotAssigned, user.email, user.password, firstName, lastName))
    }
  }

  def createActivation(user: SocialUser): String = {
    val uuid: String = Codec.UUID()
    activations.put(uuid, user)
    uuid
  }

  def activate(uuid: String): Boolean = {
    val user: SocialUser = activations.get(uuid).asInstanceOf[SocialUser]
    var result = false

    if (user != null) {
      user.isEmailVerified = true
      save(user)
      activations.remove(uuid)
      result = true
    }

    result
  }

  def deletePendingActivations() {
    activations.clear()
  }
}
Jorge was a great help in getting my authentication needs met and he even wrote a BasicAuth.scala trait to implement Basic Authentication on my JSON services.
package controllers

import _root_.securesocial.provider.{UserService, ProviderType, UserId}
import play._
import play.mvc._
import play.libs.Crypto

import controllers.securesocial.SecureSocial

/*
 * @author Jorge Aliss <[email protected]> of Secure Social fame.
 */
trait BasicAuth {
  self: Controller =>

  @Before def checkAccess = {
    if (currentUser != null) {
      // this allows SecureSocial.getCurrentUser() to work.
      renderArgs.put("user", currentUser)
      Continue
    }

    val realm =
      Play.configuration.getProperty("securesocial.basicAuth.realm", "Unauthorized")

    if (request.user == null || request.password == null) {
      Unauthorized(realm)
    } else {
      val userId = new UserId
      userId.id = request.user
      userId.provider = ProviderType.userpass
      val user = UserService.find(userId)

      if (user == null ||
        !Crypto.passwordHash(request.password).equals(user.password)) {
        Unauthorized(realm)
      } else {
        // this allows SecureSocial.getCurrentUser() to work.
        renderArgs.put("user", user)
        Continue
      }
    }
  }

  def currentUser = {
    SecureSocial.getCurrentUser()
  }
}
Summary
My latest pass at developing with Scala and leveraging Play to build my app was a lot of fun. While there were issues with class reloading every-so-often and Scala versions with Scalate, I was able to add the features I wanted. I wasn't able to upgrade to Play 2.0, but I didn't try that hard and figured it's best to wait until its upgrade guide has been published.
I'm excited to describe my latest experience to the developers at Jfokus this week. In addition, the conference has talks on Play 2.0, CoffeeScript, HTML5, Scala and Scalate. I hope to attend many of these and learn some new tricks to improve my skills and my app.
Update: The Delving developers have written an article on Migration to Play 2. While it doesn't provide specific details on what they needed to change, it does have good information on how long it took and things to watch for.


")


")