Matt RaibleMatt Raible is a writer with a passion for software. Connect with him on LinkedIn.

The Angular Mini-Book The Angular Mini-Book is a guide to getting started with Angular. You'll learn how to develop a bare-bones application, test it, and deploy it. Then you'll move on to adding Bootstrap, Angular Material, continuous integration, and authentication.

Spring Boot is a popular framework for building REST APIs. You'll learn how to integrate Angular with Spring Boot and use security best practices like HTTPS and a content security policy.

For book updates, follow @angular_book on Twitter.

The JHipster Mini-Book The JHipster Mini-Book is a guide to getting started with hip technologies today: Angular, Bootstrap, and Spring Boot. All of these frameworks are wrapped up in an easy-to-use project called JHipster.

This book shows you how to build an app with JHipster, and guides you through the plethora of tools, techniques and options you can use. Furthermore, it explains the UI and API building blocks so you understand the underpinnings of your great application.

For book updates, follow @jhipster-book on Twitter.

10+ YEARS


Over 10 years ago, I wrote my first blog post. Since then, I've authored books, had kids, traveled the world, found Trish and blogged about it all.
You searched this site for "repo". 48 entries found.

You can also try this same search on Google.

The Angular Mini-Book 1.0 is now available!

I'm pleased to announce that the Angular Mini-Book has been released! You can download it in PDF and EPUB formats from InfoQ.

Angular Mini-Book Cover

About this book

The Angular Mini-Book is a guide to getting started with Angular. You'll learn how to develop a bare-bones application, test it, and deploy it. Then you'll move on to adding Bootstrap, Angular Material, continuous integration, and authentication. Spring Boot is a popular framework for building REST APIs. You'll learn how to integrate Angular with Spring Boot and use security best practices like HTTPS and a content security policy.

This initial edition (v1.0) uses Angular 12 and Spring Boot 2.5. I do plan on updating it for Angular 13 and Spring Boot 2.6. If you have any tips for upgrading, please let me know!

Purpose of the book

I think building web and mobile applications with Angular, Bootstrap, and Spring Boot is a great experience. I'd like to encourage more developers to try it.

Thanks!

I'm incredibly grateful to Trish, Abbie, and Jack. They put up with my late nights and extended screen time while I worked on this book.

[Read More]

Posted in Open Source at Nov 17 2021, 02:48:40 PM MST Add a Comment

Getting Started + Testing with Angular CLI and Angular 2 (RC5)

I started creating Angular 2 applications when it was in beta (back in March). To keep up with Angular 2's changes, I wrote a tutorial about developing with RC1 in June. Earlier this month, RC5 was released and many things changed once again. I think Scott Davis sums it up nicely in a tweet.

To keep up with the rapid pace of change in Angular 2, I decided to write another tutorial, this time using Angular CLI. The biggest change I found since writing the last tutorial is testing infrastructure changes. Since Angular's Testing documentation hasn't been updated recently, hopefully this tutorial will help.

[Read More]

Posted in The Web at Aug 23 2016, 05:18:41 PM MDT 6 Comments

Testing Angular 2.0 RC1 Applications

As mentioned on Friday, there's been quite a bit that's changed with Angular 2 between its Beta 9 and RC 1 releases. This article is an update to the Testing Angular 2 Applications I wrote in March. That tutorial was based on Angular 2.0 Beta 9. Rather than simply updating that tutorial and blog post for 2.0 RC1, I decided to create a new version for posterity's sake. The 2.0 Beta 9 version will remain on my blog and I've tagged the source on GitHub.

If you've already read the first version of Testing Angular 2 Applications, checkout the diff of the Asciidoctor version to see what's changed.

What you'll build

You'll learn to use Jasmine for unit testing controllers and Protractor for integration testing. See Angular 2's guide to unit testing if you'd like more information on testing and why it's important.

The best reason for writing tests is to automate your testing. Without tests, you'll likely be testing manually. This manual testing will take longer and longer as your codebase grows.

What you'll need

  • About 15-30 minutes.
  • A favorite text editor or IDE. I recommend IntelliJ IDEA.
  • Git installed.
  • Node.js and npm installed. I recommend using nvm.

Get the tutorial project

Clone the angular2-tutorial repository, checkout the testing-start branch, and install its dependencies.

git clone https://github.com/mraible/angular2-tutorial.git
cd angular2-tutorial
git checkout testing-start
npm install

If you haven't completed the Getting Started with Angular 2.0 RC1 tutorial, you should peruse it so you understand how this application works. You can also simply start the app with npm start and view it in your browser at http://localhost:5555/.

[Read More]

Posted in The Web at Jun 06 2016, 09:57:13 AM MDT Add a Comment

The JHipster Mini-Book: How We Did It and What's Next

The JHipster Mini-Book Last Friday, the JHipster Mini-Book was published on InfoQ. I wrote about this milestone on the book's blog. I'm pumped to see this release happen, and I'd like to give you a behind-the-scenes peak at how it went from idea to production.

The Idea
At the end of last year, I wrote down my goals for 2015:

  • 21 Point Fitness App
  • JHipster Mini Book (InfoQ)
  • Finish Bus
  • New House
  • Good Blood Pressure

My reason for wanting to write a JHipster Mini-Book was simple: I knew AngularJS, Bootstrap and Spring Boot quite well. I'd used them on several projects and I really liked how JHipster married them all together. I often ran into people that used these technologies, but hadn't heard of JHipster. I was hoping to make more people aware of the project and market my development skills at the same time.

[Read More]

Posted in Java at Nov 03 2015, 10:13:40 AM MST 10 Comments

AppFuse, Reduced

In November, I had some time off between clients. To occupy my time, I exercised my body and brain a bit. I spent a couple hours a day exercising and a few hours a day working on AppFuse. AppFuse isn't used to start projects nearly as much as it once was. This makes sense since there's been a ton of innovation on the JVM and there's lots of get-started-quickly frameworks now. Among my favorites are Spring Boot, JHipster, Grails and Play.

You can see that AppFuse's community activity has decreased quite a bit over the years by looking at its mailing list traffic.

AppFuse Mailing List Traffic, December 2014

Even though there's not a lot of users talking on the mailing list, it still seems to get quite a few downloads from Maven Central.

AppFuse Maven Central Stats, November 2014

I think the biggest value that AppFuse provides now is a learning tool for those who work on it. Also, it's a good place to show other developers how they can evolve with open source frameworks (e.g. Spring, Hibernate, JSF, Tapestry, Struts) over several years. Showing how we migrated to Spring MVC Test, for example, might be useful. The upcoming move to Spring Data instead of our Generic DAO solution might be interesting as well.

Regardless of whether AppFuse is used a lot or not, it should be easy to maintain. Over the several weeks, I made some opinionated changes and achieved some pretty good progress on simplifying things and making the project easier to maintain. The previous structure has a lot of duplicate versions, properties and plugin configurations between different projects. I was able to leverage Maven's inheritance model to make a number of improvements:

[Read More]

Posted in Java at Dec 16 2014, 06:03:31 AM MST 6 Comments

A Webapp Makeover with Spring 4 and Spring Boot

A typical Maven and Spring web application has a fair amount of XML and verbosity to it. Add in Jersey and Spring Security and you can have hundreds of lines of XML before you even start to write your Java code. As part of a recent project, I was tasked with upgrading a webapp like this to use Spring 4 and Spring Boot. I also figured I'd try to minimize the XML.

This is my story on how I upgraded to Spring 4, Jersey 2, Java 8 and Spring Boot 0.5.0 M6.

When I started, the app was using Spring 3.2.5, Spring Security 3.1.4 and Jersey 1.18. The pom.xml had four Jersey dependencies, three Spring dependencies and three Spring Security dependencies, along with a number of exclusions for "jersey-spring".

Upgrading to Spring 4
Upgrading to Spring 4 was easy, I changed the version property to 4.0.0.RC2 and added the new Spring bill of materials to my pom.xml. I also add the Spring milestone repo since Spring 4 won't be released to Maven central until tomorrow.

<dependencyManagement>
    <dependencies>
        <dependency>
            <groupId>org.springframework</groupId>
            <artifactId>spring-framework-bom</artifactId>
            <version>${spring.framework.version}</version>
            <type>pom</type>
            <scope>import</scope>
        </dependency>
    </dependencies>
</dependencyManagement>

<repositories>
    <repository>
        <id>spring-milestones</id>
        <url>http://repo.spring.io/milestone</url>
        <snapshots>
            <enabled>true</enabled>
        </snapshots>
    </repository>
</repositories>
[Read More]

Posted in Java at Dec 11 2013, 12:47:15 PM MST 7 Comments

Integrating GWT into AppFuse

I've been interested in integrating GWT into AppFuse ever since I blogged about it 4 years ago. A few months after that post, I wrote about Enhancing Evite.com with GWT and Grails. After Evite, I had a gig near Boston where I developed with GXT for the remainder of the year. When all was said and done, I ended up spending a year with GWT and really enjoyed my experience. I haven't used it much since.

GWT is scheduled to be integrated into AppFuse in version 4.0. That's quite a ways off. The good news is you might not have to wait that long, thanks to Iván García Sainz-Aja. Iván let us know about his work a couple weeks ago in an email to the appfuse-dev mailing list.

It's still work in progress but it has already most of AppFuse functionality..

If you want to give it a try

https://github.com/ivangsa/appfuse.git

the quickest way to have a go would be

web/gwt> mvn -P gwtDebug -Dgwt.inplace=true gwt:compile jetty:run  

at the moment it still requires this fork of gwt-bootstrap to be compiled first

https://github.com/ivangsa/gwt-bootstrap.git

It needs a lot of testing yet but it's getting quite there

As you can imagine, I was very excited to hear about Iván's work. So I cloned his repo, built gwt-bootstrap locally and checked it out. Functionality wise, it was great! However, when I dug into the source code, I found a whole lotta code.

To see how the GWT flavor compared to the other implementations in AppFuse, I created a cloc report on the various web frameworks in AppFuse. I'm sure these reports could be adjusted to be more accurate, but I believe they give a good general overview. I posted some graphs that displays my findings in visual form.

Lines of Java Number of Files

When I sent this to the mailing list, Ivan responded that it was a lot of code and estimated 12 new files would be needed to CRUD an entity. This sure seems like a lot to me, but he defended this yesterday and noted that his implementation follows many of GWT's latest best practices: MVP pattern, Activities and Places, EventBus, Gin and Guice. He also shared a wiki page with explanations and diagrams of how things work.

The reason I'm writing this post is to get more feedback on this implementation. First of all, does GWT really require this much code? Secondly, are there other GWT implementations that reduce a lot of the boilerplate? SmartGWT, Vaadin* and Errai come to mind.

If you were starting a new GWT project and using AppFuse, how would you want it implemented?

* Vaadin 7 claims it can be used as a drop-in replacement for GWT. I tried replacing the gwt-servlet and gwt-user dependencies with Vaadin's, but it didn't work.

Posted in Java at Mar 07 2013, 06:49:28 PM MST 7 Comments

Switching AppFuse from MyFaces to PrimeFaces

When describing my bias against JSF back in November, I wrote:

... there's a lot of folks praising JSF 2 (and PrimeFaces moreso). That's why I'll be integrating it (or merging your pull request) into the 2.3 release of AppFuse. Since PrimeFaces contains a Bootstrap theme, I hope this is a pleasant experience and my overall opinion of JSF improves.

Shortly after the AppFuse 2.2.1 release in December, Gilberto Andrade contributed a sample project that used Mojarra (the JSF RI) and PrimeFaces instead of MyFaces and its Tomahawk components. Last week, I spent a few hours integrating Gilberto's changes into AppFuse's master branch. You can see all the changes I made (which include a Jetty plugin upgrade and some cleanup) in this Crucible review. Feel free to leave comments on ask questions in the review itself.

The first thing I noticed when integrating PrimeFaces is you have to add a custom repository in order to get its artifacts via Maven.

<repositories>
    <repository>
        <id>prime-repo</id>
        <name>Prime Repo</name>
        <url>http://repository.primefaces.org</url>
    </repository>
</repositories>

This is unfortunate since all of AppFuse's other dependencies can be found in Maven Central. It means that if you're using a JSF archetype, the PrimeFaces repo will be checked for artifacts first, causing an unnecessary slowdown in artifact resolution. I hope the PrimeFaces developers fix this soon.

While integrating these two frameworks, I ran into a number of issues.

An IllegalStateException on startup when using "mvn jetty:run"
The first issue I encountered was that I was unable to run the app in Jetty. It worked fine in Tomcat but I got the following error in Jetty:

2013-01-31 22:28:07.683:WARN:/:unavailable
java.lang.IllegalStateException: Application was not properly initialized at startup, could not find Factory: javax.faces.context.FacesContextFactory
at javax.faces.FactoryFinder$FactoryManager.getFactory(FactoryFinder.java:951)
at javax.faces.FactoryFinder.getFactory(FactoryFinder.java:316)
at javax.faces.webapp.FacesServlet.init(FacesServlet.java:302)
at org.eclipse.jetty.servlet.ServletHolder.initServlet(ServletHolder.java:492)
at org.eclipse.jetty.servlet.ServletHolder.doStart(ServletHolder.java:312)

I found the fix for this on Stack Overflow and added the following listener to my web.xml to solve it.

<listener>
    <listener-class>com.sun.faces.config.ConfigureListener</listener-class>
</listener>

Conditionally rendering a button disables its click-ability
The next thing I noticed was the Delete button didn't work when editing a user. It was hidden correctly when adding a user, but clicking on it to delete a user simply refreshes the page. Below is the code I used successfully with MyFaces. For some reason, this doesn't work with PrimeFaces.

<c:if test="${not empty userForm.user.id}">
<h:commandButton value="#{text['button.delete']}" action="#{userForm.delete}"
    styleClass="btn" onclick="return confirmMessage(msgDelConfirm)"/>
</c:if>

I also tried the following, but no dice. This is currently an open issue.

<h:commandButton rendered="${not empty userForm.user.id}" value="#{text['button.delete']}" 
    action="#{userForm.delete}" styleClass="btn" onclick="return confirmMessage(msgDelConfirm)"/>

The PrimeFaces Bootstrap theme 404s on some images
After integrating PrimeFaces' Bootstrap theme, the following error shows up in server logs.

[INFO] [talledLocalContainer] Feb 02, 2013 10:40:25 PM com.sun.faces.application.resource.ResourceHandlerImpl logMissingResource
[WARNING] [talledLocalContainer] WARNING: JSF1064: Unable to find or serve resource, images/ui-bg_highlight-hard_70_000000_1x100.png, from library, primefaces-bootstrap.

This seems to have happened before in previous releases and is currently an open issue.

Canoo WebTest doesn't work with fileUpload nor to set checkbox values
We use Canoo WebTest to run integration tests on the UI in AppFuse. For some reason, performing file uploads and setting checkbox values works fine with MyFaces/Tomahawk, but not with Mojarra/PrimeFaces. I'm not sure if this is caused by the JSF core or the component library, but it remains an open issue. For now, I've just commented out the parts of tests that used to do this.

On a related note, getting the real path of a resource from the ServletContext worked fine before the switch, but results in a null value now.

String uploadDir = getServletContext().getRealPath("/resources") + "/" + request.getRemoteUser() + "/";

PrimeFaces resources served up at /javax.faces.resource/* not found
While I didn't have problems with this in AppFuse, I did encounter it in AppFuse Light. I don't know why there was a difference between the two, but it turned out to be caused by the UrlRewriteFilter and my desire for extensionless URLs. The outbound-rule to strip .xhtml from URLs was the culprit. Adding a condition to it solved the problem. Yeah, the condition seems backwards, but it works.

<outbound-rule match-type="regex">
    <condition type="query-string" operator="equal">ln=primefaces</condition>
    <from>^(.*)\.xhtml(\?.*)?$</from>
    <to last="false">$1$2</to>
</outbound-rule>

Summary
The initial switch to Mojarra/PrimeFaces was pretty easy thanks to Gilberto's sample project. However, the small issues encountered after that turned out to be quite frustrating and you can see that several are still not fixed. I guess it just goes to show that not all web frameworks are perfect. Hopefully we'll get these minor issues fixed before the next release. In the meantime, you can checkout the updated demos for AppFuse JSF and AppFuse Light JSF.

Posted in Java at Feb 06 2013, 12:19:34 PM MST Add a Comment

Deploying Java and Play Framework Apps to the Cloud with James Ward

Yesterday, I attended James Ward's presentation on Deploying Java & Play Framework Apps to the Cloud at Devoxx. I arrived a bit late, but still managed to get there in time to see a lot of demos and learn more about Heroku. Below are my notes from James's talk.

When I arrived, James was doing a demo using Spring Roo. He was using Roo's Petclinic sample app and showed us how you could use Git to create a local repository of the new project and install Heroku's command line tool. From there, he ran the following command to create a new application on Heroku.

heroku create -s cedar

The Cedar Stack is what supports Java, Scala and Play Framework. It's the 3rd generation stack for Heroku. The command above created two endpoints, one for HTTP and one for Git. It picks from a list of randomly generated names, which all seem to have some humor in them. James ended up with "electric-sword-8877" for this demo.

From there, he ran git push heroku master to deploy the project to Heroku. Unfortunately, this resulted in a login error and there was an akward moment where we all thought the Demo Gods were angry. However, James was able to resolve this by using Heroku's sharing feature with the following command.

heroku sharing:add [email protected]

For Java projects, Heroku looks for a pom.xml file in the root directory and runs a Maven build on project. All the dependencies get downloaded on the cloud rather than put them into a WAR and requiring you to upload a large WAR file. You don't have to upload your source code to Heroku; James did it for the sake of the demo because it was faster.

After the build finishes, it creates a slug file. This file contains everything Heroku needs to run your application.

Next, James showed a demo of the running application and added a new Pet through its UI. Then he scaled it to two servers using the following command:

heroku scale web=2

He proved this was working by running heroku ps, which showed there were two running processes. He showed the app again, but noted that the record he added was missing. This is because when it started up a new dyno, Hibernate created the schema again and deleted all records. To fix, James changed Hibernate to only update the schema instead of create a new one. If you're a Hibernate user, you know this is as simple as changing:

hibernate.hbm2ddl.auto=create

to:

hibernate.hbm2ddl.auto=update

After committing this change, James redeployed using Git.

git push heroku master

The slug file got built again and Heroku deployed the new slug onto both dynos, automatically load balancing the app across two servers. James then ran heroku logs to see the logs of his dynos and prove that a request to his app's HTTP endpoint made requests to both dynos. The logging is powered by Logplex and you can read about how it works in the article Heroku Gets Sweet Logging.

James mentioned that Roo has a Heroku plugin, but after watching his talk and searching a bit on the internet, it seems it's just the jetty-runner setup as described in Getting Started with Spring MVC Hibernate on Heroku/Cedar.

What about autoscaling? There are some 3rd party tools that do this. Heroku's Management infrastructure has APIs that these tools talk too. Heroku hasn't built autoscaling into the platform because they don't know where the bottlenecks are in your application.

Heroku = Polyglot + PaaS + Cloud Components. It supports Ruby, node.js, Java, Clojure, Play and Scala and they're working on native Grails and Gradle support. There's currently 534,374 apps running on Heroku.

Heroku is a cloud application platform and there's 5 different components.

  1. Instant deployment
  2. HTTP Routing / Load Balancing
  3. Elastic Polyglot Runtime
  4. Management & Logging
  5. Component as a Service Ecosystem

For instant deployment, it's a pretty simple process:

  • You add files to a git repo
  • You provision the app on Heroku (heroku create)
  • You upload the files to Heroku (git push heroku master)
  • Heroku runs the build and assembles a "slug" file
  • Heroku starts a "dyno"
  • Heroku copies the "slug" to the "dyno"
  • Heroku starts the web application

Most apps will contain a Procfile that contains information about how to run the web process. For Spring Roo, it has:

web: java $JAVA_OPTS -jar target/dependency/jetty-runner.jar --port $PORT target/*.war

So how does Heroku decide what application server to use? It doesn't, you do. You need to get your application server into the slug file. The easiest way to do this is to specify your application server as a dependency in your pom.xml. In the Roo example, James uses the maven-dependency-plugin to get the jetty-runner dependency and copy it to the target directory. On Heroku, you bring your application server with you.

Heroku gives you 750 free dyno hours per app, per month. For developers, it's very easy to get started and use. Once you extend past one dyno, it's $.05 per dyno hour, which works out to around $30/month. It's only when you want to scale beyond one dyno where you get charged by Heroku, no matter how much data you transfer. Scalatest is running on Heroku. It has one dyno and is doing fine with that. Bill Venners doesn't have to pay anything for it.

java.herokuapp.com is a site James created that allows you to clone example apps and get started quickly with Heroku's Cedar Stack.

For HTTP Routing, Heroku uses an Erlang-based routing system to route all the HTTP requests across your dynos. Heroku doesn't support sticky sessions. Distributed session management does not work well, because it does not scale well. Heroku recommends you use a stateless web architecture or move your state into something like memcached. Jetty has (in the latest version) the ability to automatically serialize your session into a Mongo system. This works fine on Heroku. The problem with this is if you have 2 dynos running, each request can hit a different dyno and get different session state. Hence the recommendation for an external storage mechanism that can synchronize between dynos.

You can also run non-web applications on Heroku. You can have one web process, but as many non-web processes as you want.

Heroku has native support for the Play framework. To detect Play applications, it look for a conf/application.conf file. You don't need to have a Procfile in your root directory because Heroku knows how to start a Play application.

At this point, James created a new Play application, created a new Heroku app (he got "young-night-7104" this time) and pushed it to Heroku. He created a simple model object, a controller to allow adding new data and then wrote some jQuery to show new records via Ajax and JSON. He also showed how to configure the application to talk to Heroku's PostgreSQL database using the DATABASE_URL environment variable. He explained how you can use the heroku config command to see your environment variables.

The reason they use environment variables is so Heroku can update DATABASE_URL (and other variables) without having to call up all their customers and have them change them in their source code.

Play on Heroku supports Scala if you create your app with Scala. Play 2.0 uses Scala, Akka and SBT. Heroku added support for SBT a couple month ago, so everything will work just fine.

Heroku also supports Scala, detecting it by looking for the build.sbt file in the root directory. Heroku supports SBT 0.11.0 and it builds the 'stage' task. It currently does not support Lift because Lift uses an older version of SBT and because it's a very stateful framework that would require sticky sessions. Use Play, BlueEyes or Scalatra if you want Scala on Heroku.

Heroku has addons for adding functionality to your application, including Custom DNS, HTTPS, Amazon RDS, NoSQL and many more. They're also working on making their add-on and management APIs available via Java, so you'll (hopefully) be able to use them from your IDE in the future.

From there, James showed us how Heroku keeps slug files around so you can do rollbacks with heroku rollback. He also showed how you can use:

heroku run "your bash command"
to run any Bash command on the cloud.

Summary
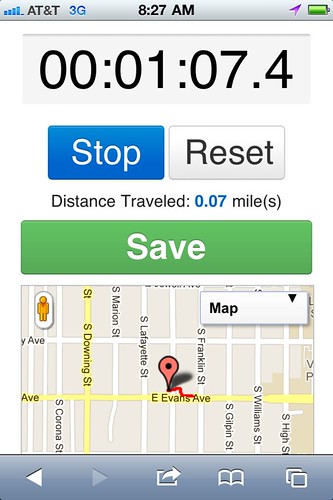
I attended James's talk because he's a good friend, but also because I've been using Heroku to host my latest adventures with Play, Scala, CoffeeScript and Jade. I'm glad I attended because I learned some good tips and tricks and more about how Heroku works.

Heroku seems like a great development tool to me. In my experience, it's been really nice to have instant deployments using Git. In fact, I've created a 'push' alias so I can push to my project's repo and heroku at the same time.

alias push='git push origin master && git push heroku master'

I'd like to see more organizations embrace something like Heroku for developers. It'd be great if everyone had their own sandbox that business owners and product managers could see. I can't help but think this would be awesome for demos, prototyping, etc.

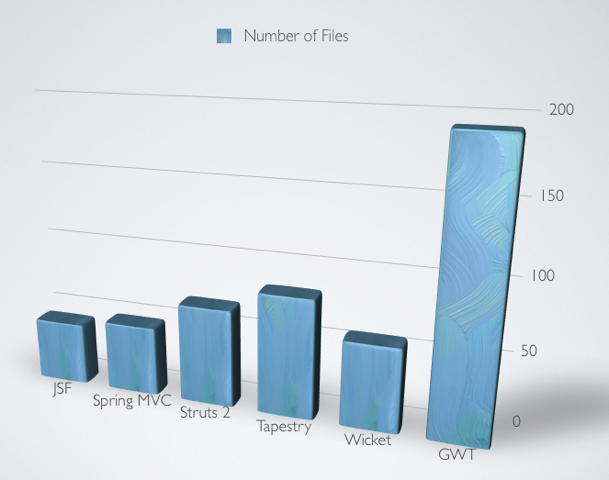
There were some other talks I wanted to attend at the same time, particularly Martin Odersky's What's in store for Scala? and WWW: World Wide Wait? A Performance Comparison of Java Web Frameworks. The WWW talk has posted their presentation but I'm sure it'd be more fun to watch.

It's pretty awesome that all the talks from Devoxx 2011 will be up on Parleys.com soon.

Update: James has posted his slides from this talk.

Posted in Java at Nov 18 2011, 08:14:45 AM MST 2 Comments

Developing with HTML5, CoffeeScript and Twitter's Bootstrap

HTML5 Logo This article is the fourth in a series about my adventures developing a Fitness Tracking application with HTML5, Play Scala, CoffeeScript and Jade. Previous articles can be found at:

  1. Integrating Scalate and Jade with Play 1.2.3
  2. Trying to make CoffeeScript work with Scalate and Play
  3. Integrating HTML5 Boilerplate with Scalate and Play

Developing Features
After getting my desired infrastructure setup, I started coding like a madman. The first feature I needed was a stopwatch to track the duration of a workout, so I started writing one with CoffeeScript. After spending 20 minutes playing with dates and setTimeout, I searched and found a stopwatch jQuery plug-in. I added this to my app, deployed it to Heroku, brought up the app on my iPhone 3G, clicked Start and started riding my bike to work.

When I arrived, I unlocked my phone and discovered that the time had stopped. At first, I thought this was a major setback. My disappointed disappeared when I found a Super Neat JavaScript Stopwatch and Kåre Byberg's version that worked just fine. This stopwatch used setTimeout, so by keeping the start time, the app on the phone would catch up as soon as you unlocked it. I ported Kåre's script to CoffeeScript and rejoiced in my working stopwatch.

# Created by Kåre Byberg © 21.01.2005. Please acknowledge if used 
# on other domains than http://www.timpelen.com.
# Ported to CoffeeScript by Matt Raible. Also added hours support.
flagClock = 0
flagStop = 0
stopTime = 0
refresh = null
clock = null

start = (button, display) ->
  clock = display
  startDate = new Date()
  startTime = startDate.getTime()
  if flagClock == 0
    $(button).html("Stop")
    flagClock = 1
    counter startTime, display
  else
    $(button).html("Start")
    flagClock = 0
    flagStop = 1

counter = (startTime) ->
  currentTime = new Date()
  timeDiff = currentTime.getTime() - startTime
  timeDiff = timeDiff + stopTime  if flagStop == 1
  if flagClock == 1
    $(clock).val formatTime timeDiff, ""
    callback = -> counter startTime
    refresh = setTimeout callback, 10
  else
    window.clearTimeout refresh
    stopTime = timeDiff

formatTime = (rawTime, roundType) ->
  if roundType == "round"
    ds = Math.round(rawTime / 100) + ""
  else
    ds = Math.floor(rawTime / 100) + ""
  sec = Math.floor(rawTime / 1000)
  min = Math.floor(rawTime / 60000)
  hour = Math.floor(rawTime / 3600000)
  ds = ds.charAt(ds.length - 1)
  start() if hour >= 24
  sec = sec - 60 * min + ""
  sec = prependZeroCheck sec
  min = min - 60 * hour + ""
  min = prependZeroCheck min
  hour = prependZeroCheck hour
  hour + ":" + min + ":" + sec + "." + ds

prependZeroCheck = (time) ->
  time = time + "" # convert from int to string
  unless time.charAt(time.length - 2) == ""
    time = time.charAt(time.length - 2) + time.charAt(time.length - 1)
  else
    time = 0 + time.charAt(time.length - 1)

reset = ->
  flagStop = 0
  stopTime = 0
  window.clearTimeout refresh
  if flagClock == 1
    resetDate = new Date()
    resetTime = resetDate.getTime()
    counter resetTime
  else
    $(clock).val "00:00:00.0"

@StopWatch = {
  start: start
  reset: reset
}

The Scalate/Jade template to render this stopwatch looks as follows:

script(type="text/javascript" src={uri("/public/javascripts/stopwatch.coffee")})

#display
  input(id="clock" class="xlarge" type="text" value="00:00:00.0" readonly="readonly")
#controls
  button(id="start" type="button" class="btn primary") Start
  button(id="reset" type="button" class="btn :disabled") Reset

:plain
  <script type="text/coffeescript">
    $(document).ready ->
      $('#start').click ->
        StopWatch.start this, $('#clock')

      $('#reset').click ->
        StopWatch.reset()
  </script>

Next, I wanted to create a map that would show your location. For this, I used Merge Design's HTML 5 Geolocation Demo as a guide. The HTML5 Geo API is pretty simple, containing only three methods:

// Gets the users current position
navigator.geolocation.getCurrentPosition(successCallback,
                                         errorCallback,
                                         options);
// Request repeated updates of position
watchId = navigator.geolocation.watchPosition(successCallback, errorCallback);

// Cancel the updates
navigator.geolocation.clearWatch(watchId);

After rewriting the geolocation example in CoffeeScript, I ended up with the following code in my map.coffee script. You'll notice it uses Google Maps JavaScript API to show an actual map with a marker.

# Geolocation with HTML 5 and Google Maps API based on example from maxheapsize: 
# http://maxheapsize.com/2009/04/11/getting-the-browsers-geolocation-with-html-5/
# This script is by Merge Database and Design, http://merged.ca/ -- if you use some, 
# all, or any of this code, please offer a return link.

map = null
mapCenter = null
geocoder = null
latlng = null
timeoutId = null

initialize = ->
  if Modernizr.geolocation
    navigator.geolocation.getCurrentPosition showMap

showMap = (position) ->
  latitude = position.coords.latitude
  longitude = position.coords.longitude
  mapOptions = {
    zoom: 15,
    mapTypeId: google.maps.MapTypeId.ROADMAP
  }
  map = new google.maps.Map(document.getElementById("map"), mapOptions)
  latlng = new google.maps.LatLng(latitude, longitude)
  map.setCenter(latlng)

  geocoder = new google.maps.Geocoder()
  geocoder.geocode({'latLng': latlng}, addAddressToMap)

addAddressToMap = (results, status) ->
  if (status == google.maps.GeocoderStatus.OK) 
    if (results[1]) 
      marker = new google.maps.Marker({
          position: latlng,
          map: map
      })
      $('#location').html('Your location: ' + results[0].formatted_address)
  else 
    alert "Sorry, we were unable to geocode that address."

start = ->
  timeoutId = setTimeout initialize, 500

reset = ->
  if (timeoutId)
    clearTimeout timeoutId

@Map = {
  start: start
  reset: reset
}

The template to show the map is a mere 20 lines of Jade:

script(type="text/javascript" src="//www.google.com/jsapi")
script(type="text/javascript" src="//maps.googleapis.com/maps/api/js?sensor=false")

:css
  .demo-map {
    border: 1px solid silver;
    height: 200px;
    margin: 10px auto;
    width: 280px;
  }

#map(class="demo-map")

p(id="location")
  span(class="label success") New
  | Fetching your location with HTML 5 geolocation...

script(type="text/javascript" src={uri("/public/javascripts/map.coffee")})
:javascript
    Map.start();

The last two features I wanted were 1) distance traveled and 2) drawing the route taken on the map. For this I learned from A Simple Trip Meter using the Geolocation API. As I was beginning to port the JS to CoffeeScript, I thought, "there's got to be a better way." I searched and found Js2coffee to do most of the conversion for me. If you know JavaScript and you're learning CoffeeScript, this is an invaluable tool.

I tried out the trip meter that evening on a bike ride and noticed it said I'd traveled 3 miles when I'd really gone 6. I quickly figured out it was only calculating start point to end point and not taking into account all the turns in between. To view what was happening, I integrated my odometer.coffee with my map using Google Maps Polylines. Upon finishing the integration, I discovered two things, 1) HTML5 geolocation was highly inaccurate and 2) geolocation doesn't run in the background.

I was able to solve the first problem by passing in {enableHighAccuracy: true} to navigator.geolocation.watchPosition(). Below are two screenshots showing before high accuracy and after. Both screenshots are from the same two-block walk.

Without {enableHighAccuracy: true} With {enableHighAccuracy: true}

The second issue is a slight show-stopper. PhoneGap might be able to solve the problem, but I'm currently using a workaround → turning off auto-lock and keeping Safari in the foreground.

Making it look good
After I got all my desired features developed, I moved onto making the app look good. I started by using SASS for my CSS and installed Play's SASS module. I then switched to LESS when I discovered and added Twitter's Bootstrap to my project. At first I used Play's LESS module (version 0.3), but ran into compilation issues. I then tried Play's GreenScript module, but gave up on it when I found it was incompatible with the CoffeeScript module. Switching back to the LESS module and using the "0.3.compatibility" version solved all remaining issues.

You might remember that I integrated HTML5 Boilerplate and wondering why I have both Bootstrap and Boilerplate in my project. At this point, I don't think Boilerplate is needed, but I've kept it just in case it's doing something for HTML5 cross-browser compatibility. I've renamed its style.css to style.less and added the following so it has access to Bootstrap's variables.

/* Variables from Bootstrap */
@import "libs/variables.less";

Then I made my app look a lot better with layouts, stylish forms, a fixed topbar and alerts. For example, here's the CoffeeScript I wrote to display geolocation errors:

geolocationError = (error) ->
  msg = 'Unable to locate position. '
  switch error.code
    when error.TIMEOUT then msg += 'Timeout.'
    when error.POSITION_UNAVAILABLE then msg += 'Position unavailable.'
    when error.PERMISSION_DENIED then msg += 'Please turn on location services.'
    when error.UNKNOWN_ERROR then msg += error.code
  $('.alert-message').remove()
  alert = $('<div class="alert-message error fade in" data-alert="alert">')
  alert.html('<a class="close" href="#">×</a>' + msg);
  alert.insertBefore($('.span10'))

Then I set about styling up the app so it looked good on a smartphone with CSS3 Media Queries. Below is the LESS code I used to hide elements and squish the widths for smaller devices.

@media all and (max-device-width: 480px) {
  /* hide scrollbar on mobile */
  html { overflow-y:hidden }
  /* hide sidebar on mobile */
  .home .span4, .home .page-header, .topbar form {
    display: none
  }
  .home .container {
    width: 320px;
  } 
  .about {
    .container, .span10 {
      width: 280px;
    }
    .span10 {
      padding-top: 0px;
    }
  }

Tools
In the process of developing a stopwatch, odometer, displaying routes and making everything look good, I used a number of tools. I started out primarily with TextMate and its bundles for LESS, CoffeeScript and Jade. When I started writing more Scala, I installed the Scala TextMate Bundle. When I needed some debugging, I switched to IntelliJ and installed its Scala plugin. CoffeeScript, LESS and HAML plugins (for Jade) were already installed by default. I also used James Ward's Setup Play Framework with Scala in IntelliJ.

Issues
I think it's obvious that my biggest issue so far is the fact that a webapp can't multitask in the background like a native app can. Beyond that, there's accuracy issues with HTML5's geolocation that I haven't seen in native apps.

I also ran into a caching issue when calling getCurrentPosition(). It only worked the first time and I had to refresh my browser to get it to work again. Strangely enough, this only happened on my desktop (in Safari and Firefox) and worked fine on my iPhone. Unfortunately, it looks like PhoneGap has issues similar to this.

My workaround for no webapp multitasking is turning off auto-lock and leaving the browser in the foreground while I exercise. The downside to this is it really drains the battery quickly (~ 3 hours). I constantly have to charge my phone if I'm testing it throughout the day. The testing is a real pain too. I have to deploy to Heroku (which is easy enough), then go on a walk or bike ride. If something's broke, I have to return home, tweak some things, redeploy and go again. Also, there's been a few times where Safari crashes halfway through and I lose all the tracking data. This happens with native apps too, but seemingly not as often.

If you'd like to try the app on your mobile phone and see if you experience these issues, checkout play-more.com.

Summary
Going forward, there's still more HTML5 features I'd like to use. In particular, I'd like to play music while the fitness tracker is running. I'd love it if cloud music services (e.g. Pandora or Spotify) had an API I could use to play music in a webapp. Soundcloud might be an option, but I've also thought of just uploading some MP3s and playing them with the <audio> tag.

I've really enjoyed developing with all these technologies and haven't experienced much frustration so far. The majority has come from integrating Scalate into Play, but I've resolved most problems. Next, I'll talk about how I've improved Play's Scalate support and my experience working with Anorm.

Posted in Java at Oct 20 2011, 02:47:36 PM MDT 3 Comments